

Scenarios
This document introduces the basic operations for user management, including adding a user, viewing user information, modifying basic user information, deleting a user, and enabling or disabling user login.
Prerequisites
You have logged in to Cloud Organization > Identity Center.
Operation Steps
Creating a User
- In the left sidebar, choose User Management > User.
- On the User list page, click Create User.
- On the Create User panel, set basic user information.
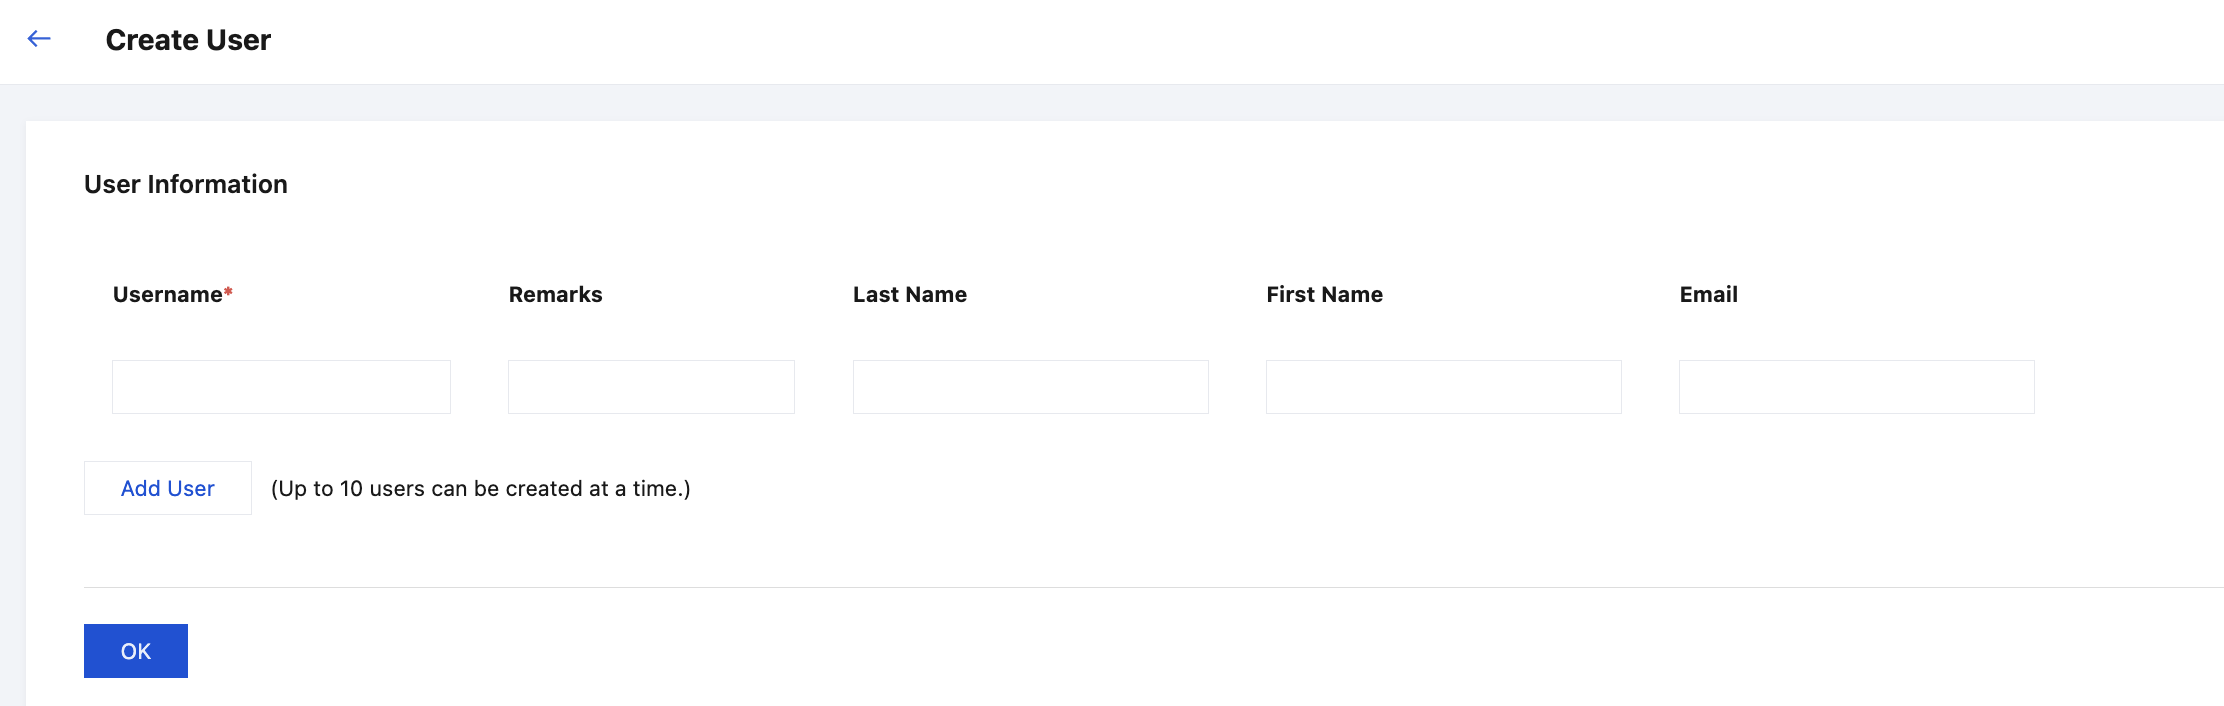
- Username: required. The username should be unique within the space. The username can contain up to 64 characters, including English letters, digits, plus signs (+), equal signs (=), commas (,), periods (.), at signs (@), hyphens (-), and underscores (_).
- Remarks, Last Name, First Name, and Email: optional. You can specify them as needed.
- Click OK.
Viewing User Information
- In the left sidebar, choose User Management > User.
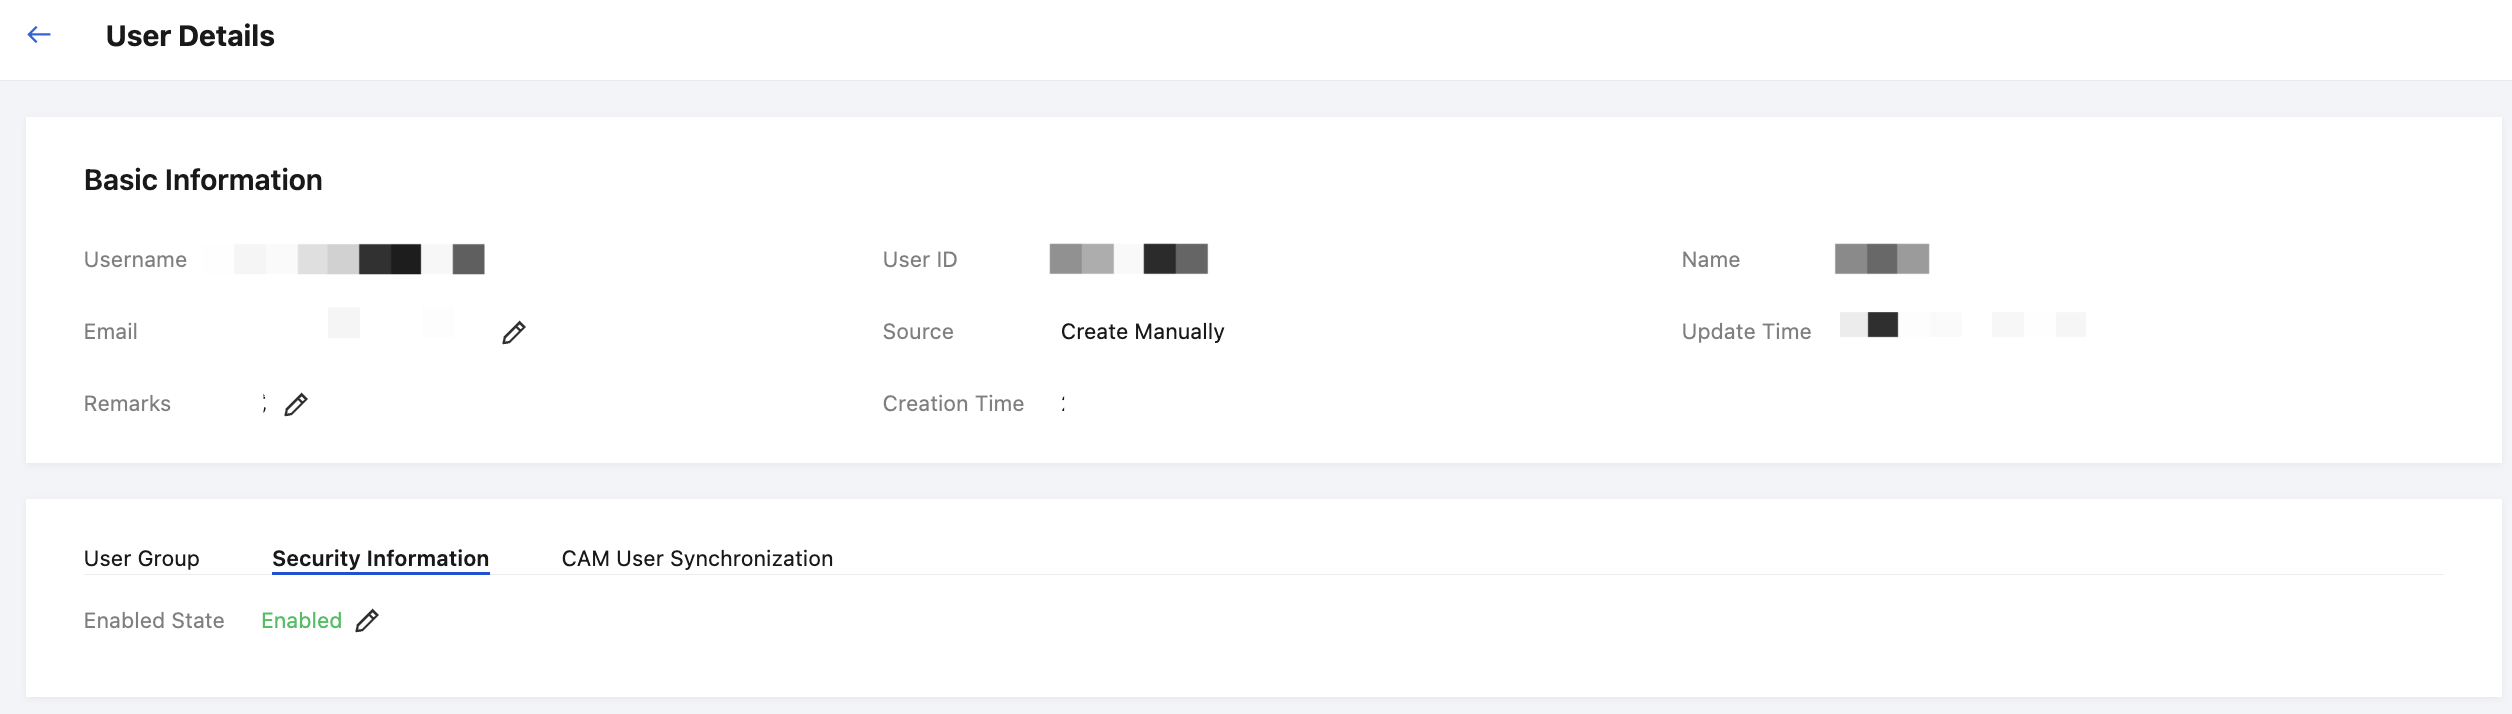
- On the User list page, click the target username to view the following information of the user:
- View basic information of the user.
- Click the User Group tab to view the user groups the user has joined.
- Click the Security Information tab to view the enabling status of the user.
- Click the CAM User Synchronization tab to view the CAM user synchronization information configured for the user. For more information about CAM user synchronization, see Multi-account Authorization Overview.
Modifying Basic User Information
Note:
The username cannot be modified.
- In the left sidebar, choose User Management > User.
- On the User list page, click the target username.
- In the Basic Info area at the top of the user details page, the modifiable fields are Remark and Mailbox.

Deleting a User
Note:
Before deleting a user, ensure that the user is not associated with the following resources. Otherwise, the deletion will fail.
- User groups: user groups from which the user will be deleted
- Permissions: account permissions of the user to be deleted
- CAM user synchronization: the account synchronization relationship of the user to be deleted
- In the left sidebar, choose User Management > User.
- On the User list page, click Delete in the Operation column of the target user.
- On the Delete User page, click Confirm.
Enabling or Disabling User Login
Warning:
A user in a disabled state cannot normally log in to the login portal of Identity Center.
- In the left sidebar, choose User Management > User.
- On the User list page, click the target username.
- In the Security Information area of the details page, you can enable or disable user login.
- Enable user login.
In the Manage User Status pop-up window, click Enable, and then click OK. - Disable user login.
In the Manage User Status pop-up window, click Disable, and then click OK.
- Enable user login.
