

Overview
This document describes how to use CFS on a Windows client. This guide uses Windows Server 2012 R2 as an example. The operating methods on other versions of operating systems, such as Windows Server 2008 and Windows Server 2016, are the same.
Creating a File System and Its Mount Point
For detailed steps, see Creating File Systems and Mount Targets.
Connecting to an Instance
This section describes how to log in to a Windows-based CVM instance.
Prerequisites
You have logged in to the CVM instance using an administrator account and its corresponding password.
- Administrator account: Administrator for all Windows-based instances.
- Password: the password specified when purchasing the CVM instance.
Logging In to a CVM Instance in the Console
- In the operation column of the CVM instance list, click Log In to connect to the Windows-based CVM instance through VNC.
- Click in the upper left corner and send the Ctrl-Alt-Delete command to go to the System Login page.
- Enter the account (Administrator) and password to log in.
Note:
This instance is exclusive, meaning that only one user can log in through the console at a time.
Verifying Network Communication
Before mounting, check the network connectivity between the client and the file system. You can use the telnet command on the Windows client for verification. The specific protocols and open ports are as follows:
| File System Protocol | Open Port | Check Network Connectivity |
|---|---|---|
| NFS 3.0 | 111, 892, and 2049 | telnet 111, 892, or 2049 |
| NFS 4.0 | 2049 | telnet 2049 |
| CIFS/SMB | 445 | telnet 445 |
Note:
Currently, CFS does not support ping.
Mounting a CIFS/SMB File System
You can mount a CIFS/SMB file system via the command line or graphical interface.
Mounting a File System via the Command Line
Use FSID to mount the file system. The mount command is as follows:
net use
Example:
net use X: \\10.10.11.12\fjie120
Note:
You can obtain FSID by clicking CFS Console > File System Details > Mount Point Info.
Mounting a File System via the Graphical Interface
Click
 to go to the start menu interface.
If you are using Windows 10 or Windows Server 2019 or later, modify the registry and allow Guest access to SMB.
Note:
Microsoft officially explains the changes related to this permission as follows:
Guest access in SMB2 and SMB3 disabled by default in Windows
Run the following instruction via CMD with the administrator command:
reg add "HKLM\SYSTEM\CurrentControlSet\Services\LanmanWorkstation\Parameters" /v "AllowInsecureGuestAuth" /t REG_DWORD /d 1 /f && net stop lanmanworkstation /y && net start lanmanworkstation && net start SessionEnvRight-click This PC and select Map Network Drive.
In the pop-up window, set the "Drive" letter name and folder (that is, the mount directory seen in the CIFS/SMB file system) and click Finish.
Enter the mounted file system and right-click to create a file to verify the correctness of reading and writing.
 to go to the start menu interface.
Mounting an NFS File System
1. Enabling NFS Service
Before mounting, ensure the system has started the NFS service.
- Click
 , choose Control Panel > Programs > Turn Windows features on or off.
 - In the opened Add Role and Features Wizard window, keep the default configuration and click Next for five times continuously.
- On the feature interface, select NFS Client and click Next.
- Click Install.
- Restart the CVM to finish enabling the Windows NFS client service.
Note:
Windows Home does not include an NFS client option, so you can use the Windows Server operating system or Windows Professional.
 , choose Control Panel > Programs > Turn Windows features on or off.
2. Verifying Whether the NFS Service Is Started
Open the CMD Command Line Interface and execute the following command:
mount -hIf NFS-related information is returned, it indicates that the NFS client is running normally.
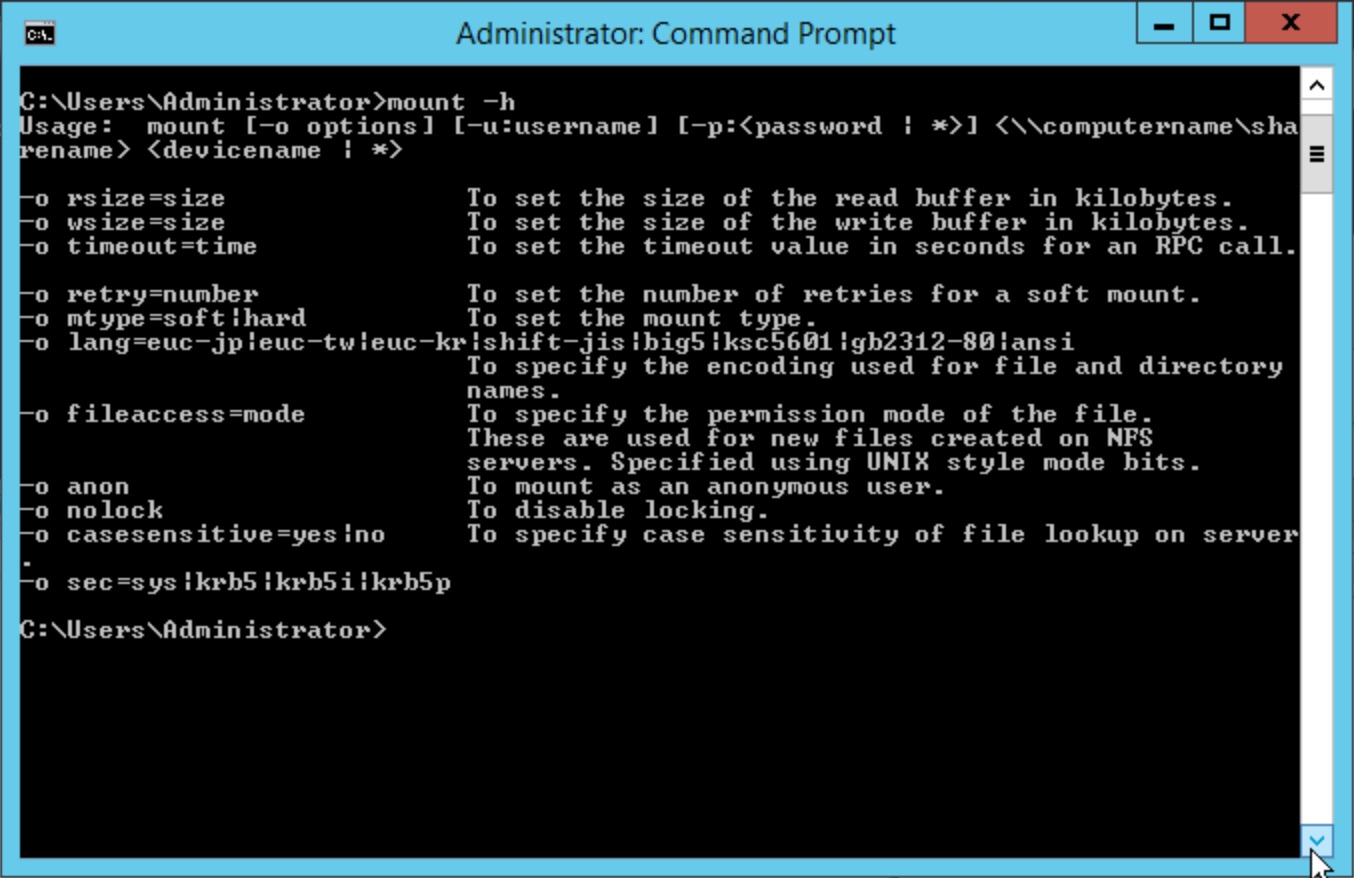
3. Adding Anonymous Access Users and User Groups
Run the CMD Command Line Interface as an administrator, execute the following instructions to modify the registry, allow anonymous user/user group access, and set the Mount's Lock parameter to No (Windows only supports NFS v3.0, which does not support the file lock service).
reg add "HKEY_LOCAL_MACHINE\SOFTWARE\Microsoft\ClientForNFS\CurrentVersion\Default" /v AnonymousUid /t REG_QWORD /d 0 /f && reg add "HKEY_LOCAL_MACHINE\SOFTWARE\Microsoft\ClientForNFS\CurrentVersion\Default" /v AnonymousGid /t REG_QWORD /d 0 /f && reg add "HKEY_LOCAL_MACHINE\SOFTWARE\Microsoft\ClientForNFS\CurrentVersion\User\Default\Mount" /v Locking /t REG_DWORD /d 0 /fTo make the modified registry take effect, run the following command to restart the NFS client service or directly restart the Windows system.
net stop nfsclnt && net stop nfsrdr && net start nfsrdr && net start nfsclnt
4. Mounting an NFS File System
You can mount a file system via the graphic interface or the CMD command line.
Mount a file system via the CMD command line
In the CMD Command Line Interface, enter the following command to mount the file system. Among them, the default subdirectory of the system is FSID.mount -o nolock mtype=hardExample:
mount -o nolock mtype=hard 10.10.0.12:/z3r6k95r X:
Note:
You can obtain the FSID mount command by clicking File System Console > File System Details > Mount Point Info.
Uninstalling a File System
Uninstalling a Shared Directory via the Graphical Interface
To disconnect the mounted file system, right-click the disk and click Disconnect in the menu that appears. You can just do this to disconnect the file system.
Uninstalling a Shared NFS Directory via the CMD Command
To uninstall a shared directory in some cases, start the command line terminal and run the following command, where Directory Name is the full path of the root directory or the file system.
Example of NFS:
umount X:
Example of SMB:net use x: /del
Terminating Resources
Note:
After the file system is deleted, the resources cannot be recovered. It is recommended to back up the resources before deleting the file system.
You can terminate a file system from the console. Go to the CFS console, select the file system to be terminated, and then click Delete and Confirm to delete it.