

After you purchase the DC service, you can quickly create and log in to the dedicated line instance through visual operations on the console interface.
Step 1: Log in to the DC console
Log in to the Cloud Console, select Cloud Products >Cloud Computing & Networking > Direct Connect to open the DC console.
Step 2: Create a connection
- In the directory on the left, click Connection to open the management page.
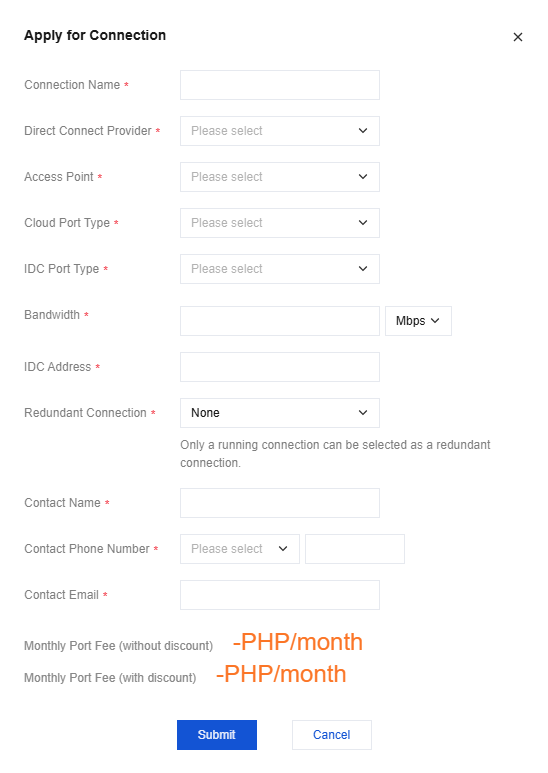
- On the Connection page, click Create.
- Please fill in the relevant parameter information according to your dedicated line requirements. After submitting your request, the cloud platform will send a DC manager to verify the detailed information with you as soon as possible.
Step 3: Create DC gateway
You can log in to the cloud console and select Cloud Products > Cloud Computing & Networking > Virtual Private Cloud to enter the VPC console.
In the directory on the left, click Direct Connect Gateway to open the management page.
Select a region and network at the top of the page and click Create.
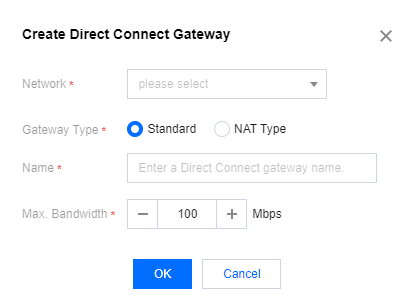
In the Create Direct Connect Gateway dialog box that pops up, enter a custom name, select the network type to be associated with, and set the bandwidth limit.
Note:
If the IP addresses at both ends of the dedicated line conflict, you can create a NAT gateway and configure network address translation rules on the DC gateway.
Click OK to complete the creation of the DC gateway.
Step 4: Create a Dedicated Tunnel
- Log in to the Cloud Console, select Cloud Products >Cloud Computing & Networking > Direct Connect to open the DC console.
- In the directory on the left, click Dedicated Tunnel to open the management page.
- Click Create.
- Basic Configuration:
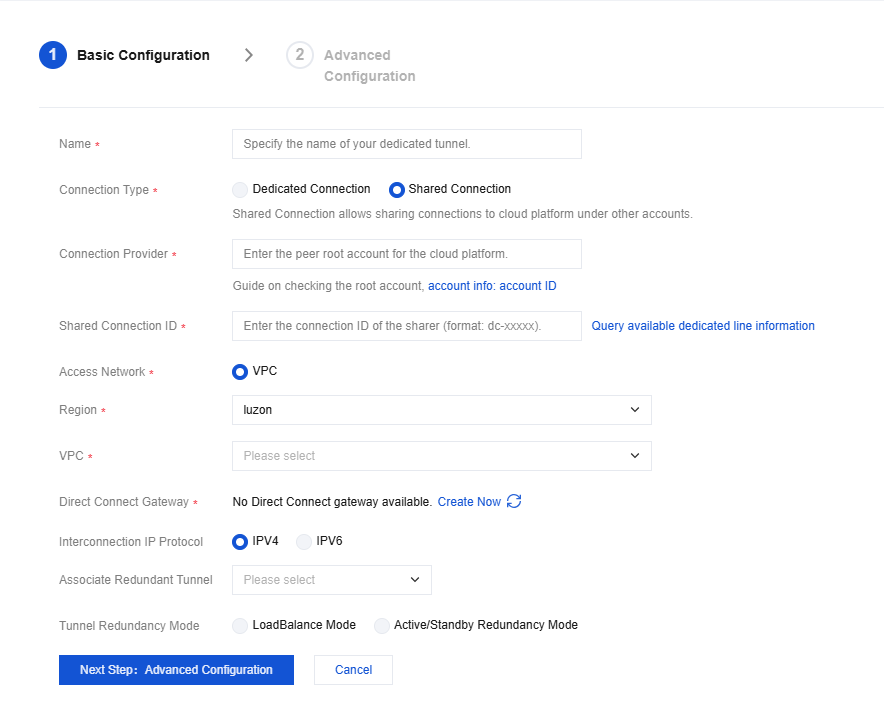
- Name: Create a name for the custom DC tunnel.
- Connection Type: Select a Connection in the running status under your cloud account or a Connection of a shared partner account (obtain Connection information from the partner).
- Access Network: VPC.
- Direct Connect Gateway: Please select the DC gateway under your VPC. If you do not have one, please create a DC gateway according to the prompts on the interface. After the creation is successful, please click the Refresh button to update the gateway list information.
- Advanced Configuration:
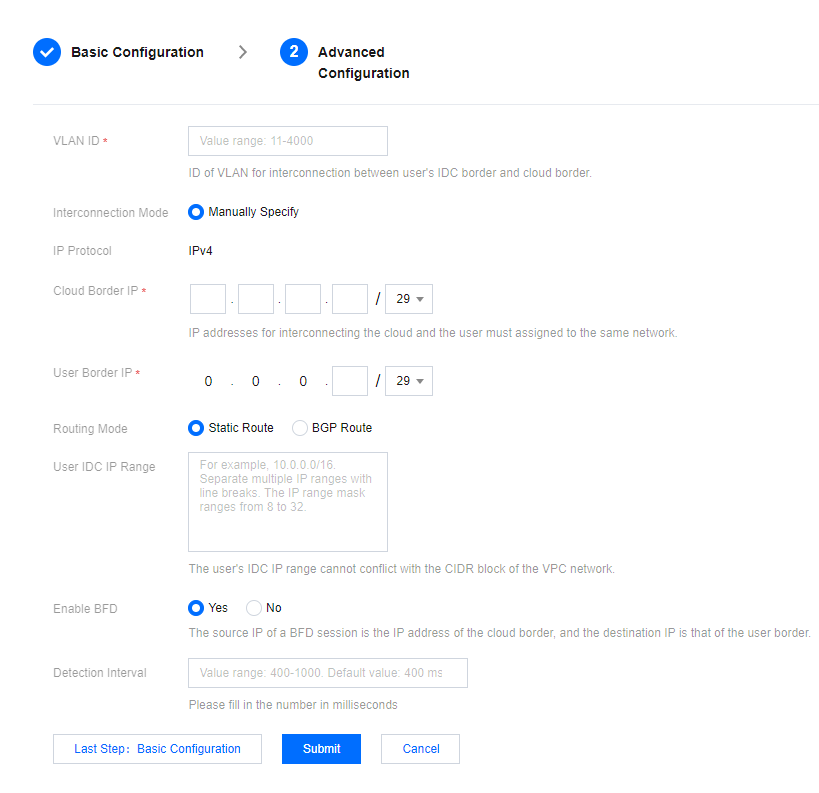
- VLAN ID: If the Connection is provided by a partner, please obtain the VLAN ID from the partner.
- Bandwidth: Set a bandwidth upper limit.
- Border IP: Refers to the interconnection API IP at both ends of the connection (IDC end and cloud connection device).
- Routing Mode: Supports BGP routing and static routing.
- IDC Device Configuration: The third step in requesting a DC tunnel. You can download the general configuration guide document in the console.
- Click Submit to complete the creation of the DC tunnel.
Step 5: Configure routing table
- You can log in to the cloud console and select Cloud Products > Cloud Computing & Networking > Virtual Private Cloud to enter the VPC console.
- In the directory on the left, you can click Route Table to open the management page.
- In the list, find the routing table associated with the subnet that requires communication, click its ID, and go to the details page.
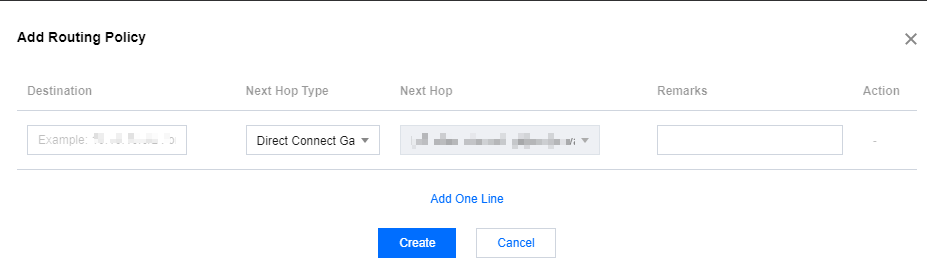
- Click Add Routing Policy, enter the destination IP range, select DC Gateway for the next hop type, and select the gateway name for the next hop.
- Click OK.
