

Overview
This document, using the example of deploying a CVM capable of connecting to the Internet, guides you through rapidly establishing an IPv4 VPC. Detailed directions are introduced as follows: From creating VPCs and subnets, to creating CVMs and allocating public IP addresses, and finally controlling inbound and outbound traffic to CVMs via security groups.
Directions
Step 1: Create PVCs and Subnets
- Log in to the Virtual Private Cloud console.
- At the top, choose the region to which the VPC belongs, and click Create.
- In the pop-up dialog box New VPC, fill in the VPC information and initial subnet information, and click Create.
Note:
Once the CIDRs (that is, IP ranges) of the VPC and subnets are created, they cannot be modified. Plan the network in advance.

- The VPC Information
- Name: VPC name.
- IPv4 CIDR:
- You can select any one of the standard IP ranges 10.0.0.0-10.255.255.255, 172.16.0.0-172.31.255.255 and 192.168.0.0-192.168.255.255 as the VPC IP range. The IP mask range should be between 16 and 28, such as 10.0.0.0/16.
- The non-standard IPv4 private address ranges can also be selected (the mask range should be between 16 and 28).
Note:
Since September 16, 2020, VPCs have started to support non-standard IPv4 private address ranges (non-standard IPv4 private address ranges refer to those that are not defined within the three major private address ranges specified in RFC 1918). If you need to use them, you may submit a ticket for application.
- Initial Subnet Information
- IPv4 CIDR:
- You can choose a VPC IP range that is within the range of the VPC IP range or the same as the VPC IP range. For example, if the VPC IP range is 10.0.0.0/16, you can select the range between 10.0.0.0/16-10.0.255.255/28 as the subnet IP range.
- If the VPC to which the subnet belongs needs to communicate with other VPCs or IDCs, ensure that the subnet's IP range does not overlap with the peer's IP range. Otherwise, private network interconnection is impossible.
- IPv4 CIDR:
- Availability Zone: Select an availability zone of the subnet. The same VPC can have subnets of different availability zones. By default, subnets of different availability zones under the same VPC are private network interconnected.
Step 2: Purchase CVMs
- Log in to the Cloud Virtual Machine Console.
- At the top left of the list page, click Create to enter the CVM purchase page.
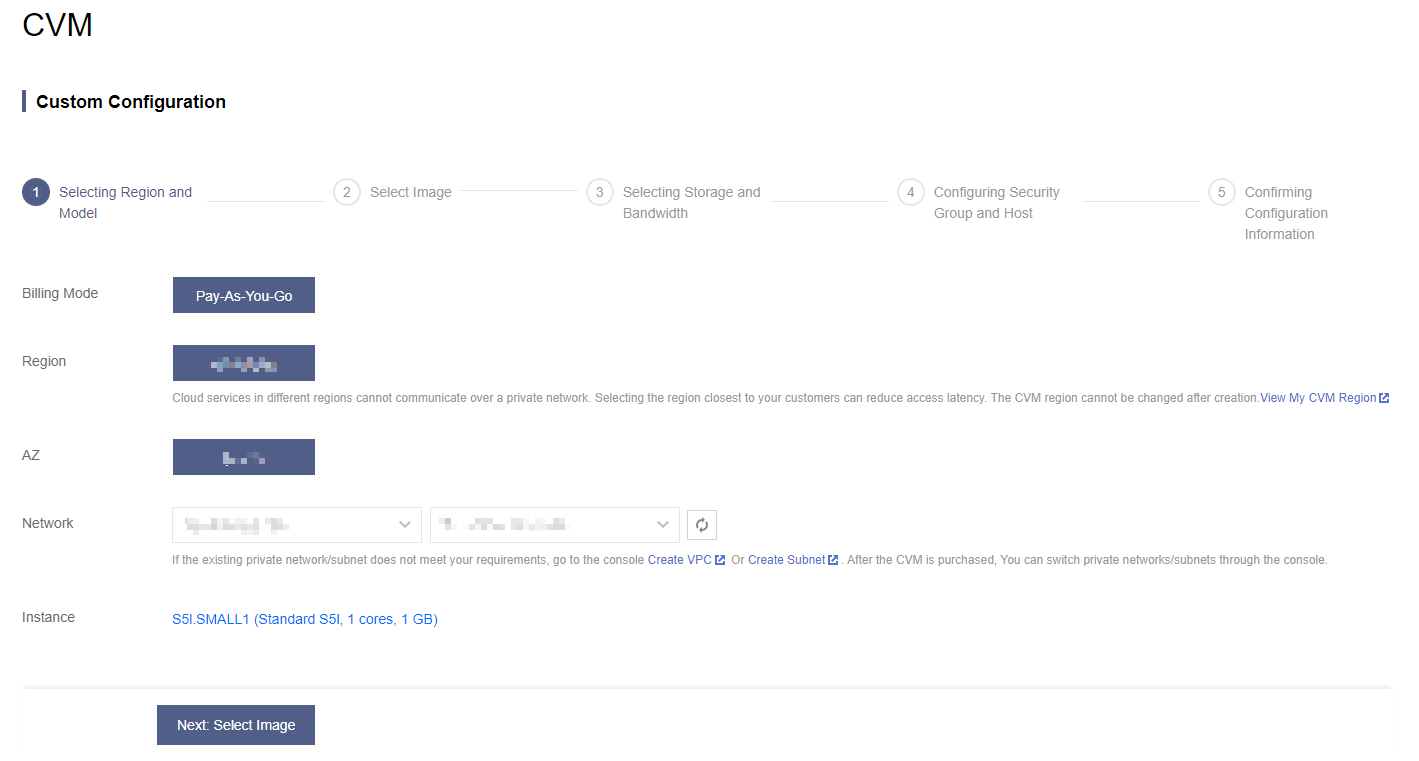
- On the custom configuration page, configure CVM instances according to actual needs and interface prompts. The example is as follows:
On the Select Region and Instance page, choose the VPC and subnet you have created, choose the instance model, and click Next: Select Image.
In the Select Image interface, choose the image version. In this example, CentOS 7.4 64-bit is chosen. You can also choose other models according to your actual needs. After completion, click Next: Select Storage and Bandwidth.
On the 3. Select Storage and Bandwidth page, set the system disk type and public network IP address. In this example, choose not to allocate temporarily. Click Next: Configure Security Groups and Host.
Note:
If you choose to allocate now, the system will automatically allocate a public network IP address to your CVM. If you choose not to allocate a public network IP address temporarily, you need to apply for and bind an EIP in the CVM console so that the CVM can access the public network.
On the 4. Configure Security Groups and Hosts page, in this example, choose Create Security Group, set log-in method and password, and click Next: Confirm Configuration Information.
Confirm the information on the 5. Confirm Configuration Information page, and click Activate to complete the purchase of CVM instances.
Step 3: Apply for EIP and Bind to CVM
Apply for an EIP (IP resources which can be independently purchased and held), and bind the EIP to the CVM instance to realize public network access.
- Log in to the EIP console.
- On the EIP management page, choose the region where the created CVM is located and click Apply.
- In the pop-up Apply for ElP window, configure relevant parameters, and then click OK to complete the application of EIP.
- On the EIP management page, find the applied EIP and click More > Bind.
- In the pop-up Bind Resources window, choose CVM Instance as the binding resource type. Then choose the created CVM and click OK.
Step 4: Test the Connectivity of Public Network
Complete the following operations to test the public network connectivity of CVM instances.
Note:
Before testing, make sure that the security group has allowed access to the corresponding IP/port. For example, allow ICMP protocol and public network Ping server. You can confirm it by View Security Group Rules.
- Log in to the CVM instance with the EIP bound.
- Run
ping other public network addresses, such asping www.google.comto test the connectivity of the public network.