

Creating an instance group
- Log in to the cloud platform console and choose Cloud Monitor > Instance Group.
- Click Create and configure the following options.
- Group Name: Enter an instance group name.
- Group Type: Select an option as needed.
- Add to Group: Select the instances to be added to the group.
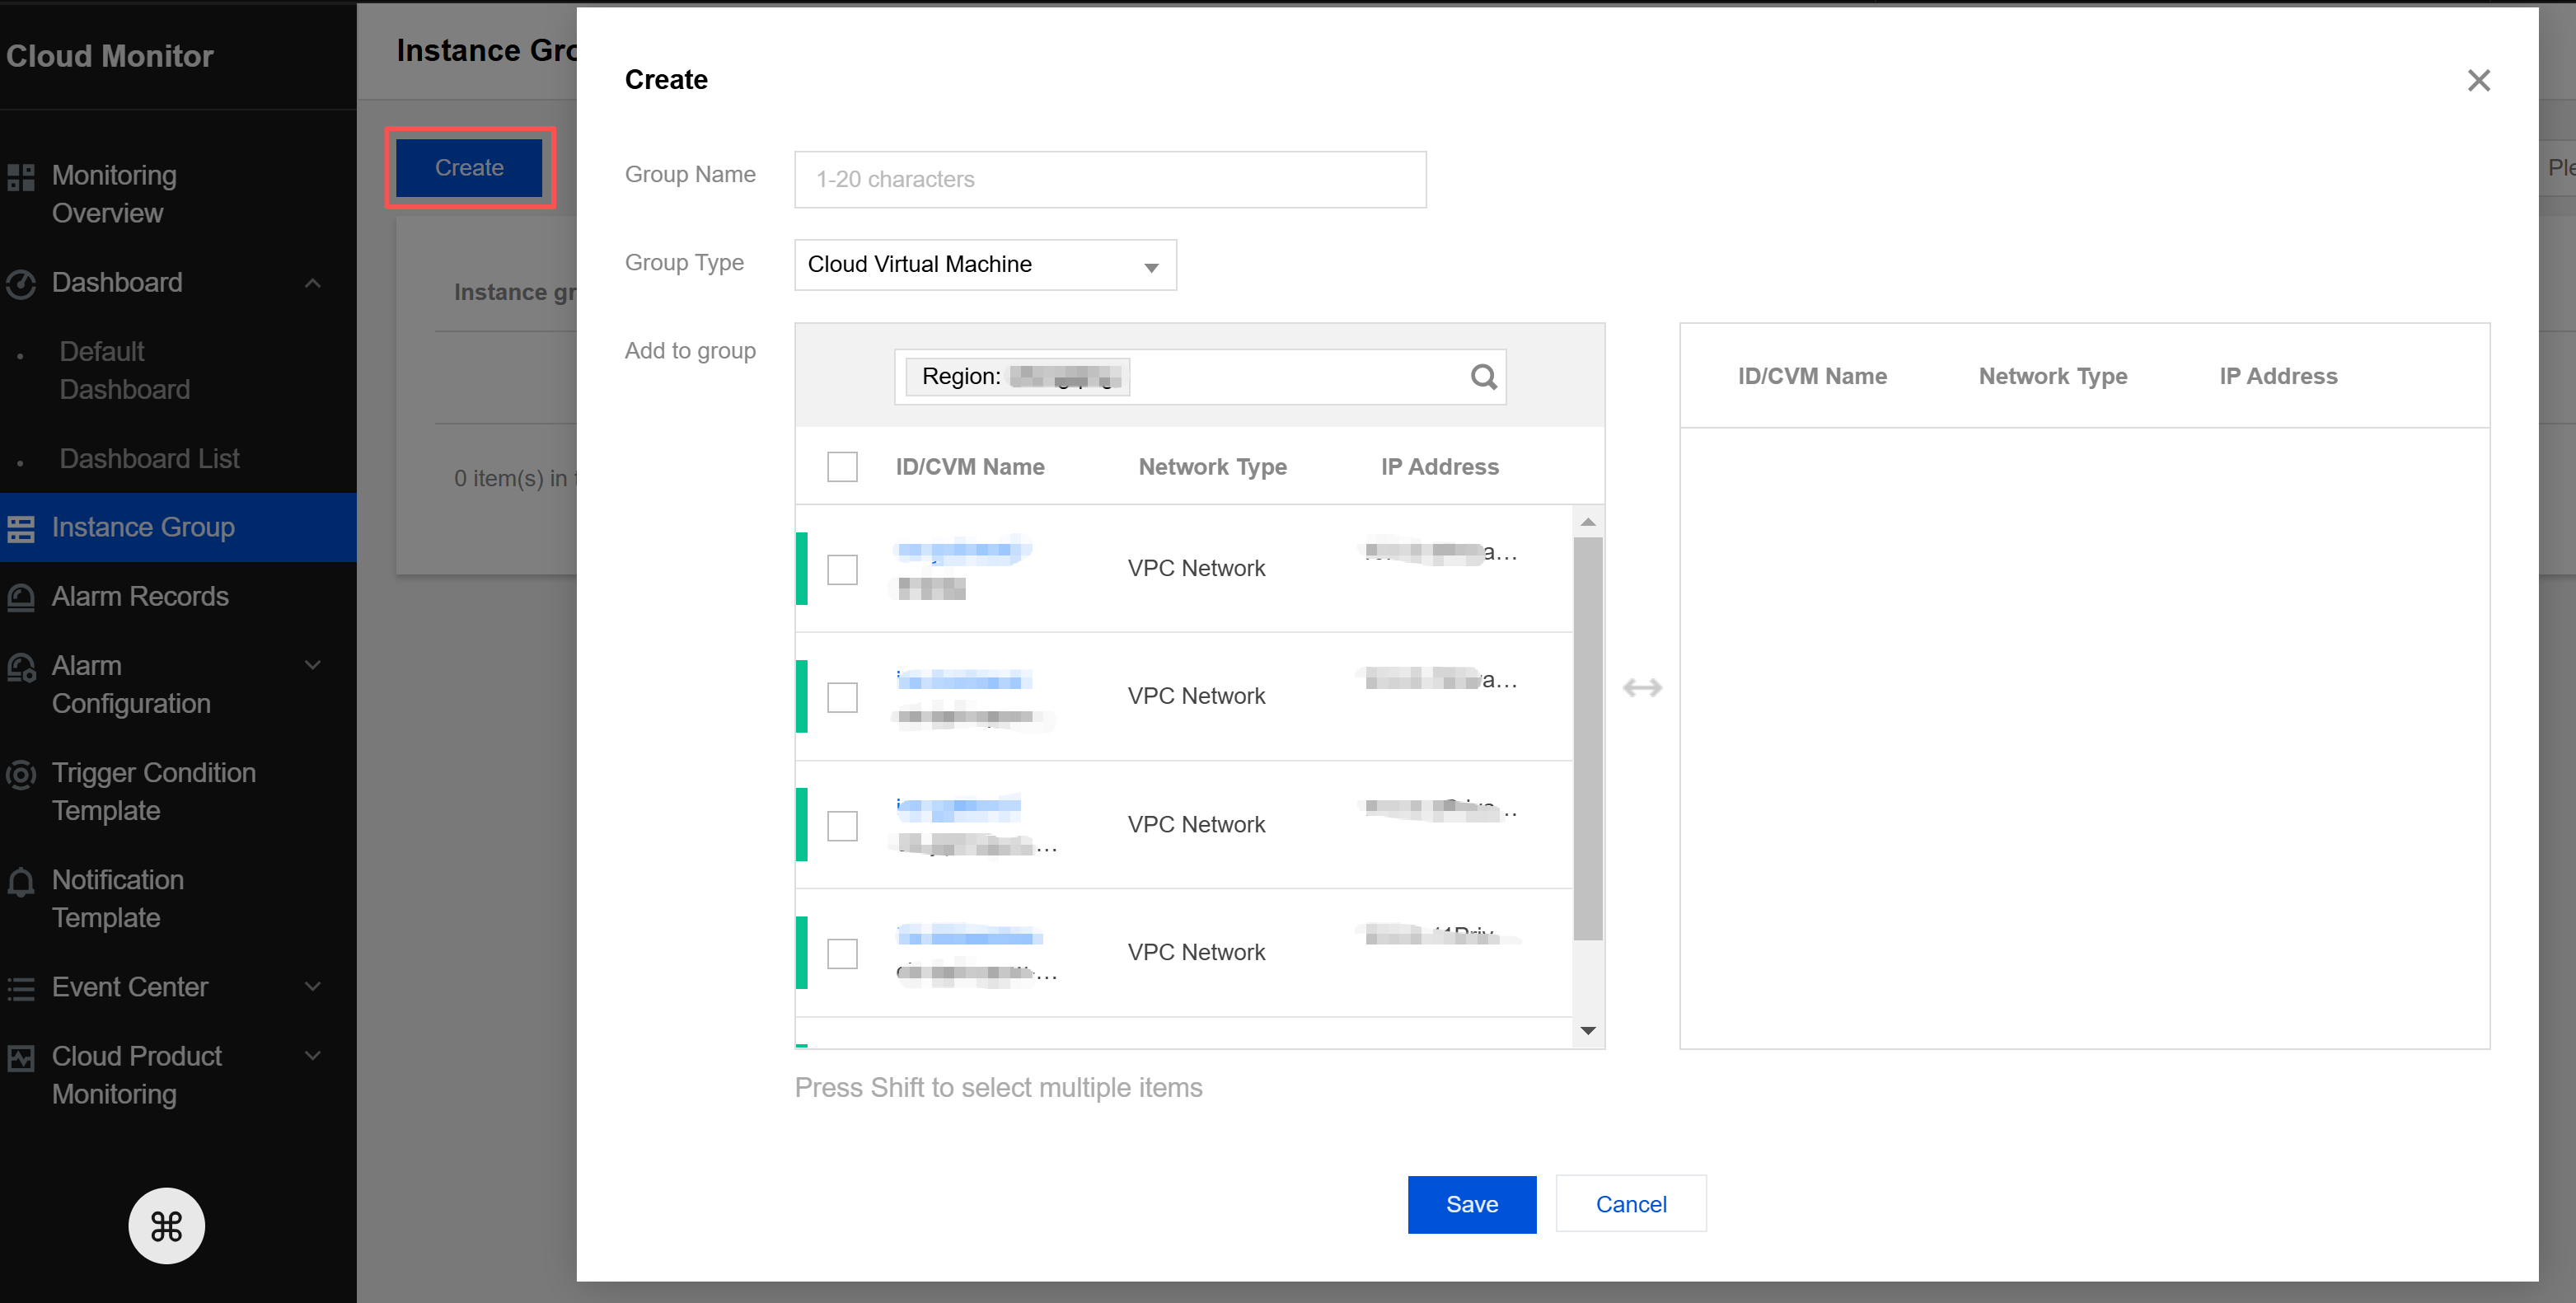
- Click Save to create the instance group.
Viewing an instance group
- Log in to the cloud platform console and choose Cloud Monitor > Instance Group.
- On the instance list page, you can view information such as the instance group name, number of instances, and number of associated alarm policies. You can also click the number of alarm policies to view the instances associated with the group.
Editing an instance group
Note:
- If an instance group is already bound to an alarm policy, instances added to this instance group will automatically be bound to this alarm policy.
- If an instance group is already bound to an alarm policy, instances removed from this instance group will no longer be bound to this alarm policy.
- Log in to the cloud platform console and choose Cloud Monitor > Instance Group.
- Click the name of the instance group that needs to be edited to go to the Instance Management page. On this page, you can edit (add or delete) the instances of this instance group.
- Adding an instance
- Click Create.
- In the pop-up configuration box, select the instance that needs to be added to this instance group.
- Click OK to add the instance to this instance group.
- Deleting an instance
- Select the instance you want to remove and click Remove.
- In the pop-up confirmation dialog box, click Confirm to Remove Selected Instance to remove the instance from the instance group.
Deleting an instance group
Note:
If an instance group is already bound to an alarm policy, deleting the instance group will cause the bound alarm policy to become invalid.
- Log in to the cloud platform console and choose Cloud Monitor > Instance Group.
- Find the instance group you want to delete, and click Delete in its right-side operation column.

- In the pop-up confirmation dialog box, click Confirm Deletion to delete the instance group.
Copying an instance group
Note:
When an instance group is copied, only the instances contained within it will be copied, and the binding relationship between this instance group and the alarm policy will not be copied.
- Log in to the cloud platform console and choose Cloud Monitor > Instance Group.
- Find the instance group you want to delete, and click Copy in its right-side operation column.

- In the pop-up confirmation dialog box, click Confirm to Copy to successfully copy the instance group.
