

Software version
The software versions in the example steps in this document are as follows. In actual operations,see the actual software versions.
- Operating system: CentOS 7.5
- Tomcat version: apache-tomcat-8.5.39
- JDK version: JDK 1.8.0_201
Install JDK
After you purchase the lCLB service, click Log In on the CVM details page to log in to the CVM directly. Enter your username and password to start building the Java Web environment. For information on how to create a CVM instance, see CVM - Create an Instance.
Download JDK
You can enter the following command:
mkdir /usr/java  # Create a Java folder
cd /usr/java     # Enter the Java folder
# Upload JDK installation package (recommended)
It is recommended to use  or other tools to upload the JDK installation package to the aforementioned java folder, and then extract the installation package.
or
# Directly use the command (It is recommended that you use the method of uploading the JDK installation package): wget download link. The compressed package downloaded cannot be decompressed. This is because the compressed package downloaded directly does not accept the Oracle BSD license by default. Everyone's cookies are different. Go to https://www.oracle.com/technetwork/java/javase/downloads/jdk8-downloads-2133151.html to agree to the license agreement and obtain the download link with your own cookies.
wget --no-check-certificate --no-cookies --header "Cookie: oraclelicense=accept-securebackup-cookie" https://download.oracle.com/otn-pub/java/jdk/8u201-b09/42970487e3af4f5aa5bca3f542482c60/jdk-8u201-linux-x64.tar.gz
# Unzip
chmod +x jdk-8u201-linux-x64.tar.gz
tar -xzvf jdk-8u201-linux-x64.tar.gz
Set the relevant environment variables
Open
/etc/profiledocument.vi /etc/profilePress the i key to enter the edit mode and add the following information to the file.
# set java environment
export JAVA_HOME=/usr/java/jdk1.8.0_201
export CLASSPATH=$JAVA_HOME/lib/tools.jar:$JAVA_HOME/lib/dt.jar:$JAVA_HOME/lib
export PATH=$JAVA_HOME/bin:$PATH
Press the Esc key to exit edit mode and enter
:wqto save and close the file.Load environment variables.
source /etc/profile
Check whether JDK is installed successfully
Run java -version. When the JDK version information is displayed, it means that the JDK has been installed successfully.
Install Tomcat
Download Tomcat
You can enter the following command:
# The image address changes and the Tomcat version is continuously upgraded. If the download link is invalid, please go to the Tomcat official website (https://tomcat.apache.org/download-80.cgi) to select the appropriate installation package address.
wget http://mirrors.tuna.tsinghua.edu.cn/apache/tomcat/tomcat-8/v8.5.39/bin/apache-tomcat-8.5.39.tar.gz
tar -xzvf apache-tomcat-8.5.39.tar.gz
mv apache-tomcat-8.5.39 /usr/local/tomcat/
In /usr/local/tomcat/ directory contains the following files:
- bin: script file, including scripts for starting and shutting down Tomcat services.
- conf: various global configuration files, with the most important of which being server.xml and web.xml.
- webapps: Tomcat's main Web publishing directory. By default, Web application files are placed in this directory.
- logs: stores the log files when Tomcat is executed.
Note:
If the download link is invalid, please replace it with Tomcat official website latest download link.
Adding Users
# Create a general user www to run Tomcat
useradd www
# Create the website root directory
mkdir -p /data/wwwroot/default
# Upload the Java Web project file WAR package to be deployed to the website root directory, and then change the file permission in the website root directory to www. This example will create a new Tomcat testing page directly in the root directory of the website:
echo Hello Tomcat! > /data/wwwroot/default/index.jsp
chown -R www.www /data/wwwroot
Set JVM memory parameters
Create a
/usr/local/tomcat/bin/setenv.shscript file.vi /usr/local/tomcat/bin/setenv.shPress the i key to enter edit mode and add the following content.
JAVA_OPTS='-Djava.security.egd=file:/dev/./urandom -server -Xms256m -Xmx496m -Dfile.encoding=UTF-8'Press Esc to exit edit mode, enter
:wq!to save and exit.
Configure server.xml
Switch to
/usr/local/tomcat/conf/table of contents.cd /usr/local/tomcat/conf/Back up the server.xml file.
mv server.xml server_default.xmlCreate a new server.xml file.
vi server.xmlPress the i key to enter edit mode and add the following content.
<?xml version="1.0" encoding="UTF-8"?> <Server port="8006" shutdown="SHUTDOWN"> <Listener className="org.apache.catalina.core.JreMemoryLeakPreventionListener"/> <Listener className="org.apache.catalina.mbeans.GlobalResourcesLifecycleListener"/> <Listener className="org.apache.catalina.core.ThreadLocalLeakPreventionListener"/> <Listener className="org.apache.catalina.core.AprLifecycleListener"/> <GlobalNamingResources> <Resource name="UserDatabase" auth="Container" type="org.apache.catalina.UserDatabase" description="User database that can be updated and saved" factory="org.apache.catalina.users.MemoryUserDatabaseFactory" pathname="conf/tomcat-users.xml"/> </GlobalNamingResources> <Service name="Catalina"> <Connector port="8080" protocol="HTTP/1.1" connectionTimeout="20000" redirectPort="8443" maxThreads="1000" minSpareThreads="20" acceptCount="1000" maxHttpHeaderSize="65536" debug="0" disableUploadTimeout="true" useBodyEncodingForURI="true" enableLookups="false" URIEncoding="UTF-8"/> <Engine name="Catalina" defaultHost="localhost"> <Realm className="org.apache.catalina.realm.LockOutRealm"> <Realm className="org.apache.catalina.realm.UserDatabaseRealm" resourceName="UserDatabase"/> </Realm> <Host name="localhost" appBase="/data/wwwroot/default" unpackWARs="true" autoDeploy="true"> <Context path="" docBase="/data/wwwroot/default" debug="0" reloadable="false" crossContext="true"/> <Valve className="org.apache.catalina.valves.AccessLogValve" directory="logs" prefix="localhost_access_log." suffix=".txt" pattern="%h %l %u %t "%r" %s %b" /> </Host> </Engine> </Service> </Server>Press Esc to exit edit mode, enter
:wq!to save and exit.
Start Tomcat
Method A
Enter the bin directory of the Tomcat server and execute ./startup.sh command to start the Tomcat server.
cd /usr/local/tomcat/bin
./startup.sh
The results are as follows:
Method B
Set up a shortcut start, and you can start Tomcat from anywhere with service Tomcat start.
wget https://github.com/lj2007331/oneinstack/raw/master/init.d/Tomcat-init
mv Tomcat-init /etc/init.d/tomcat
chmod +x /etc/init.d/tomcat
Run the following command to set the startup script JAVA_HOME.
sed -i 's@^export JAVA_HOME=.*@export JAVA_HOME=/usr/java/jdk1.8.0_201@' /etc/init.d/tomcatSet up auto-start.
chkconfig --add tomcat
chkconfig tomcat on
Start Tomcat.
# Start Tomcat
service tomcat start
# View Tomcat running status
service tomcat status
# Shut down Tomcat
service tomcat stop
The results are as follows:
5. If it prompts that you do not have permission, switch to the root user and modify the permission.
cd /usr/local
chmod -R 777 tomcat
- Enter
http://public IP:port in the browser address bar.(The port is the connector port set in server.xml) for access. When the page shown below appears, the installation is successful.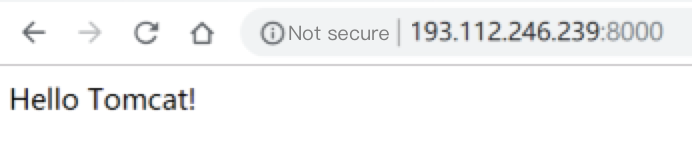
Configure Security Group
If access is unsuccessful, check the security group. In the above example, the connector port in server.xml is 8,080, so TCP:8,080 needs to be allowed in the security group bound to the corresponding cloud server.