Scenarios
This document takes the Windows Server 2012 R2 operating system Cloud Virtual Machine as an example to describe how to configure PHP 7.0 and earlier versions as well as PHP 7.0 and later versions in a Windows Cloud Virtual Machine.
Prerequisites
- You have logged in to the Windows Cloud Virtual Machine and have added and installed the IIS role in the Cloud Virtual Machine. For details, see Install and Configure IIS.
- The public network IP for the Windows Cloud Virtual Machine has been obtained. For details, see Obtaining Public Network IP Address.
Operation Steps
Install PHP 7.0 and Earlier Versions
The installation package for PHP 7.0 and earlier versions is no longer available for download on the PHP official website. If you still need to use PHP 7.0 and earlier versions, you can search and download it on the Cloud Virtual Machine; you can also download it locally and then upload the installation package to the Cloud Virtual Machine. For details about how to upload files to Windows Cloud Virtual Machine, see Upload Files to Windows Cloud Virtual Machine. The following directions take PHP 5.2.13 as an example.
Open the PHP installation package in the Cloud Virtual Machine.
Follow the instructions on the installation interface and click Next.
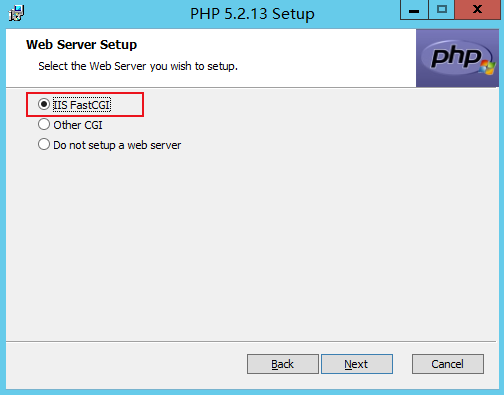
On the Web Server Setup interface, select IIS FastCGI and click Next.
Follow the instructions on the installation interface to complete the PHP installation.
In the
C:/inetpub/wwwrootdirectory, create a PHP file. For example, create a file namedhello.php.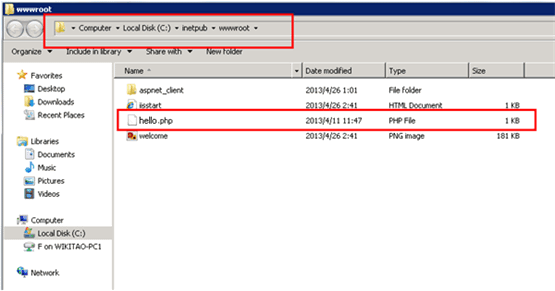
In the newly created
hello.phpfile, enter the following content and save.<?php echo "<title>Test Page</title>"; echo "hello world"; ?>On the operating system interface, open a browser and visit
http://Windows Cloud Virtual Machine's public network IP/hello.php, to check whether the environment configuration is successful.
If the opened page is as follows, the configuration is successful: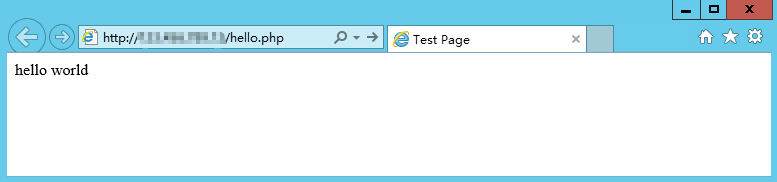
Install PHP 7.0 and Later Versions
PHP versions after 7.0 can be installed via zip file or debug pack. The following operation takes how to use the zip file to install PHP in Windows Server 2012 R2 as an example.
Software Download
- In the CVM, visit the PHP official website to download the PHP ZIP installation package.Note:
When running PHP under IIS, you must select the Non Thread Safe version of the x86 installation package. If you want to install PHP on a Windows Server 32bit (x64) operating system, you need to replace IIS with Apache and select the Non Thread Safe version of the x64 installation package.

2. Download and install the Visual C++ Redistributable installation package according to the name of the downloaded PHP installation package.
The PHP installation package corresponding to the Visual C++ Redistributable installation package that needs to be downloaded and installed is shown in the following table:
| PHP installation package name | Visual C++ Redistributable installation package download address |
|---|---|
| php-x.x.x-nts-Win32-VC16-x86.zip | Microsoft Visual C++ Redistributable for Visual Studio 2019 |
| php-x.x.x-nts-Win32-VC15-x86.zip | Microsoft Visual C++ Redistributable for Visual Studio 2017 |
| php-x.x.x-nts-Win32-VC14-x86.zip | Microsoft Visual C++ Redistributable for Visual Studio 2015 |
For example, if the name of the downloaded PHP installation package is PHP-7.0.6-nts-Win32-VC14-x86.zip, you need to download and install the installation package of Microsoft Visual C++ Redistributable for Visual Studio 2015.
Installation Configuration
- Unzip the downloaded PHP zip installation package. For example, unzip to
C:\PHPdirectory. - Copy the
php.ini-productionfile from theC:\PHPdirectory, change its file extension to.ini, and rename it tophp.ini.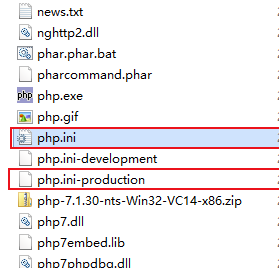
- On the operating system interface, click
 to open Server Manager.
 - In the left sidebar of Server Manager, click IIS.
- In the right-side IIS management window, right-click the server name under the Server section and select Internet Information Services (IIS) Manager.
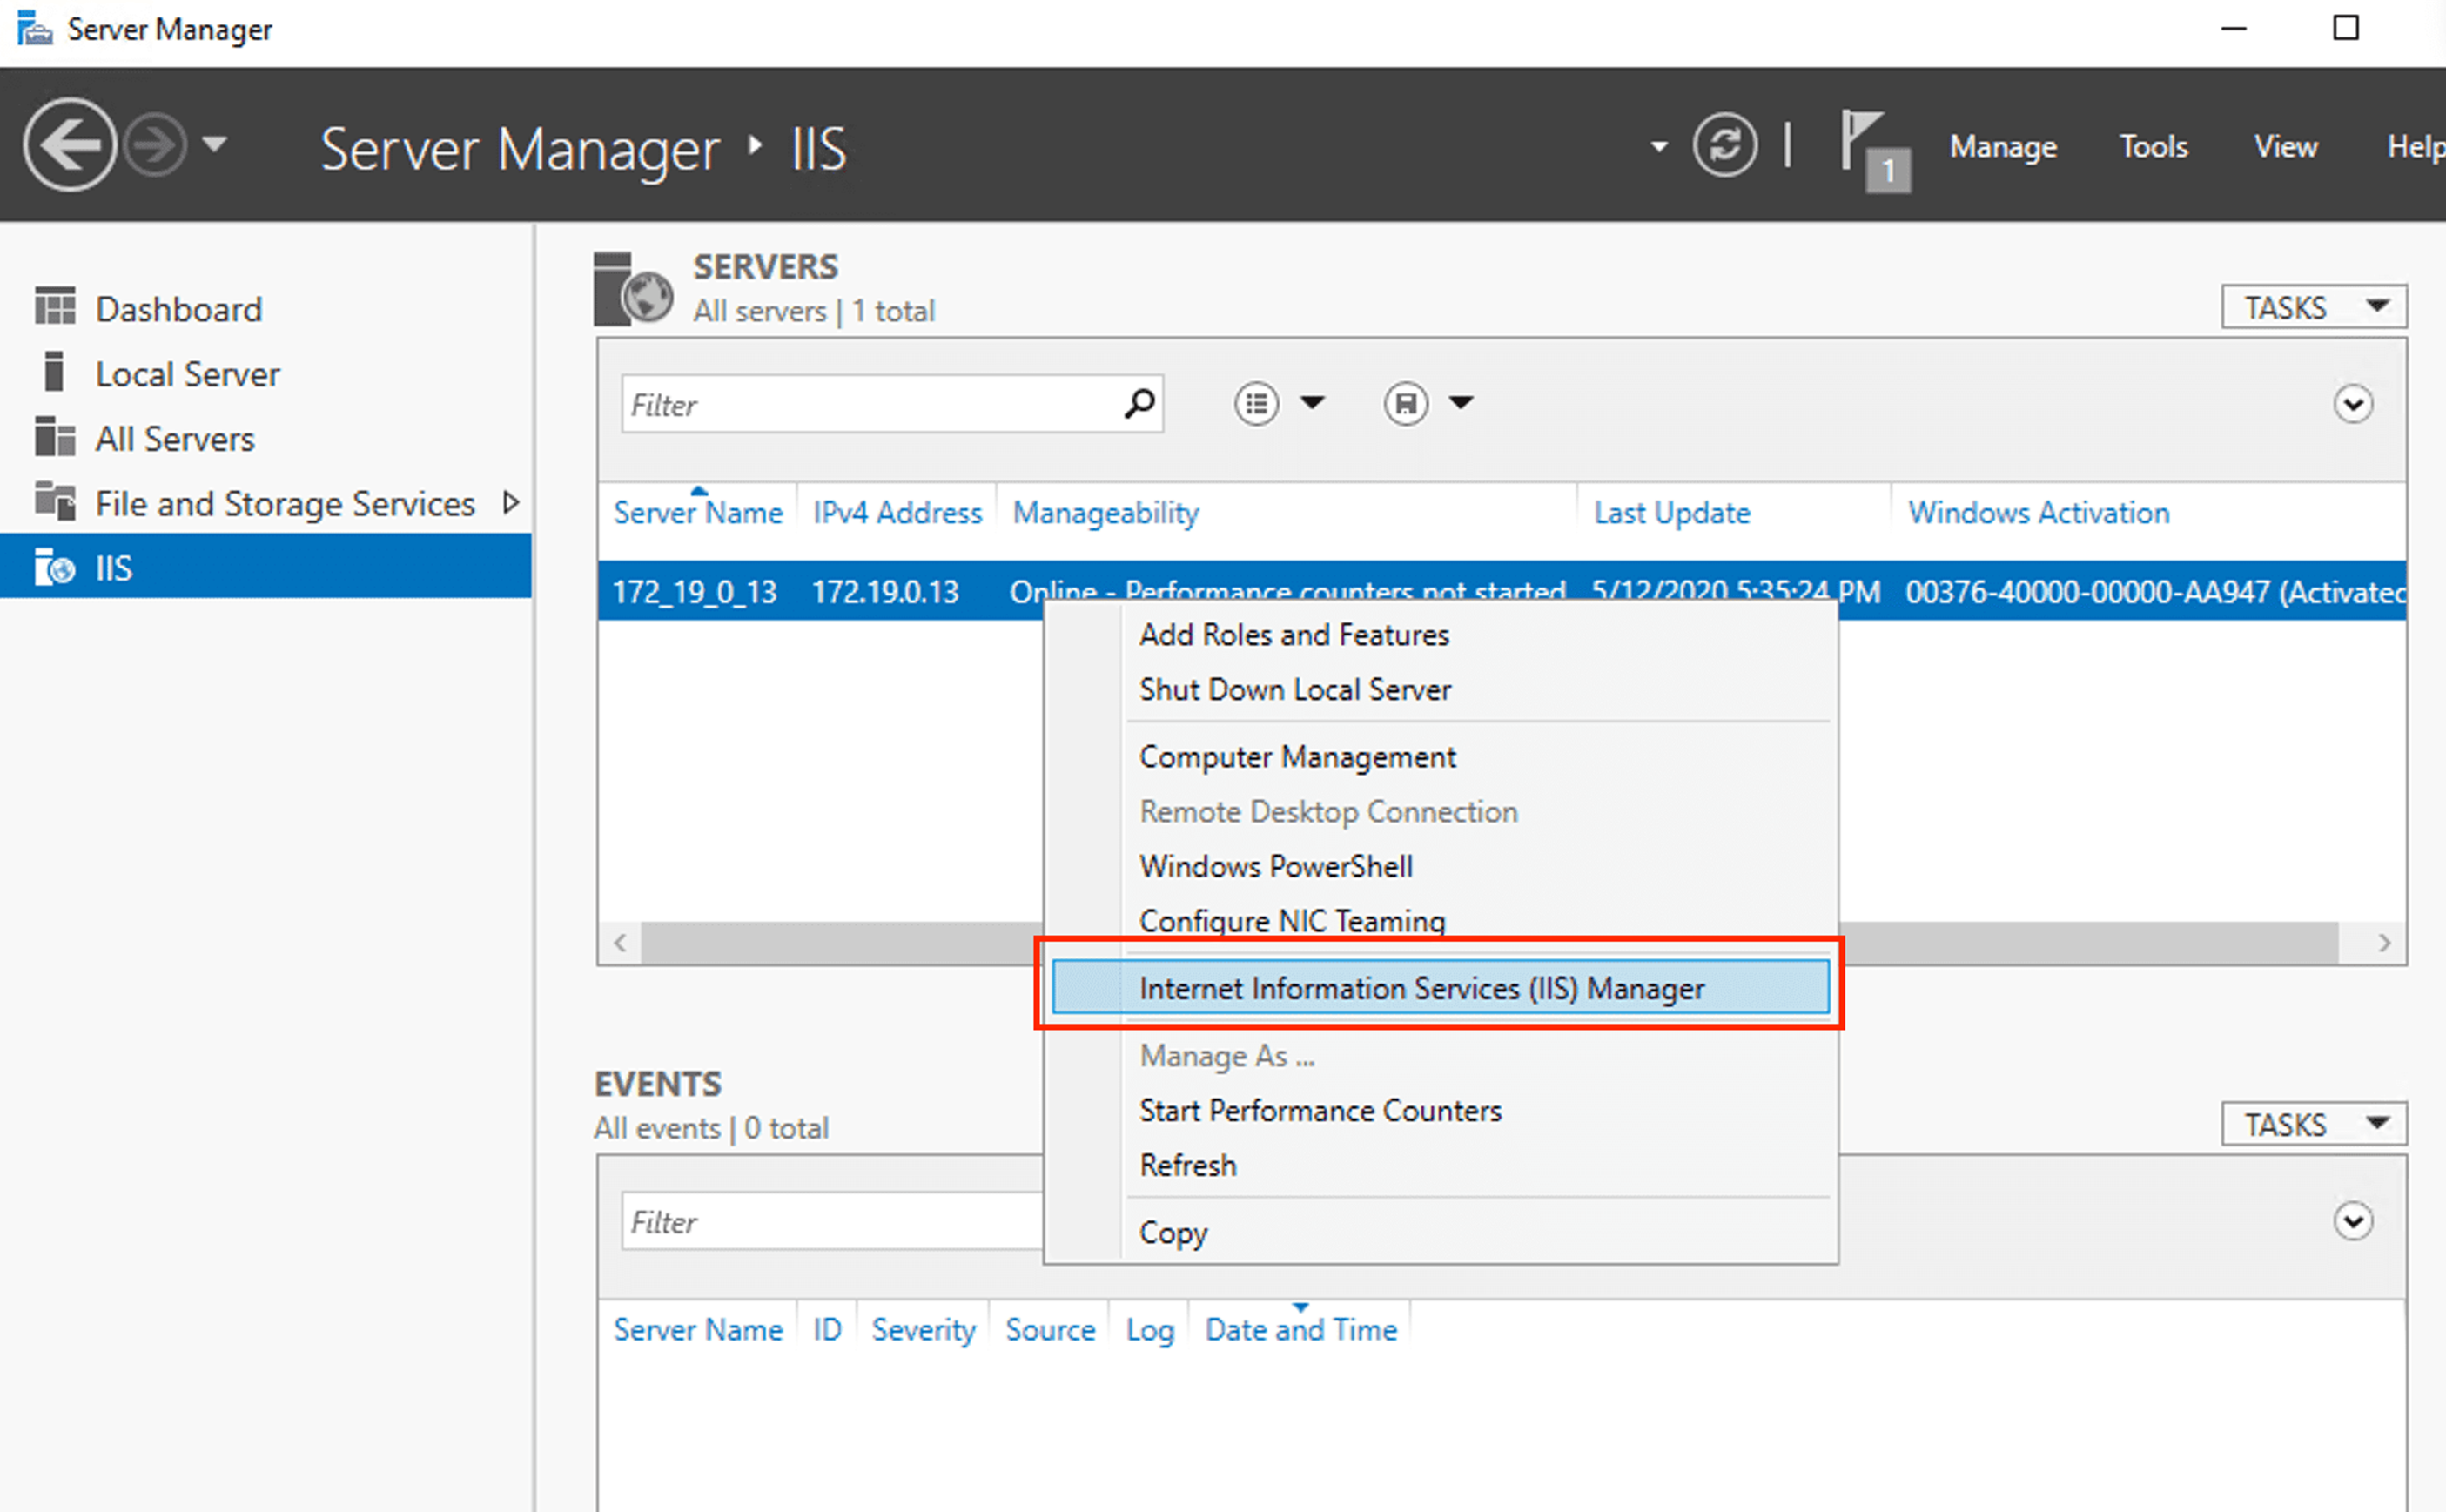
- In the opened Internet Information Services (IIS) Manager window, click the server name in the left side bar to go to the server's homepage.
For example, click the 10_141_9_72 server name to enter the 10_141_9_72 homepage.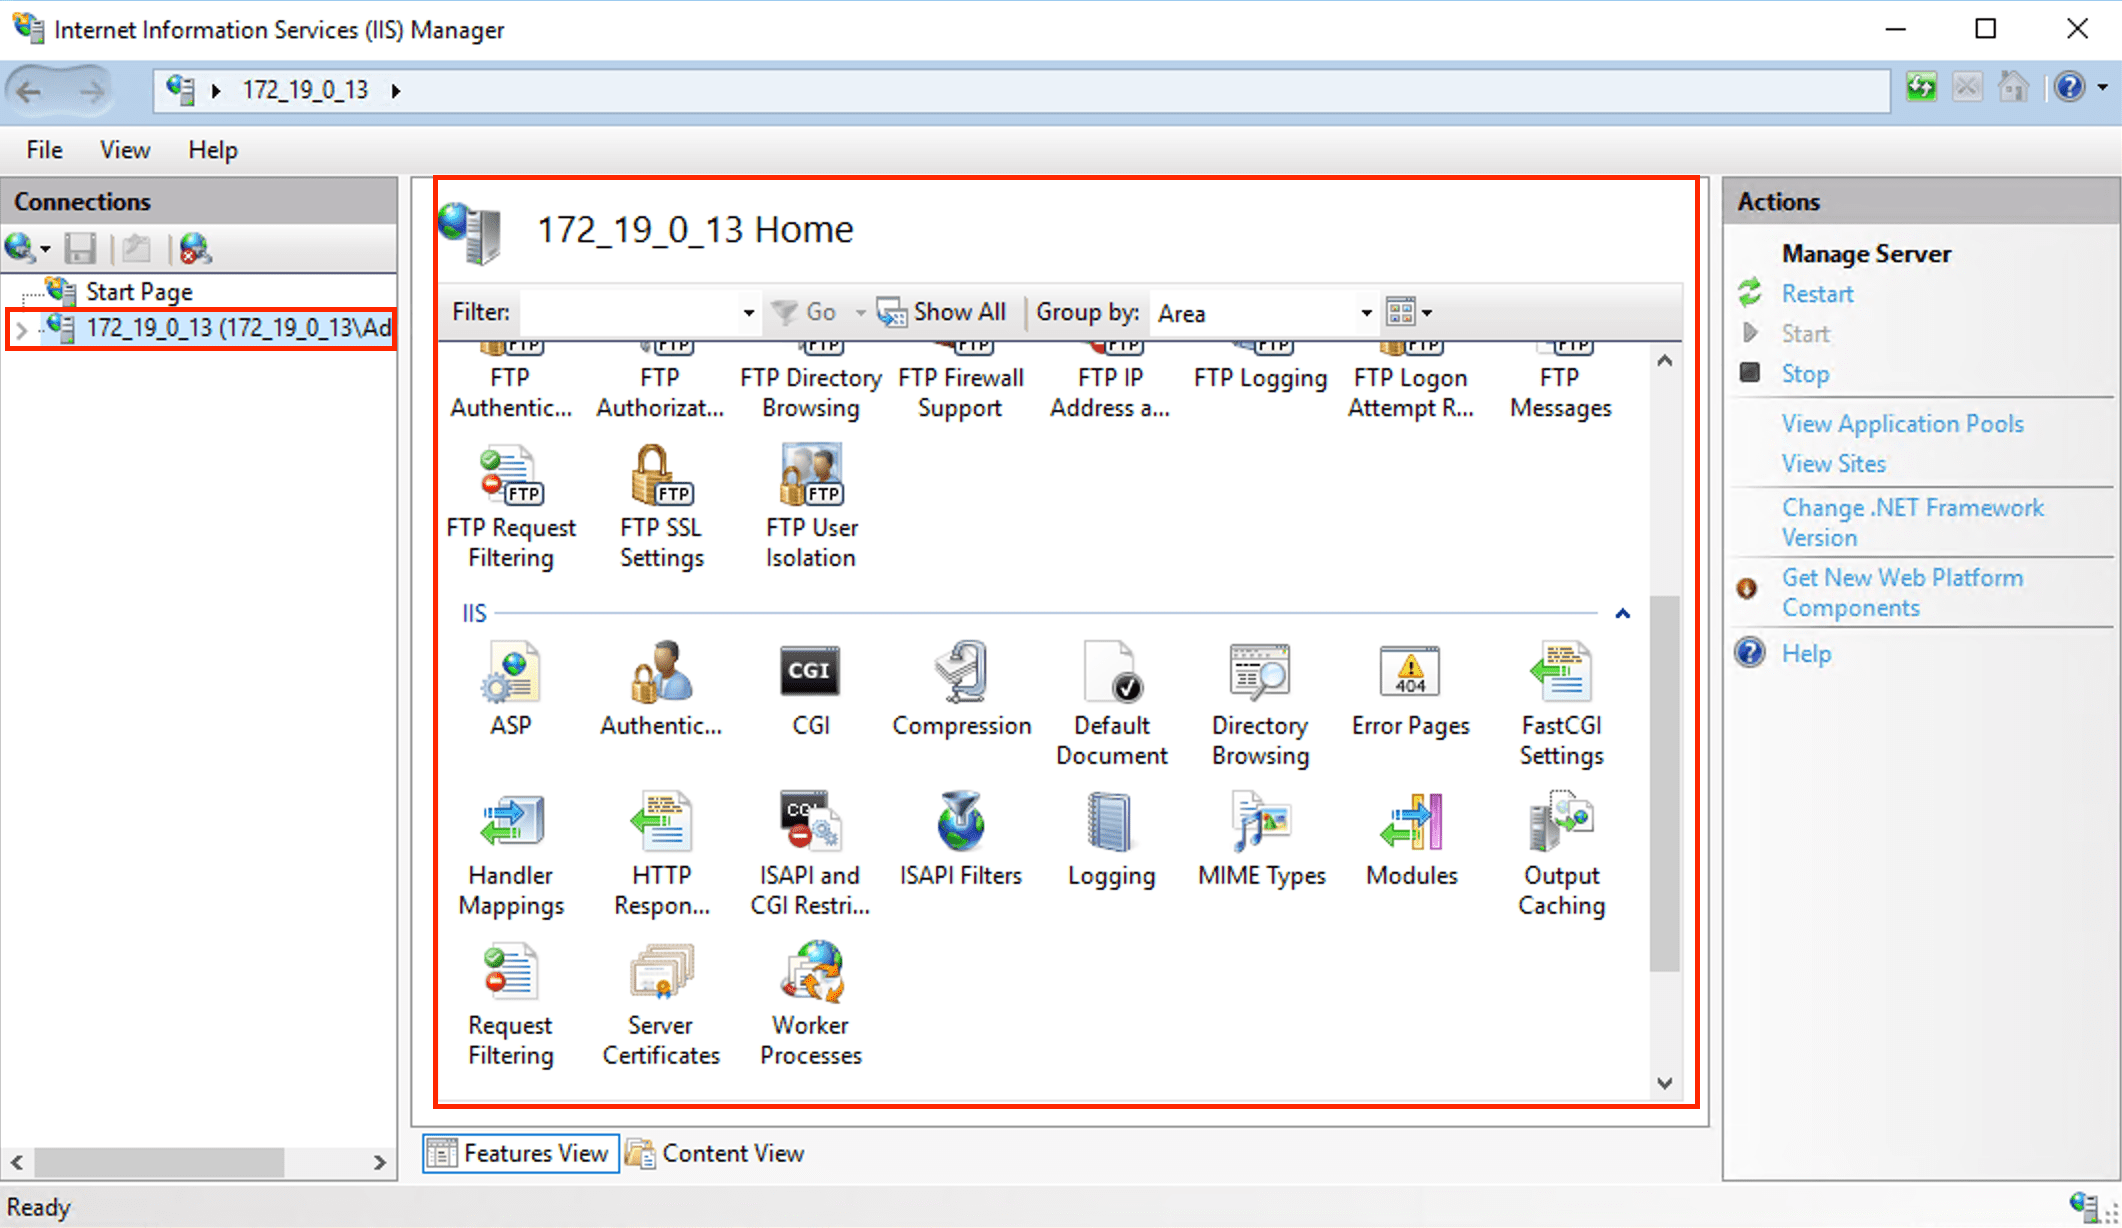
- On the 10_141_9_72 Homepage, double-click Handler Mapping to go to the Handler Mapping management interface.
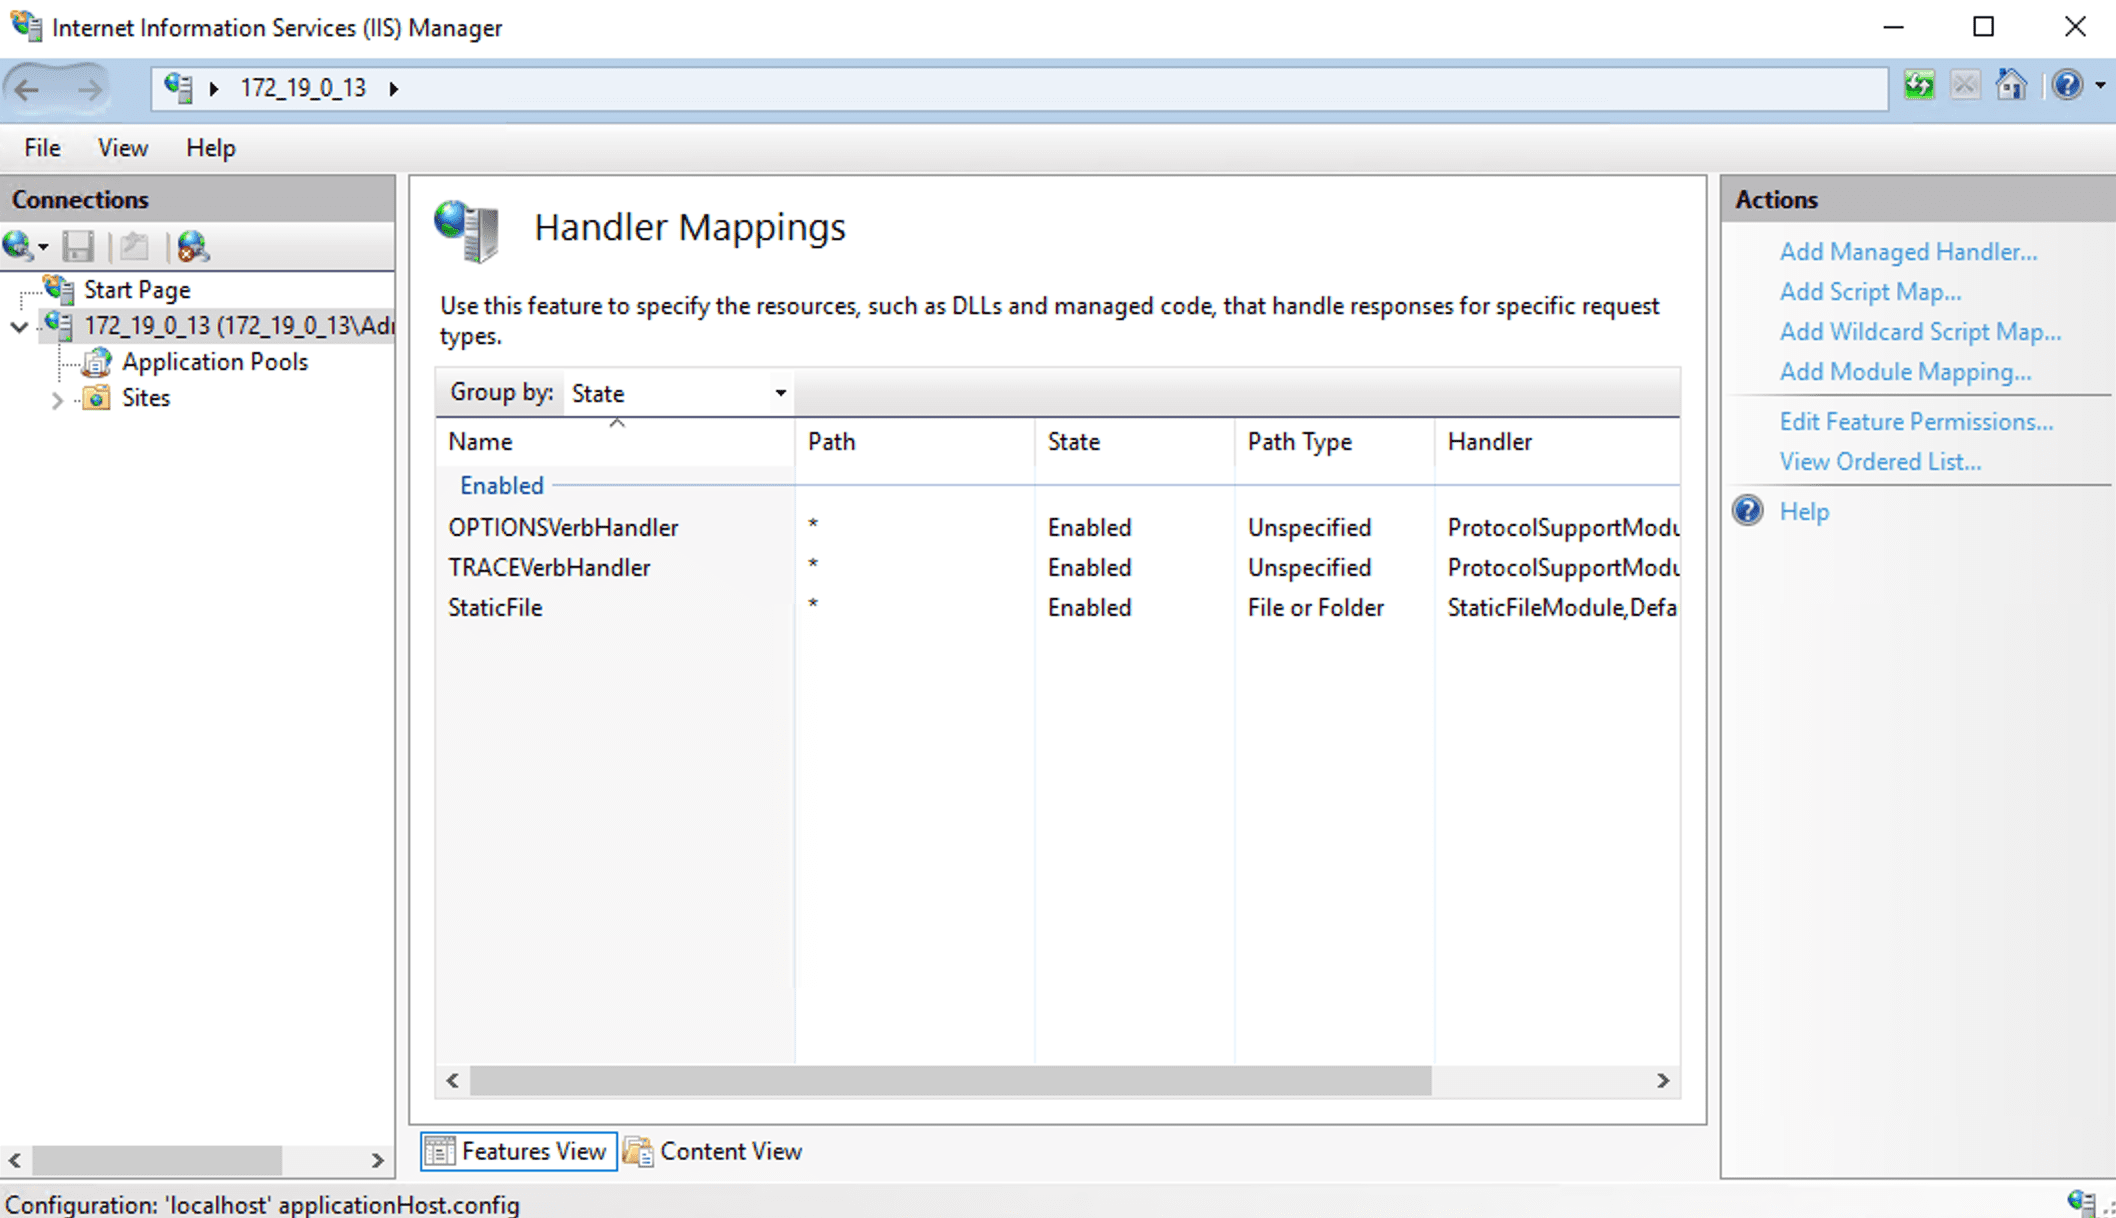
- In the Operation column on the right, click Add Module Mapping to open the Add Module Mapping window.
- In the opened Add Module Mapping window, fill in the following information and click OK.
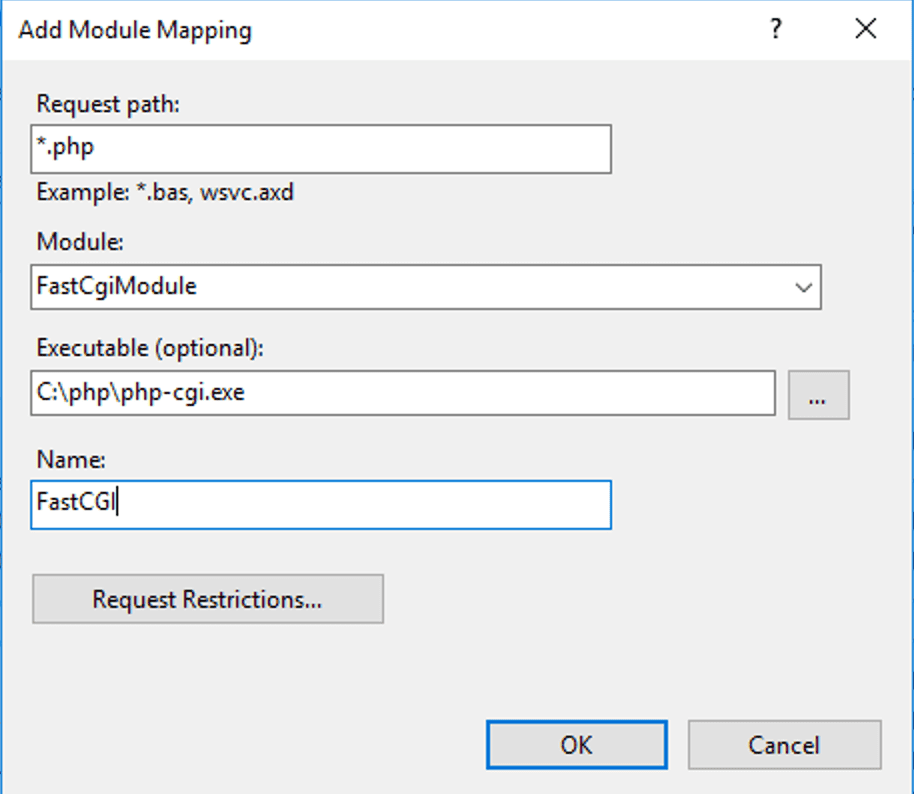
The main parameter information is as follows:- Request path: Enter
*.php. - Module: Select FastCgiModule.
- Executable file: Select the php-cgi.exe file in the PHP zip installation package, that is,
C:\PHP\php-cgi.exe. - Name: Custom. For example, enter FastCGI.
- Request path: Enter
- In the pop-up dialog box, click Yes.
- Click the 10_141_9_72 server name in the left sidebar to return to the 10_141_9_72 homepage.
- On the 10_141_9_72 Homepage, double-click Default Document to go to the Default Document management interface.
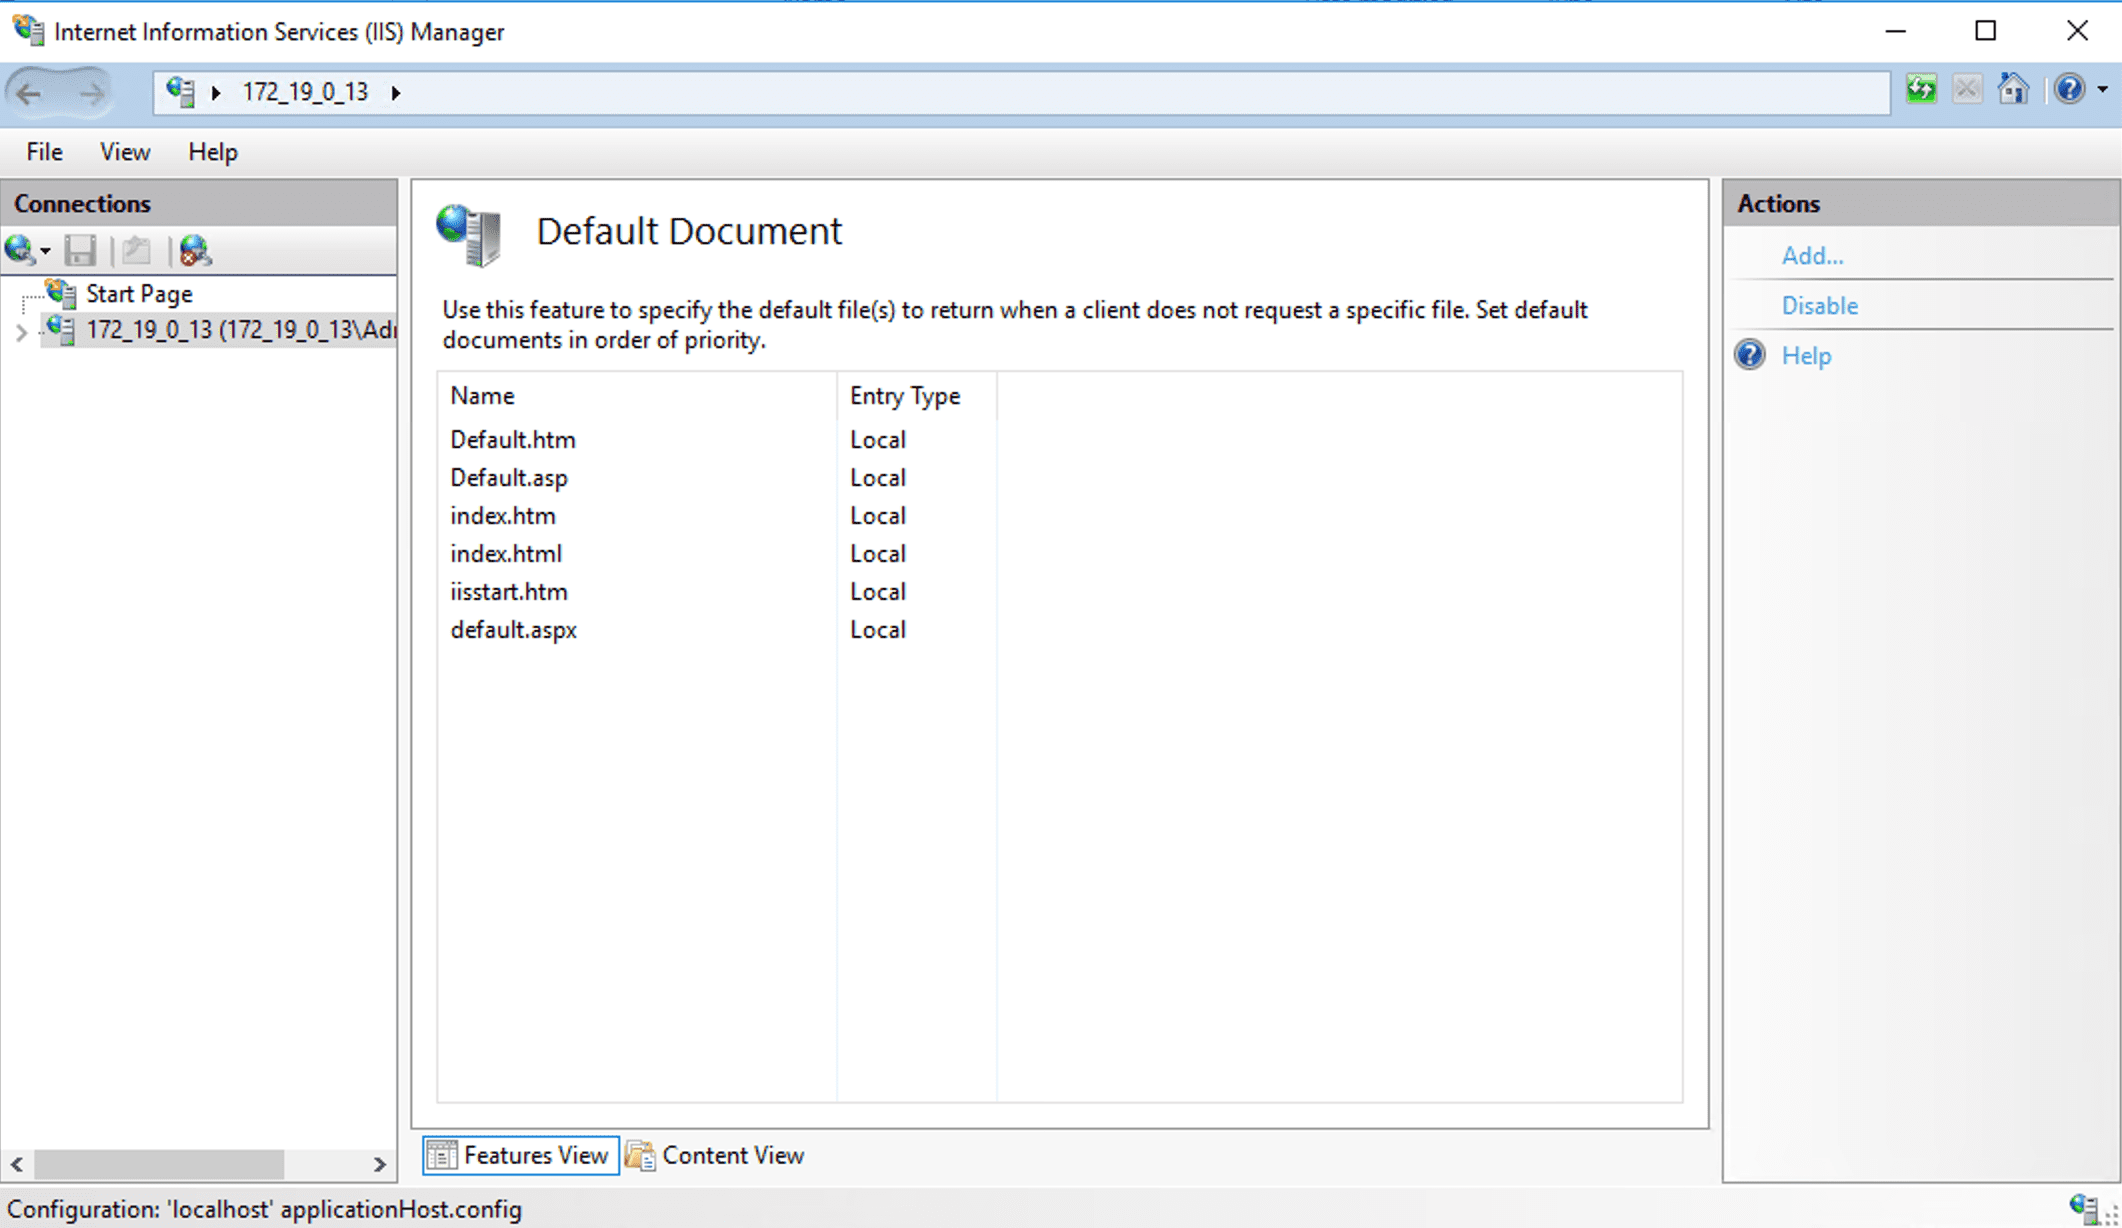
- In the Operation column on the right, click Add to open the Add Default Document window.
- In the opened Add Default Document window, enter
index.phpin the Name field and click OK.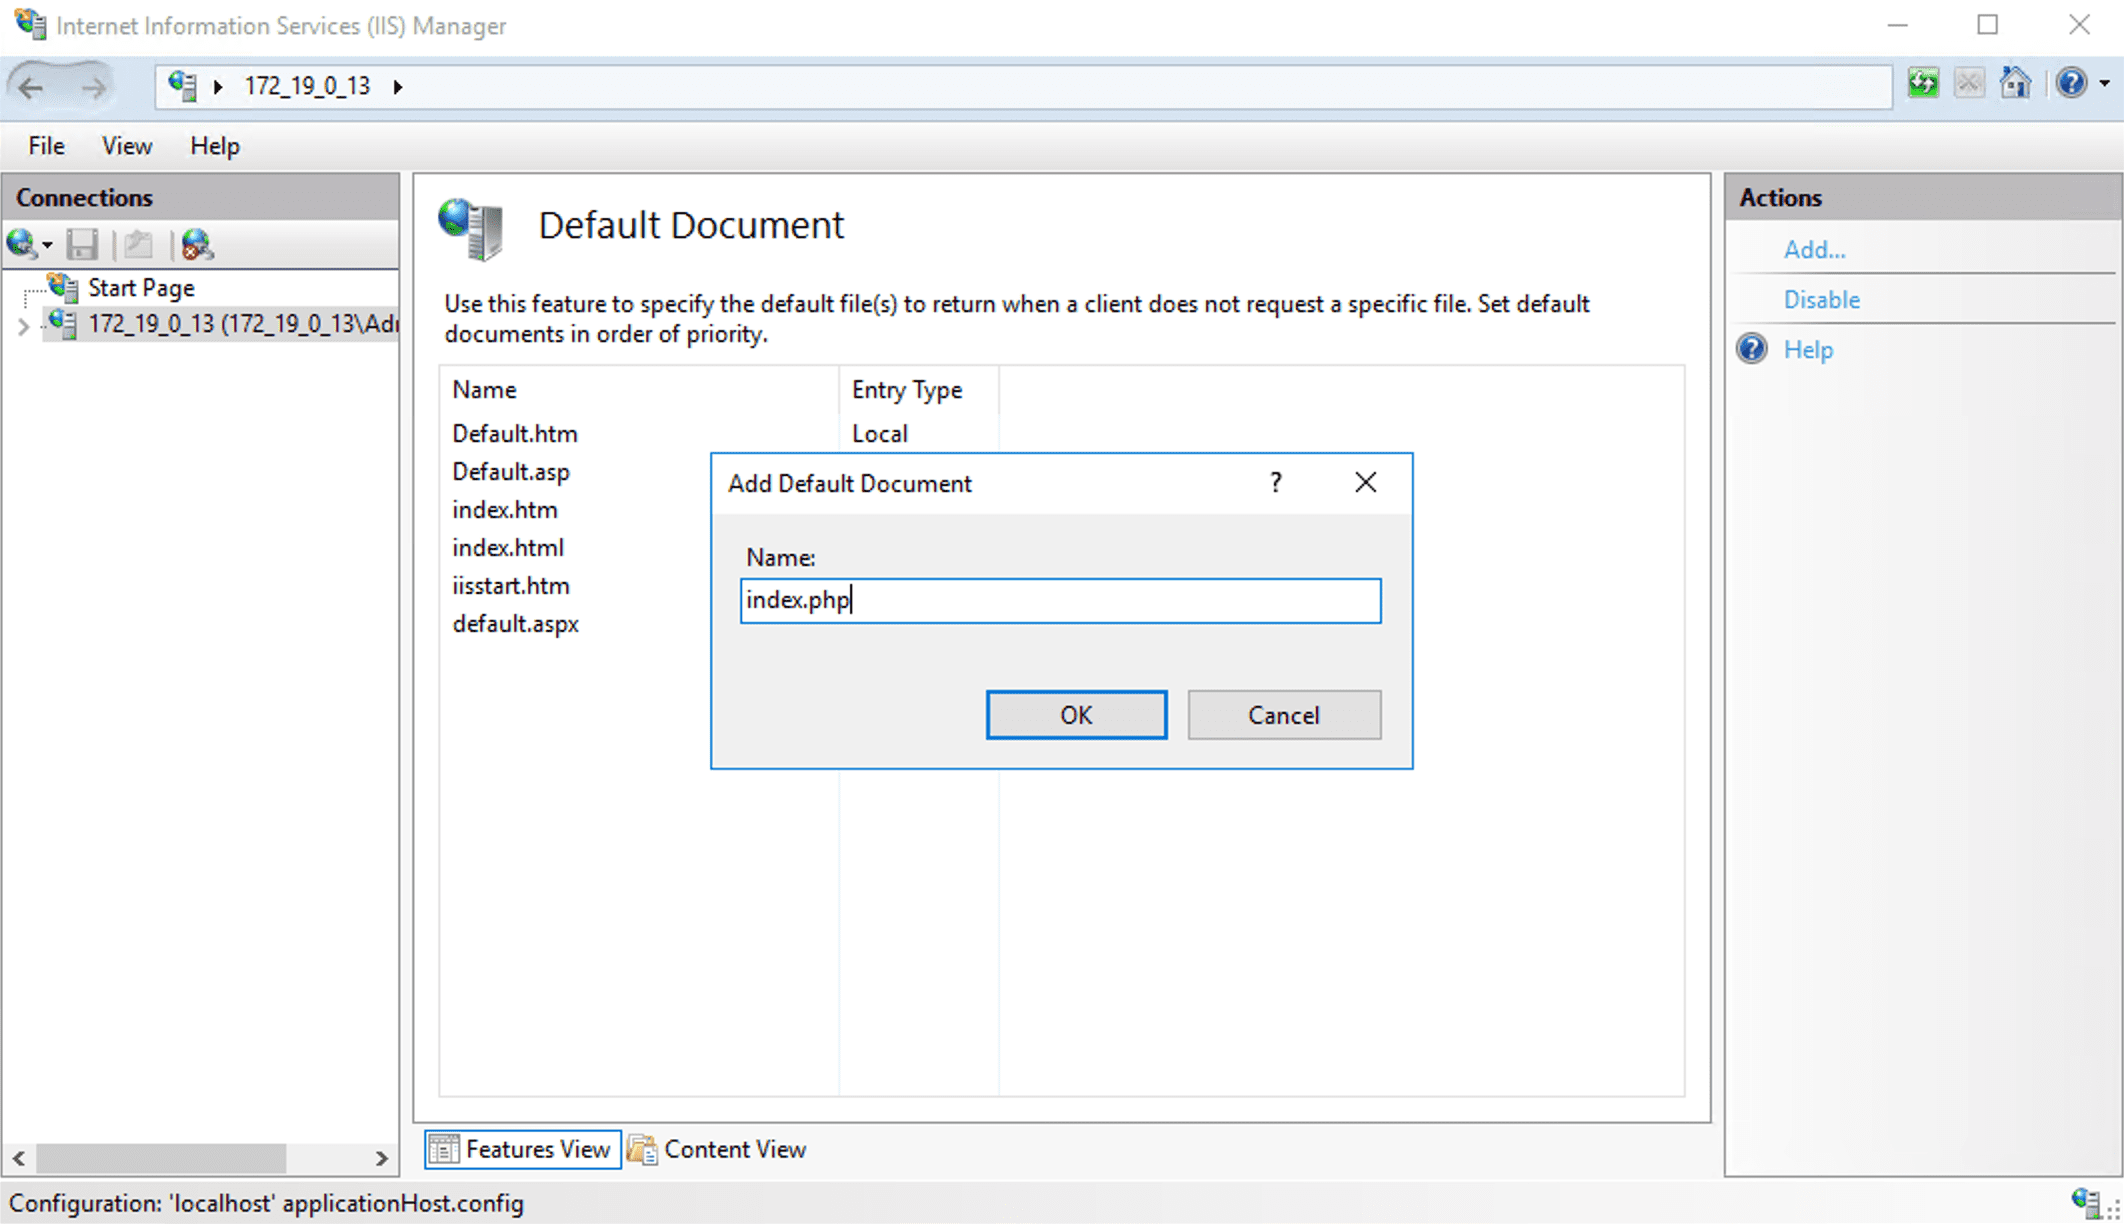
- Click the 10_141_9_72 server name in the left sidebar to return to the 10_141_9_72 homepage.
- On the 10_141_9_72 Homepage, double-click FastCGI Settings to go to the FastCGI Settings management interface.
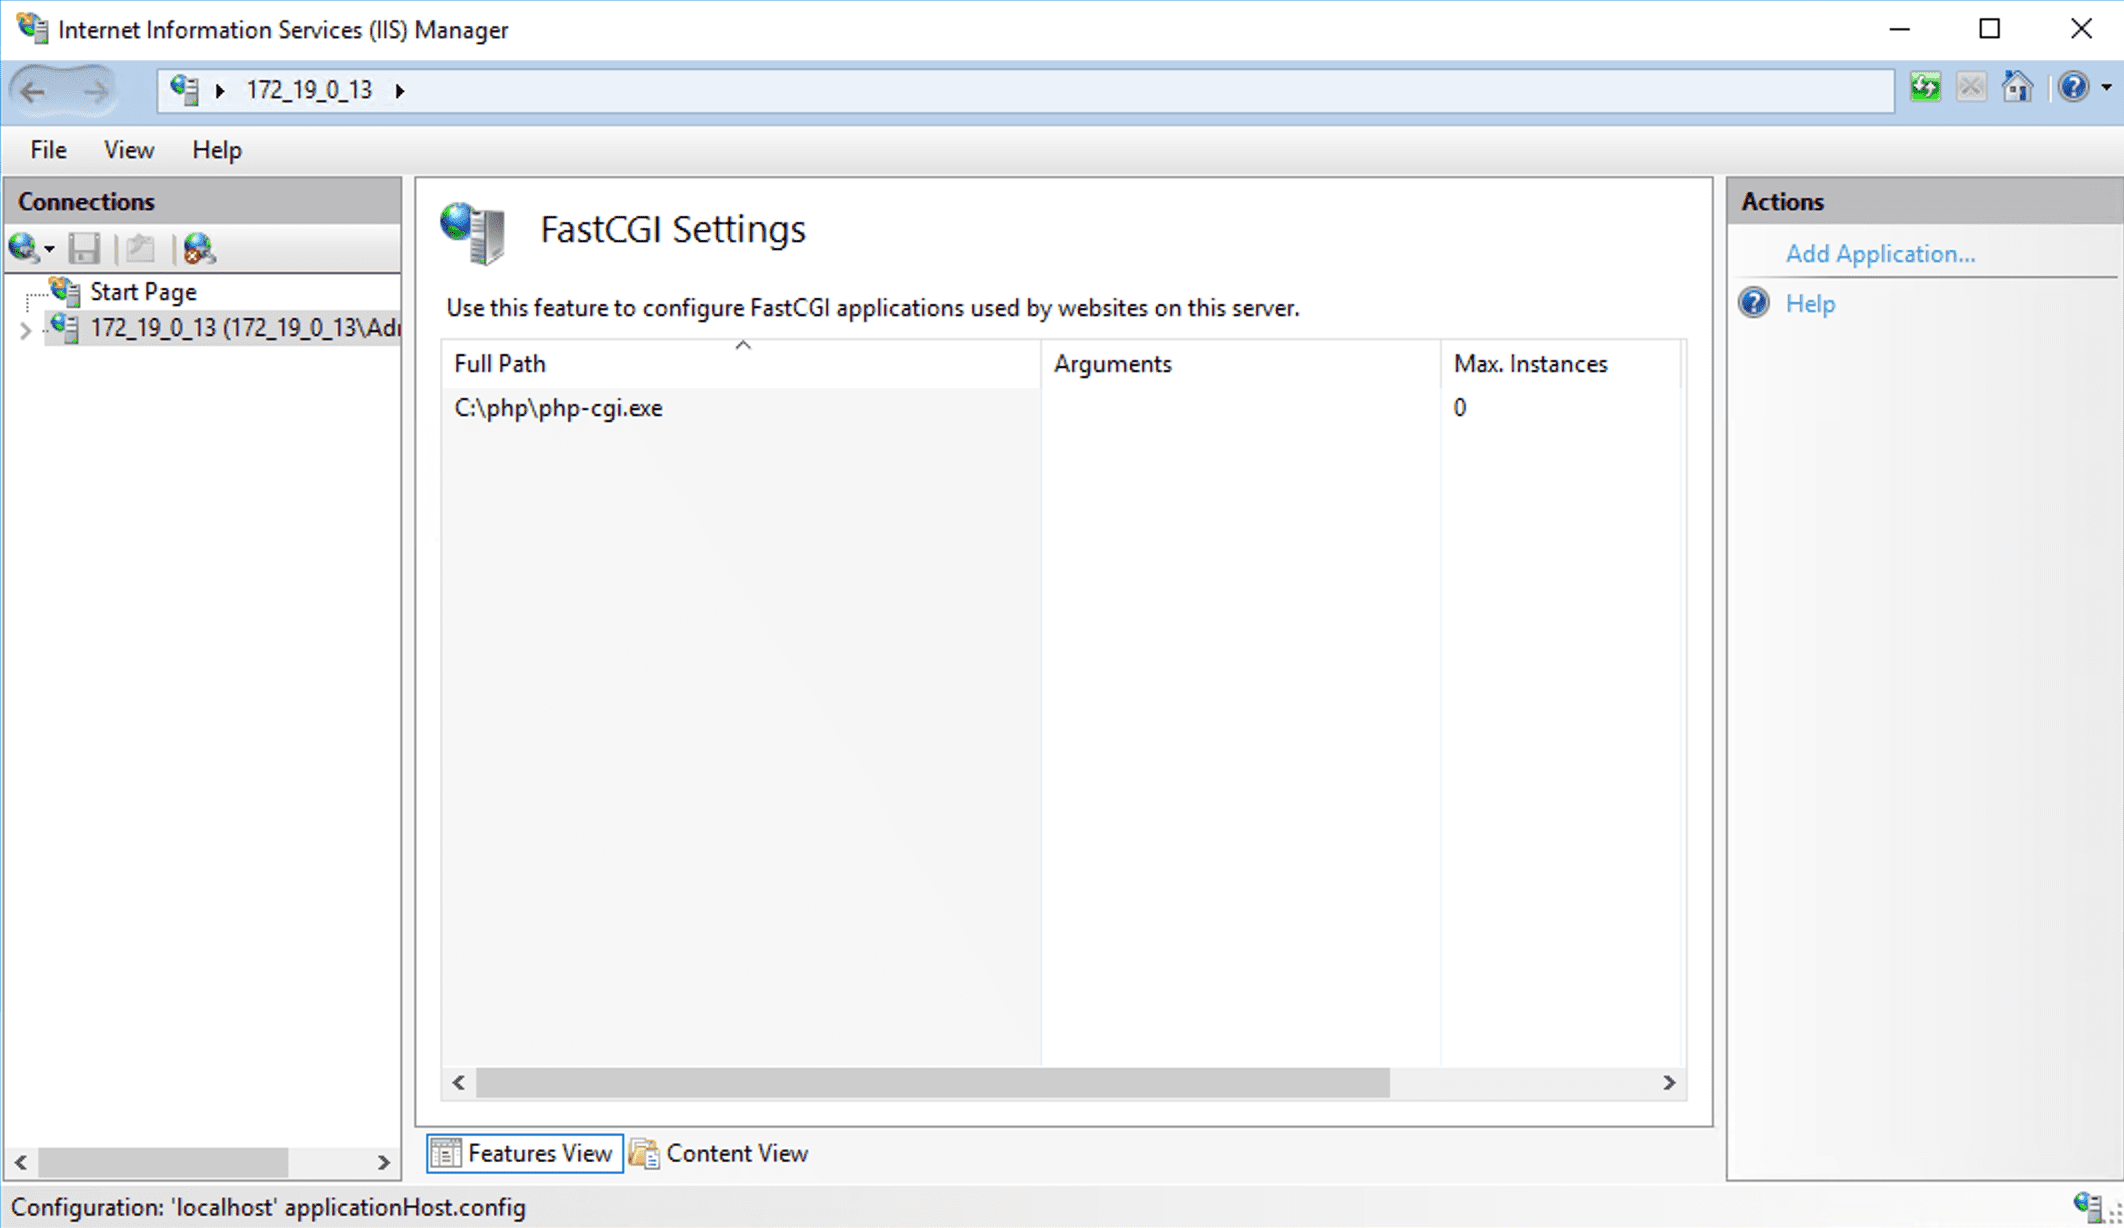
- On the FastCGI Settings management interface, select the FastCGI application and click Edit.
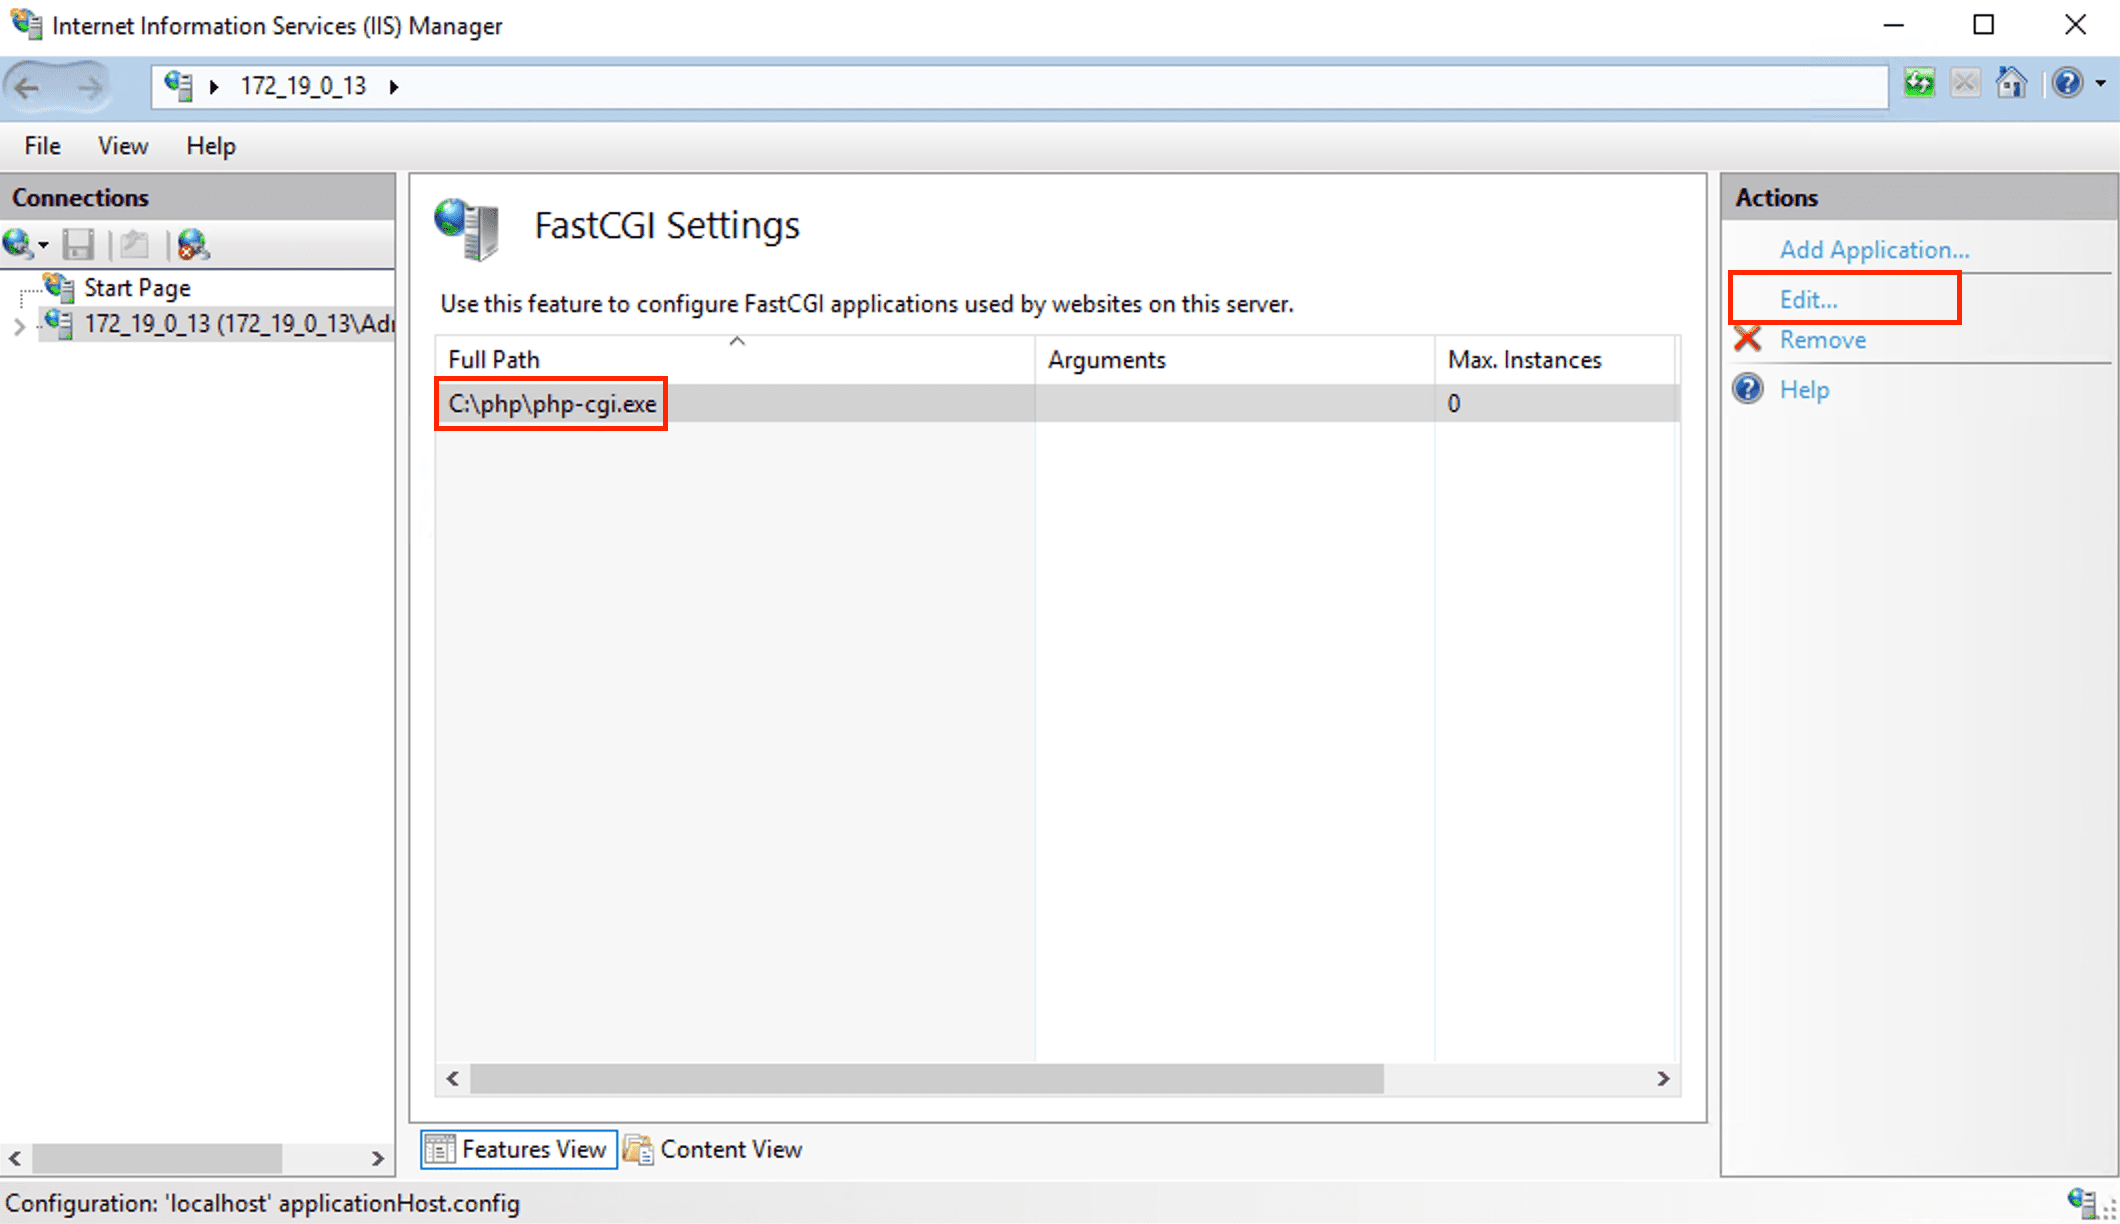
- In the opened Edit FastCGI Application window, set Monitor Changes to File to the path of the
php.inifile.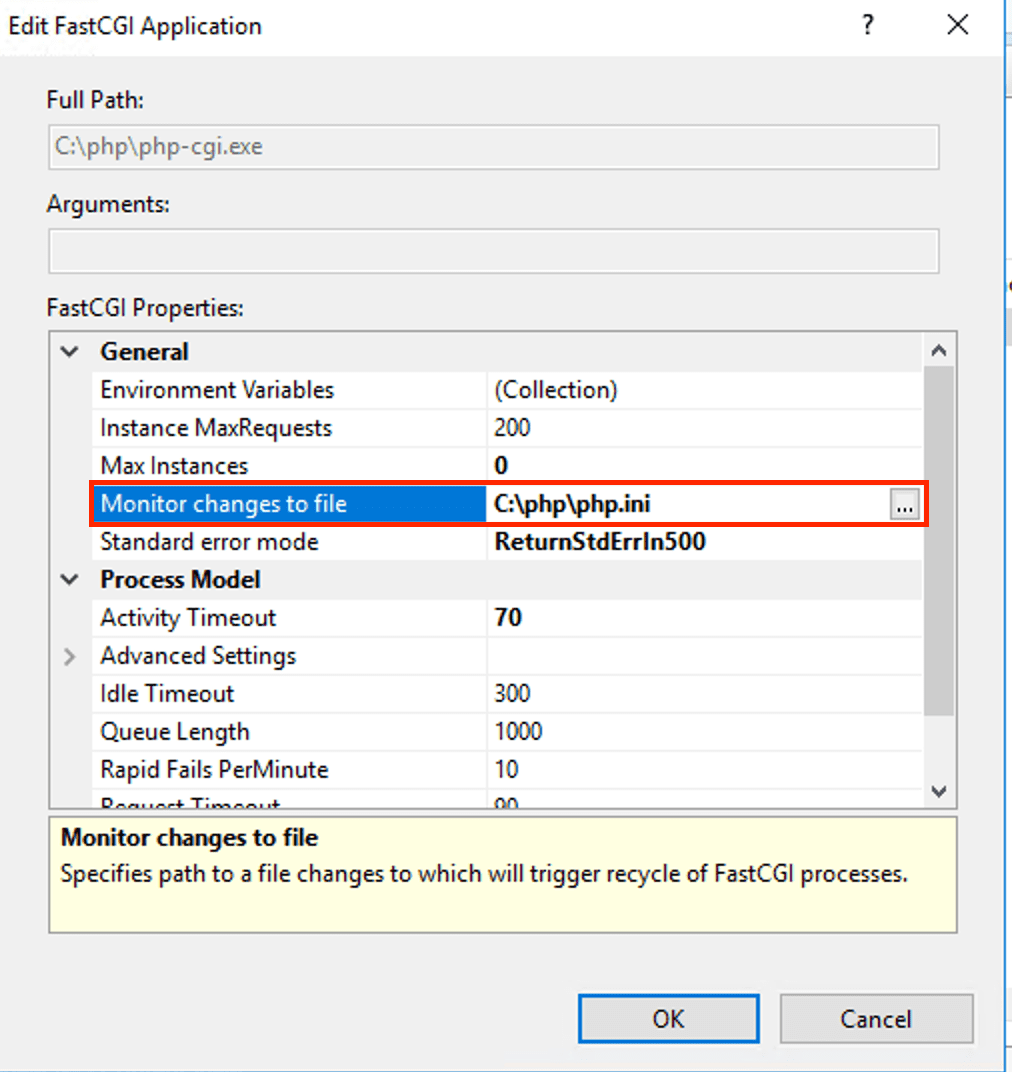
- In the
C:\inetpub\wwwrootdirectory, create a PHP file. For example, create anindex.phpfile. - In the newly created
index.phpfile, enter the following content and save.
 to open Server Manager.
<?php
phpinfo();
?>
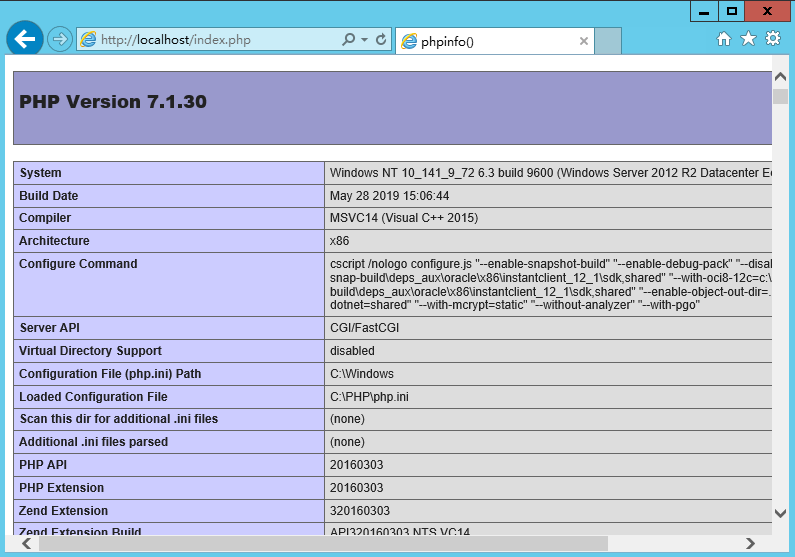
- On the operating system interface, open a browser and visit
http://localhost/index.php, to check whether the environment configuration is successful.
If the opened page is as follows, the configuration is successful: