

Scenarios
This document takes the Windows Server 2012 R2 IDC 64-bit operating system Cloud Virtual Machine as an example to introduce the specific steps for building MySQL 5.5.
Normally, Windows systems often use SQL Server databases. However, since SQL Server is a paid product, you need to authorize it yourself.
Operation Steps
Downloading MySQL Installation Package
- Log in to the Cloud Virtual Machine (CVM).
- Open a browser on the CVM and visit
https://dev.mysql.com/downloads/mysql/5.5.html#downloadsto download the MySQL installation package.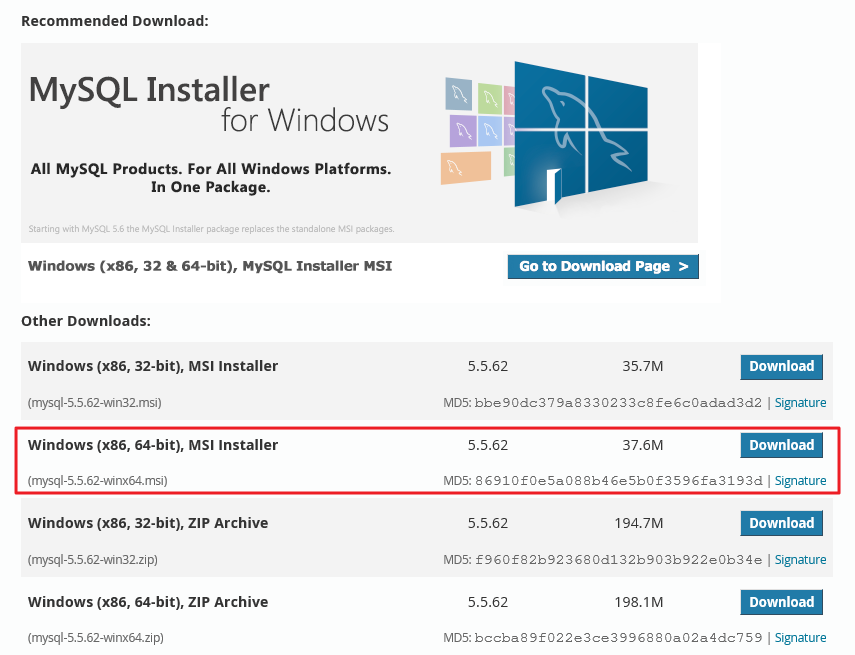
Installing MySQL
- Double click to open the MySQL installation package, and click Next on the MySQL Server 5.5 Setup installation interface.
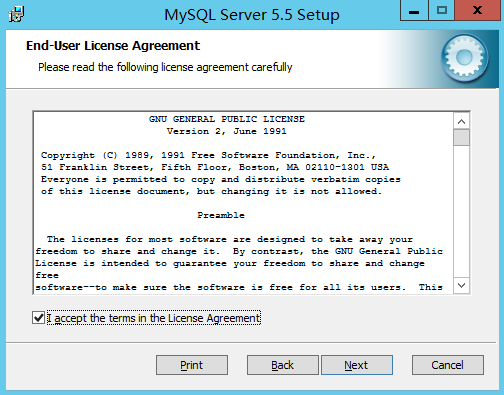
- Check I accept the terms in the License Agreement, then click Next.
- click Typical.
Typical indicates a typical installation method.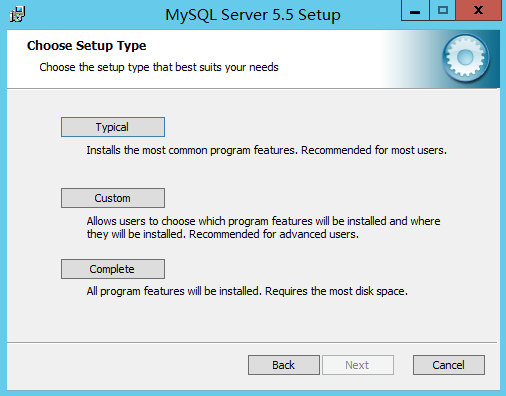
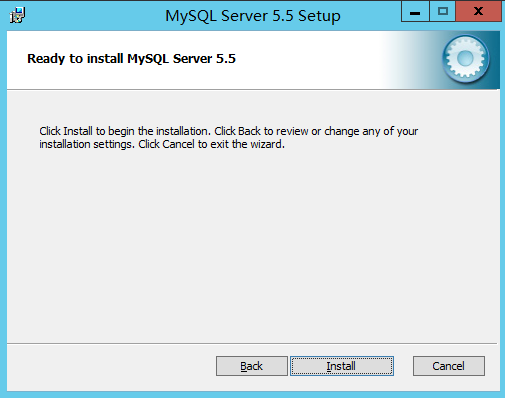
- Click Install to install MySQL.
- Select Launch the MySQL Instance Configuration Wizard and click Finish.
Close the MySQL installation window and enter the MySQL Configuration Wizard interface.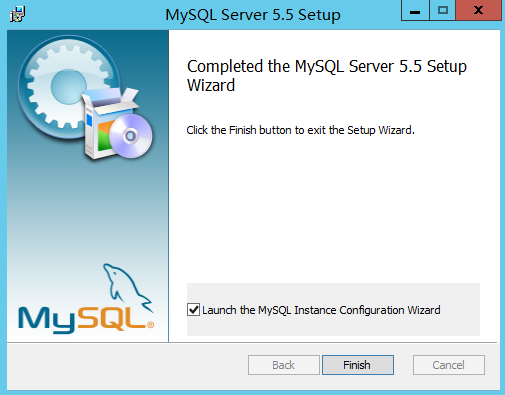
Configuring MySQL
In the MySQL Configuration Wizard interface, click Next.
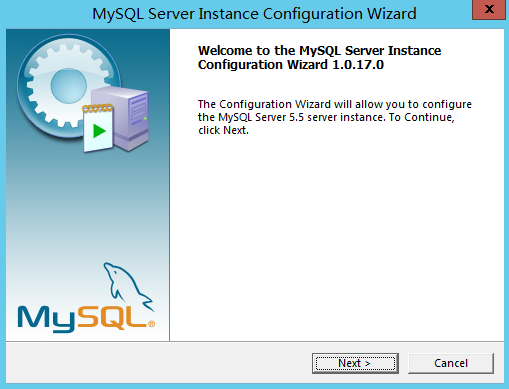
Select Detailed Configuration, then click Next.
Note: This direction takes Detailed Configuration as an example.

- Detailed Configuration is suitable for advanced users who want more fine-grained control over server configuration.
- Standard Configuration is suitable for new users who want to start MySQL quickly without worrying about server configuration. However, the standard configuration may not be compatible with the operating system, so it is recommended that you choose the detailed configuration.
- Select Developer Machine, then click Next. > Note: This direction takes Developer Machine as an example.

- Developer Machine refers to a typical personal desktop workstation. When running multiple desktop applications simultaneously, configure the MySQL server to use the least amount of resources.
- Server Machine, represents the server. The MySQL server can run alongside other applications, such as FTP, email, and web servers. The MySQL server is configured to occupy an appropriate proportion of resources.
- Dedicated MySQL Server Machine refers to a server that only runs the MySQL service. The MySQL server is configured to occupy all resources.
- Select Multifunctional Database, then click Next. > Note: This directions takes Multifunctional Database as an example.

- Multifunctional Database uses both InnoDB and MyISAM storage engines and evenly distributes resources between the two engines. It is recommended that users who frequently use two storage engines select this option.
- Transactional Database Only uses both InnoDB and MyISAM storage engines and assigns most server resources to the InnoDB storage engine. It is recommended that users who frequently use InnoDB and occasionally use MyISAM select this option.
- Non-Transactional Database Only completely disables the InnoDB storage engine and assigns all server resources to the MyISAM storage engine. It is recommended that users who do not use InnoDB select this option.
- Keep the default settings, then click Next.
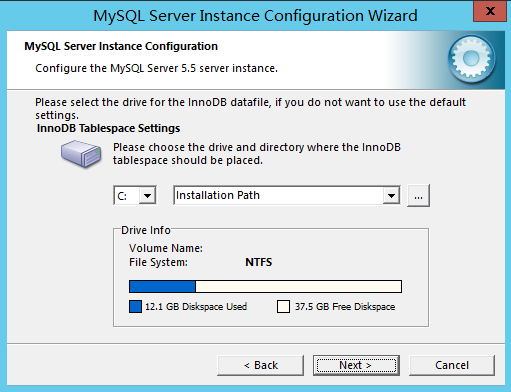
- Select Decision Support (DSS)/OLAP, then click Next. > Note: This direction takes Decision Support (DSS)/OLAP as an example.

- Decision Support (DSS)/OLAP is suitable for situations that do not require a large number of parallel connections.
- Online Transaction Processing (OLTP) is suitable for situations that require a large number of parallel connections.
- Manual Setting is suitable for manually setting the maximum number of parallel connections to the server.
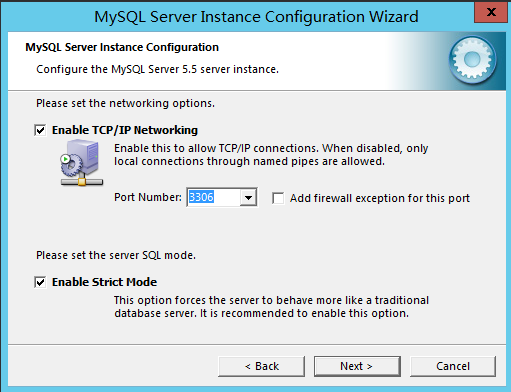
- Set up the TCP/IP network, configure the port number for connecting to the MySQL server, then click Next.
Note:- TCP/IP networking is enabled by default.
- By default, port 3306 is used.
- Select Standard Character Set, then click Next. > Note: This direction takes Standard Character Set as an example.

- Standard Character Set uses Latin1 as the server character set by default.
- Best Support For Multilingualism uses UTF8 as the server character set by default.
- Manual Selected Default Character Set/Collation, selects the desired character set from the drop-down list.
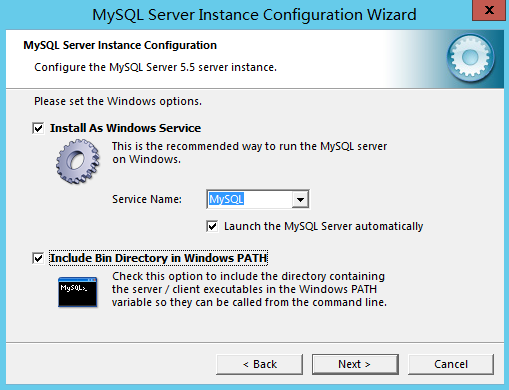
- Check Install As Windows Service and Include Bin Directory in Windows PATH, then click Next.
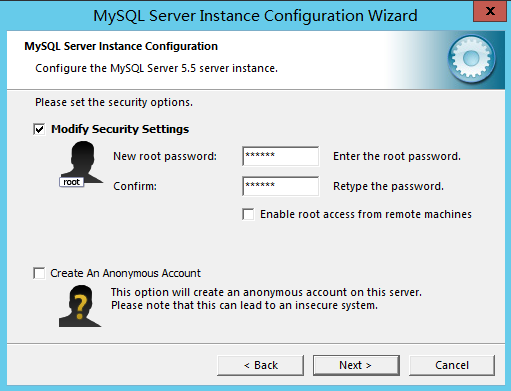
- Set the root password, then click Next.
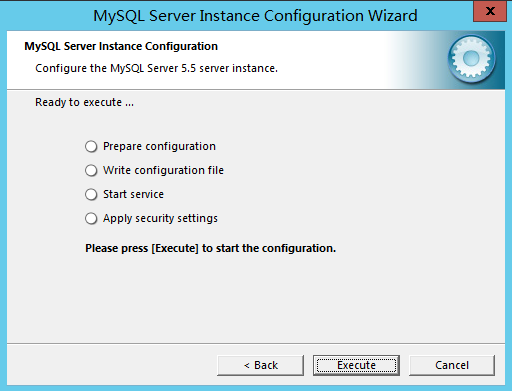
- Click Execute to configure MySQL.
- Click Finish to complete the configuration.
Verifying Whether MySQL Installed Successfully
In the operating system interface, right click
 > Run to open the Run box.
In the Run box, enter cmd, and press Enter to open the Administrator Command box.
In the Administrator Command box, execute the following command.
mysql -u root -pEnter the root password you set and press Enter to log in to MySQL.
If the following interface information is displayed, the installation and configuration are successful.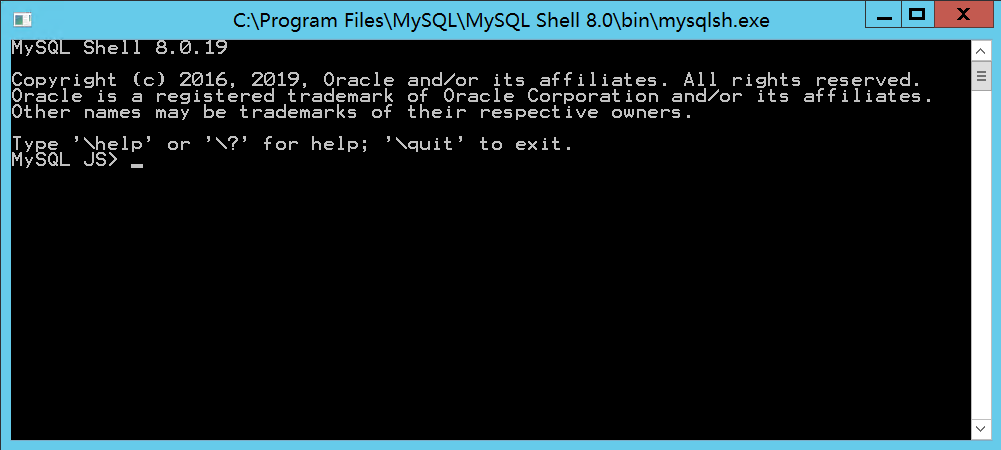
 > Run to open the Run box.