

Overview
This document guides you to directly change the subnet to which a Cloud Virtual Machine instance in a Virtual Private Cloud belongs in the console.
limitation factor
- Changing the subnet will cause the associated Cloud Virtual Machine to automatically restart.
- The secondary network interface cannot change the subnet.
Directions
- Log in to the CVM Console.
- On the CVM host list page, select the region where the instance whose subnet needs to be changed belongs.
- On the CVM host list page, find the instance whose subnet needs to be changed and click ID/Host Name of the instance to enter the Instance Details page.
- On the Instance Details page, select the ENI tab and click Primary ENI ID.
Enter the Primary Network Interface Management page.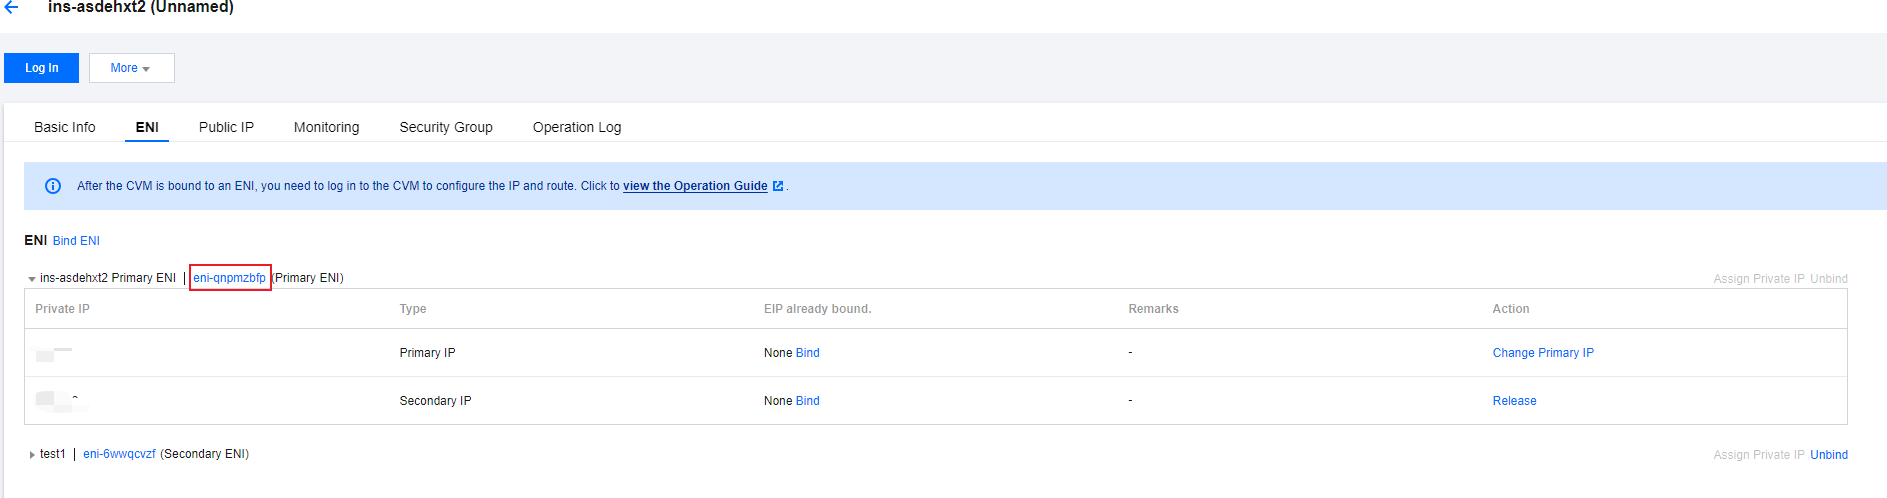
- On the Primary Network Interface Management page, click Change Subnet.
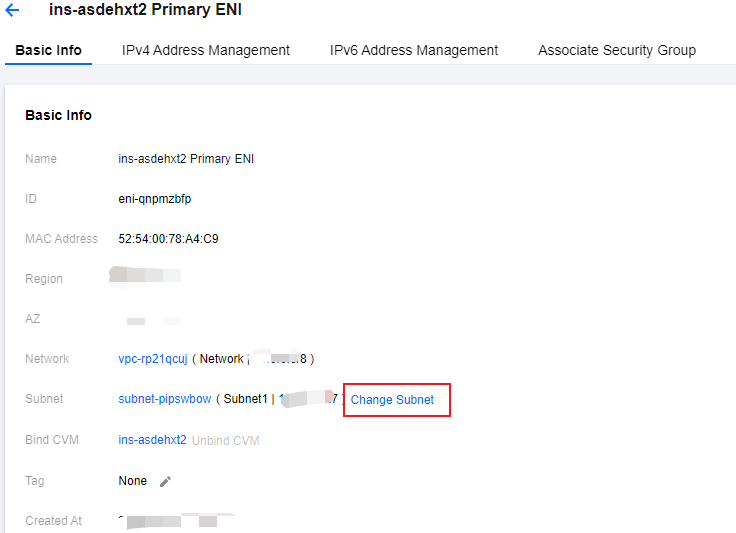
- In the pop-up Change Subnet window, select a new subnet, enter a new primary IP, and click OK.
After the instance is restarted, it takes effect.Note:- If you have not yet created a subnet in this availability zone, please create one first.
- When entering the new primary IP, you can only enter a private IP that belongs to the current subnet CIDR.