

Setting to Allow Multiple Users to Remotely Log in to Windows CVM
Last Updated At: 2025-10-21 09:10:00
Overview
This document takes the operating system CVM of Windows Server 2012 R2 as an example to guide you to make configurations to allow multiple users to remotely log in to Windows CVM.
Directions
Adding Remote Desktop Services
- Log in to the Windows CVM.
- On the operating system interface, click
 to open Server Manager. As shown below: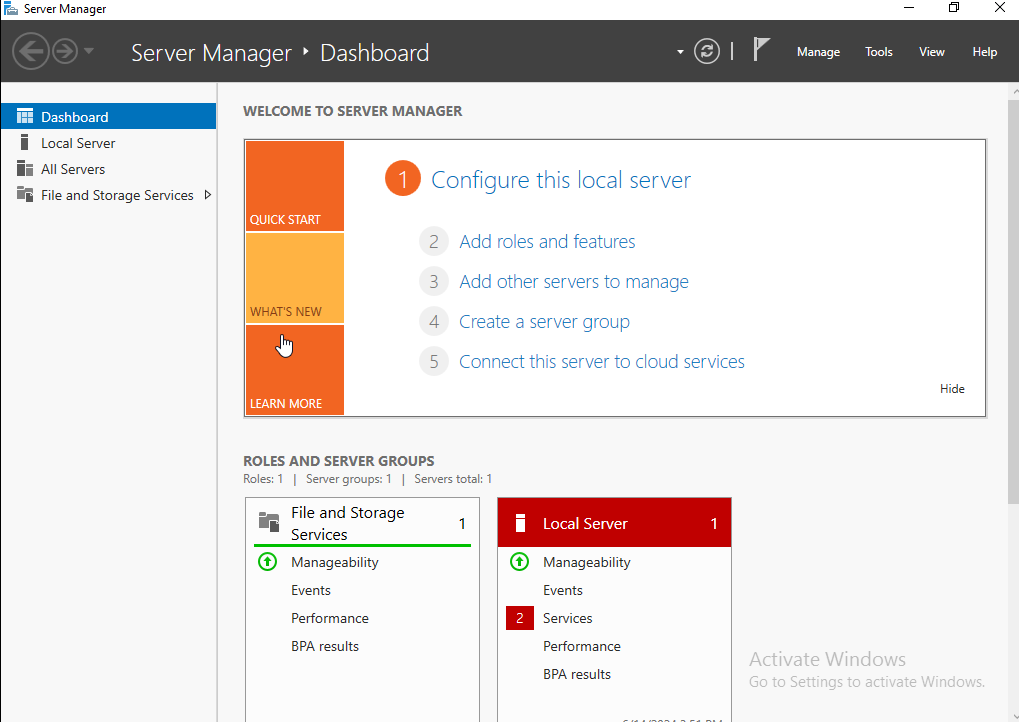
- Click Add Roles and Features to pop up the Add Roles and Features Wizard window.
- In the Wizard to Add Roles and Features window, keep the default parameters and consecutively click Next three times.
- On the Select Server Roles interface, select Remote Desktop Services and click Next. As shown below:
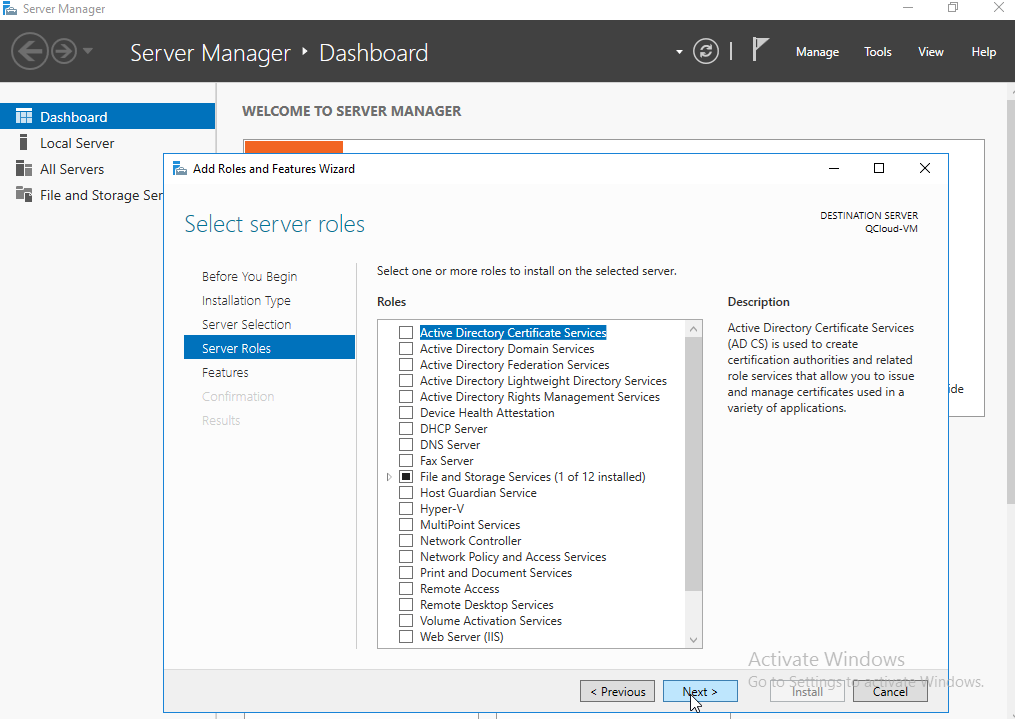
- Keep the default parameters and consecutively click Next twice.
- On the Select Role Services interface, select Remote Desktop Session Host. As shown below:
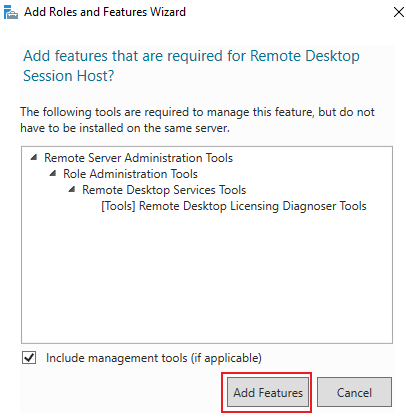
The Add Features Required for Remote Desktop Session Host dialog box pops up.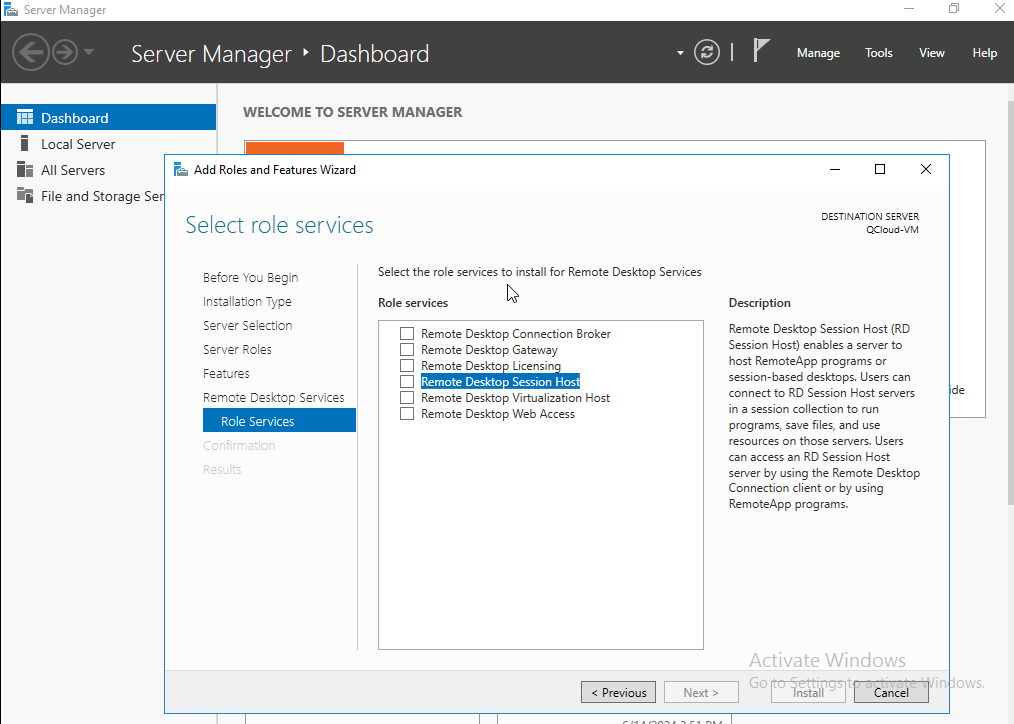
- In the Add Features Required for Remote Desktop Session Host dialog box, click Add Features. As shown below:
- On the Select Role Services interface, select Remote Desktop Licensing. As shown below:
The Add Features Required for Remote Desktop Session Host dialog box pops up.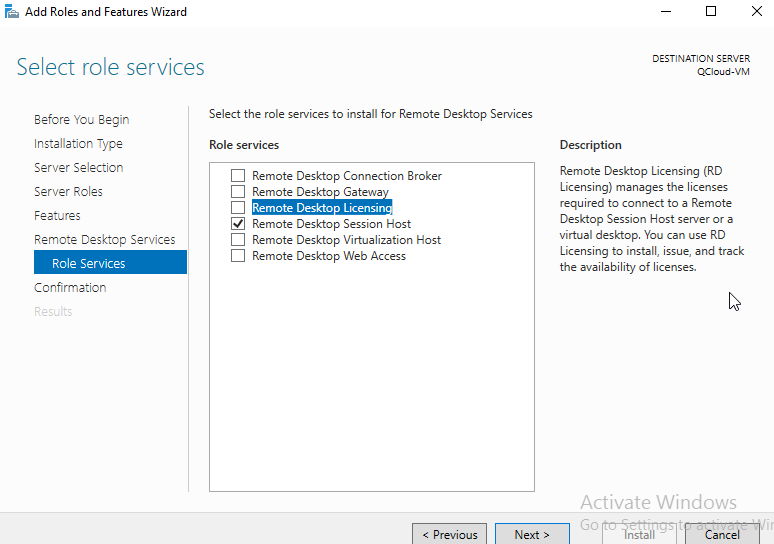
- In the Add Features Required for Remote Desktop Licensing dialog box, click Add Features.
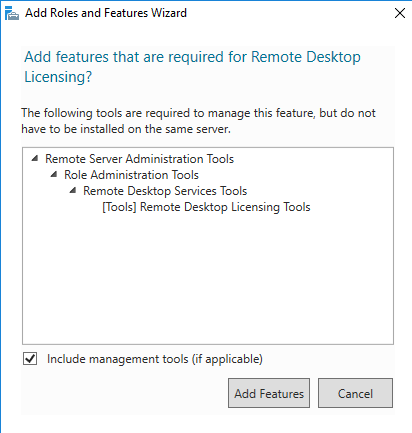
- Click next.
- Check Automatically Restart the Target Server if Necessary and click Yes in the pop-up dialog box. As shown below:
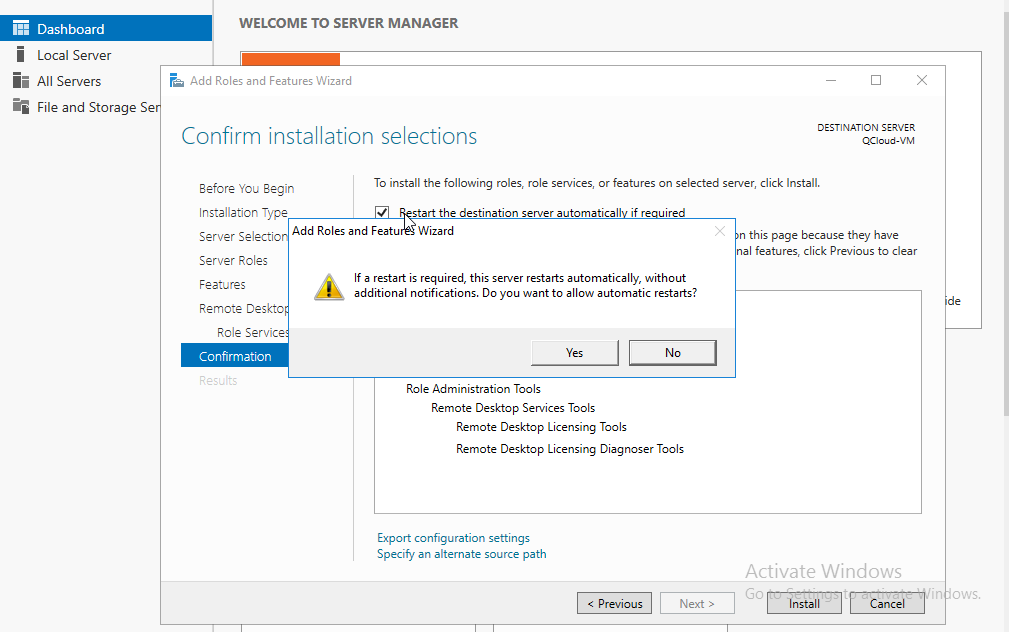
- Click Install and wait for the installation of Remote Desktop Services to complete.
 to open Server Manager. As shown below:
Configuring a Multi-user Remote Login Instance
- Use VNC to log in to Windows CVM.
- On the operating system interface, click
 to open a Windows PowerShell window.
 - In the Windows PowerShell window, enter gpedit.msc and then press Enter to open the Local Group Policy Editor.
- In the left navigation tree, select Computer Configuration > Administrative Templates > Windows Components > Remote Desktop Services > Remote Desktop Session Host > Connections, and double-click to open Limit the number of connections.
- In the popped-up Limit the number of connections window, select Enabled, and fill in the maximum number of concurrent remote users in Maximum allowed RD connections.
- Click OK.
- In the left navigation tree, select Computer Configuration > Administrative Templates > Windows Components > Remote Desktop Services > Remote Desktop Session Host > Connections, and double-click to open Restrict Remote Desktop Services users to a single Remote Desktop Services session.
- In the popped-up Restrict Remote Desktop Services users to a single Remote Desktop Services session]window, select Disabled, click OK.
- Disable the Local Group Policy Editor.
- Restart instance.
 to open a Windows PowerShell window.