

Problem Description
When a local computer running Windows operating system logs in to a Windows CVM through a remote desktop connection using the RDP protocol (such as MSTSC), the following error message appears:
Your credentials did not work. The credentials that were used to connect to XXX.XXX.XXX.XXX did not work. Please enter new credentials.
Processing Procedures
Note: This document uses Windows Server 2012 as an example. The detailed steps may vary slightly depending on the version of the operating system.
Follow the steps below to troubleshoot, and reconnect to the Windows CVM after each step to verify whether the problem is solved. If not, proceed to the next step.
Step 1: Modify the Network Access Policy
- Logging in to a Windows instance using VNC。
- On the operating system interface, click
 and open the Windows PowerShell window.
 - In the Windows PowerShell window, enter gpedit.msc, and press Enter to open the Local Group Policy Editor.
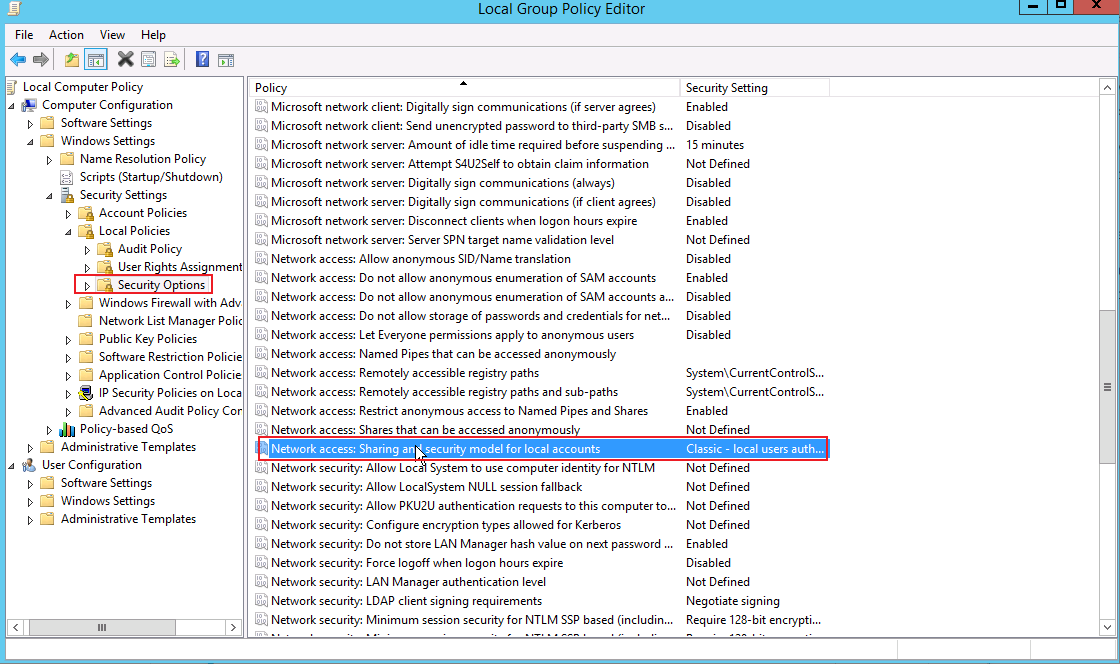
- In the left sidebar, expand Computer Configuration > Windows Settings > Security Settings > Local Policies > Security Options.
- Find and open Network access: Sharing and security model for local accounts in Security Options. As shown below:
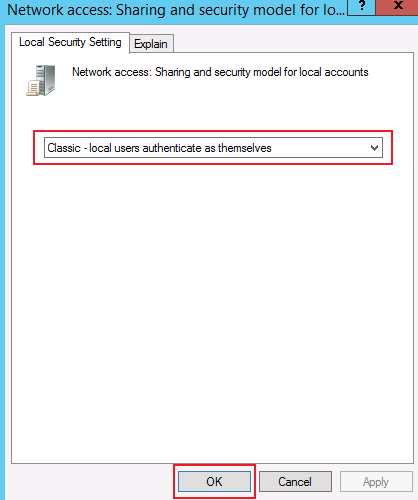
- Select Classic - Authenticate local users without changing their original identities and click OK. As shown below:
- Reconnect to the Windows CVM and verify that the connection is successful.
- Yes, the mission completed.
- No, proceed to Step 2: Modify Credentials Delegation.
 and open the Windows PowerShell window.
Step 2: Modify Credentials Delegation
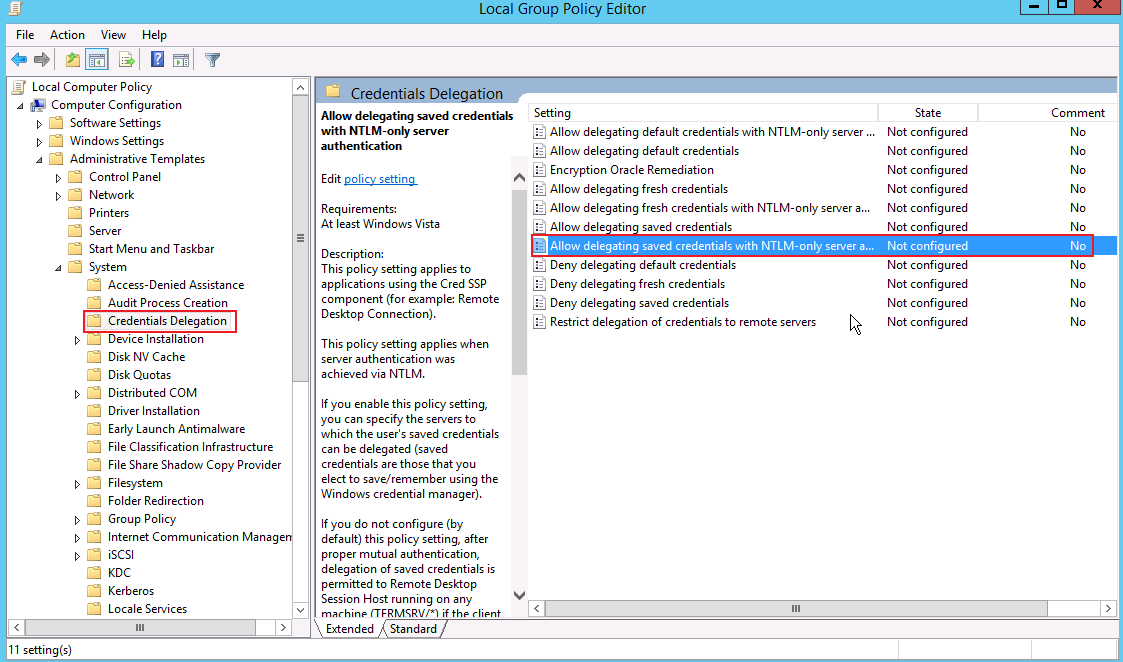
- In the left sidebar of the Local Group Policy Editor, expand Computer Configuration > Administrative Templates > System > Credentials Delegation.
- Find and turn on Allow distribution of saved credentials for NTLM server authentication in Credentials Delegation, as shown below:
- In the window that opens, select Enabled and enter
TERMSRV/*in Display in Options, and click OK. As shown below: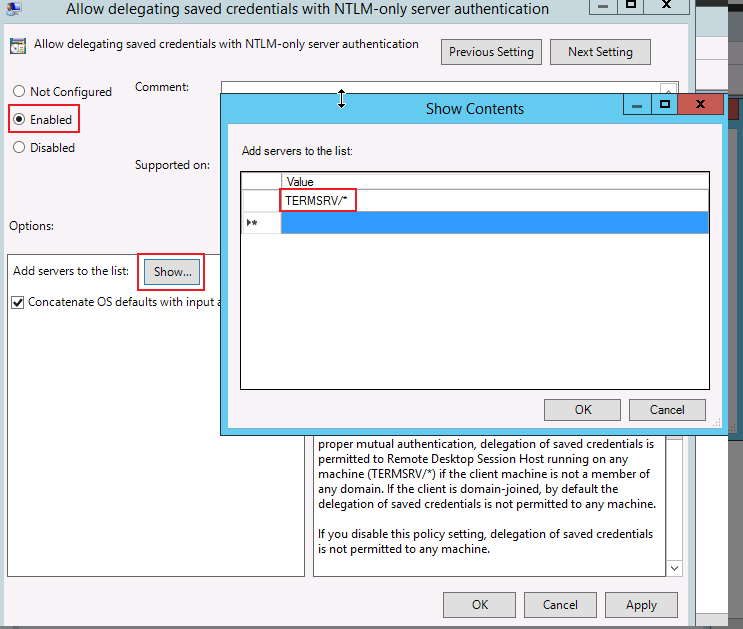
- Click OK.
- On the operating system interface, click and open the Windows PowerShell window.
- In the Windows PowerShell window, enter gpupdate /force, and press Enter to update the group policy. As shown below:
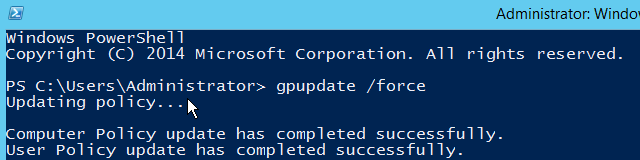
- Reconnect to the Windows CVM and verify that the connection is successful.
- Yes, the mission completed.
- No, proceed to Step 3: Set credentials for the localhost.
Step 3: Configure Local Credentials
- On the operating system interface, click
 > Control Panel > User Accounts, select Manage Windows Credentials under Credential Manager to enter the Windows Credentials interface, as shown below: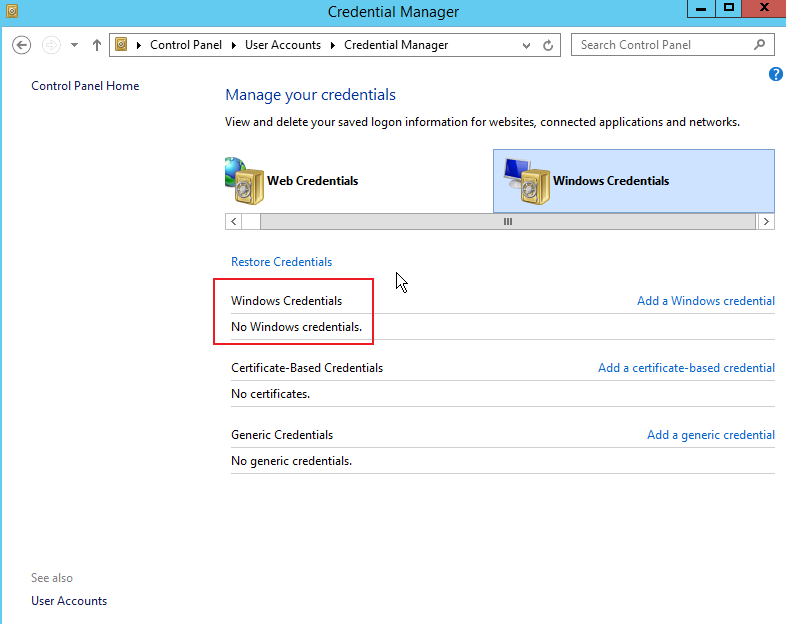
- Check whether there is a currently logged-in CVM credential under Windows credentials.
- If not, proceed to the next step to add Windows credentials.
- If yes, proceed to step 4: Disable password-protected sharing of the CVM.
- Click Add Windows Credentials to enter the Add Windows Credentials interface, as shown below:
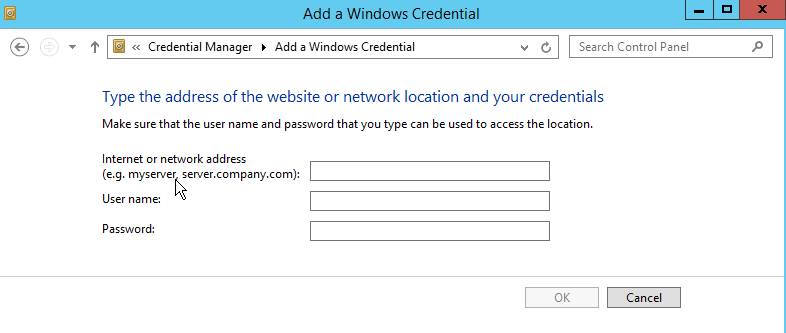
- Enter the IP address of the CVM you are currently logged in to, as well as your user name and password, and click OK.
- Reconnect to the Windows CVM and verify that the connection is successful.
- Yes, the mission completed.
- If no, proceed to Step 4: Disable password-protected sharing of the CVM.
 > Control Panel > User Accounts, select Manage Windows Credentials under Credential Manager to enter the Windows Credentials interface, as shown below:
Step 4: Turn off password protected sharing
- On the operating system interface, click > Control Panel > Network and Internet > Network and Sharing Center > Change advanced sharing settings to enter the advanced sharing settings interface. As shown below:
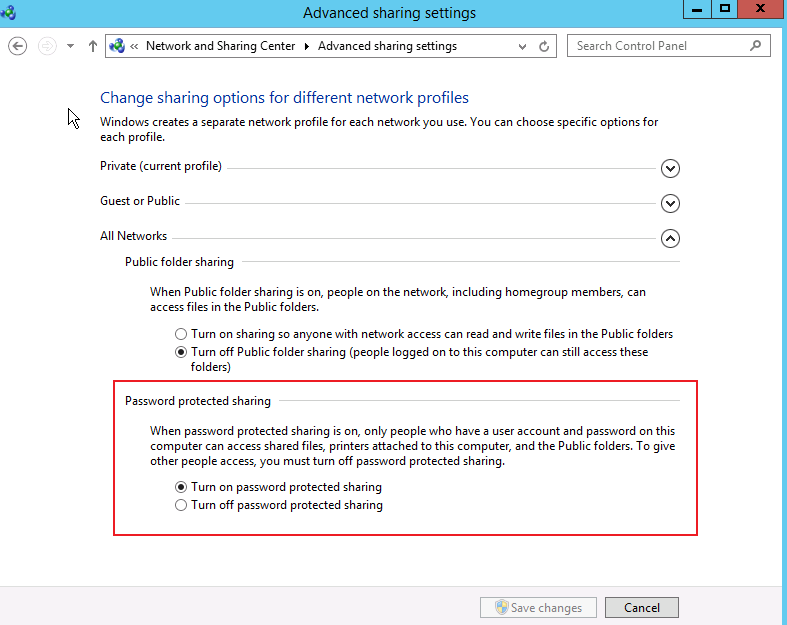
- Expand the All Networks tab, select Turn off password protected sharing under Password protected sharing, and click Save changes.
- Reconnect to the Windows CVM and verify that the connection is successful.
- Yes, the mission completed.
- No, please report to the maintenance engineer.
