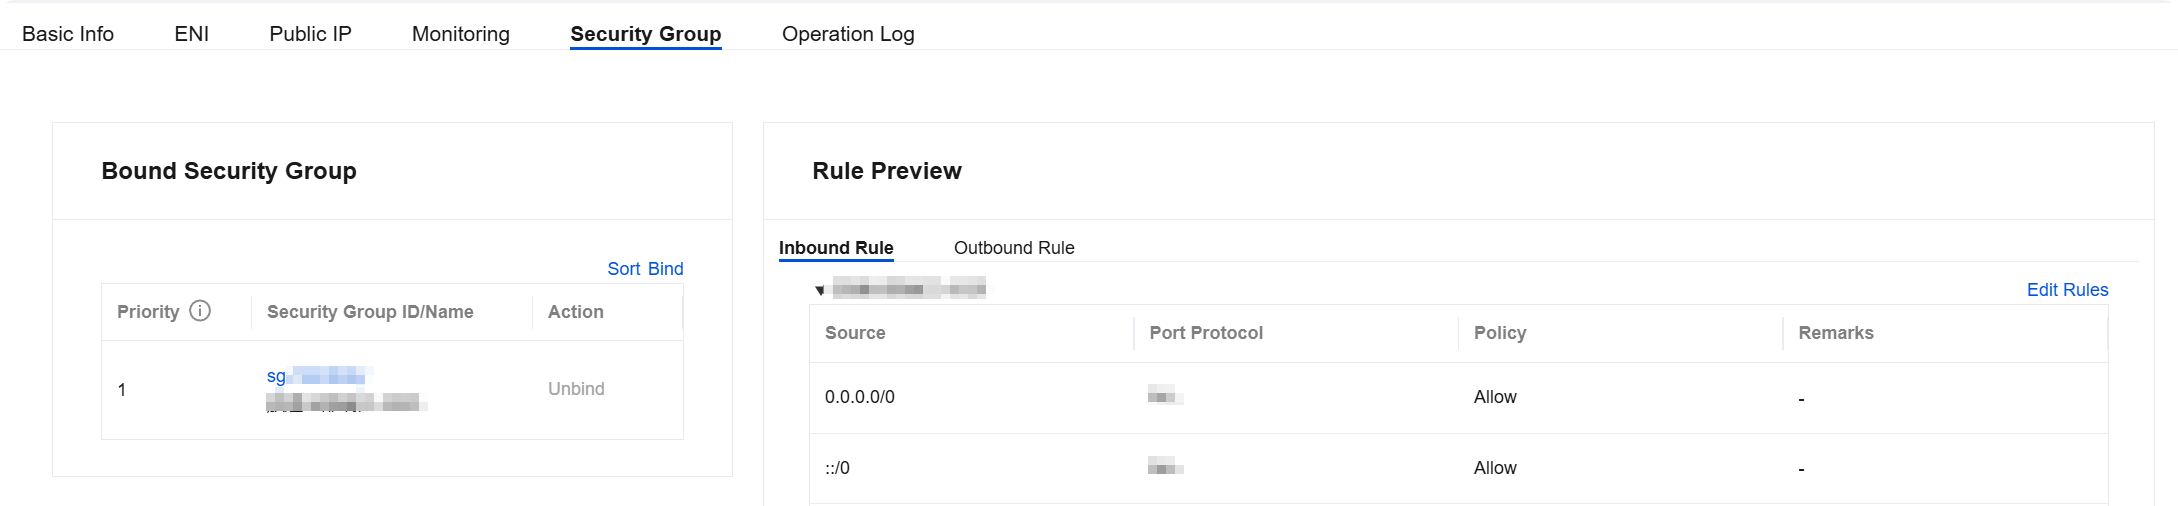
After creating a CLB instance, you can configure the CLB security group to isolate public network traffic. This document describes how to configure CLB security groups in different modes.
Use Limits
- Each CLB can bind up to five security groups. To enhance the quota, contact the cloud platform's technical support personnel for assistance.
- A single CLB security group, when fully expanded, can contain up to 512 entries including outbound rules, inbound rules, and backend parameter templates (ipm/ipmg/ppm/ppmg).
- After a private network CLB binds an EIP address, the security group on the new CLB takes effect for traffic from the EIP address and private network CLB. Security groups on existing CLB instances take effect for traffic from private network CLB, but not for traffic from the EIP address.
- The feature of allowing traffic by default in the security group takes effect only for backend servers of the ENI or CVM type within this VPC. When binding PaaS services (such as CDB) as backend servers, the feature is not supported.
Background Information
A security group is a virtual firewall that filters stateful data packets and controls the inbound and outbound traffic at the instance level. For details, see Security Group Overview.
CLB security groups are bound to CLB instances, while CVM security groups are bound to CVM instances. The two restrict different objects. The CLB security group is configured primarily in the following two modes:
- Enabling the feature of allowing traffic by default in the security group
- Disabling the feature of allowing traffic by default in the security group
Note:
- In IPv4 CLB, the feature of allowing traffic by default in the security group is disabled by default. You can enable or disable it in the console.
Enabling the Feature of Allowing Traffic by Default in the Security Group

After the feature of allowing traffic by default in the security group is enabled:
- The access traffic from CLB only needs to pass through the CLB security group, as the backend server allows traffic from CLB by default and does not need to open the port.
- Traffic from public IP addresses (including general public IP addresses and EIP addresses) still needs to pass through the CVM security group.
- If a CLB instance is not configured with a security group, all traffic is allowed, and only ports configured with listeners on the VIP of the CLB instance can be accessed. Therefore, the listening ports will allow traffic from all IP addresses.
- To deny traffic from a specified client IP address, you should deny its access in the CLB security group; denying access from an IP address in the CVM security group takes effect only for traffic from public IP addresses (including general public IP addresses and EIP addresses), but not for traffic from CLB.
Disabling the Feature of Allowing Traffic by Default in the Security Group

After the feature of allowing traffic by default in the security group is disabled:
- Business traffic passing through CLB will be double-checked by both the CLB security group and the CVM security group.
- Traffic from public IP addresses (including general public IP addresses and EIP addresses) still needs to pass through the CVM security group.
- If a CLB instance is not configured with a security group, only traffic passing through the CVM security group is allowed.
- To deny traffic from a specific client IP address, you can deny its access in either the CLB security group or the CVM security group.
When the feature of allowing traffic by default in the security group is disabled, the CVM security group should be configured as follows to ensure the health check feature:
- Configure the public network CLB.
You need to allow the CLB VIP in the backend CVM security group, so that CLB can use the VIP to detect the health status of the backend CVM. - Configure the private network CLB.
- For private network CLB, you need to allow the CLB VIP in the security group of the backend CVM (for health checks).
Operation Steps
In the following example about the configuration of the public network CLB security group, business traffic is only allowed to enter from CLB port 80, with services provided by CVM port 8080. Client IP addresses are not limited and access from any IP address is supported.
Note:
For the public network CLB used in this example, the CLB VIP needs to be allowed in the backend CVM security group for health checks. The current IP address
0.0.0.0/0can be any IP address and already contains the CLB VIP.
Step 1: Creating a CLB Instance and Listener and Binding a CVM Instance
For details, see Getting Started with CLB. An HTTP:80 listener is created and bound to a backend CVM instance whose service port is port 8080 in this example.
Step 2: Configuring a CLB Security Group
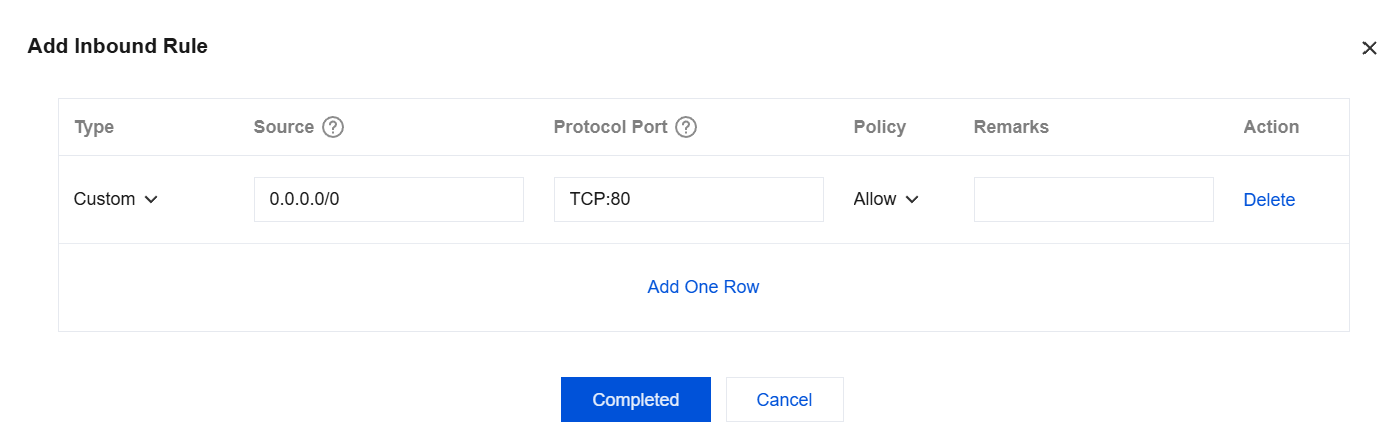
Configure a CLB security group rule.
In the security group console, configure a security group rule. In the inbound rule, allow port 80 of all IP addresses (namely0.0.0.0/0) and deny traffic from other ports.Note:
- Security group rules are screened to take effect from top to bottom. If the new rule is effective, other rules will be denied by default. Therefore, pay attention to their order. For details, see Description of Security Group Rules.
- A security group has inbound and outbound rules. The above configuration is intended to restrict inbound traffic and is therefore an inbound rule, while the outbound rule does not need to be specially configured.
Bind the security group to a CLB instance.
- Log in to the CLB console.
- On the LB Instance List page, click the ID of the target CLB instance.
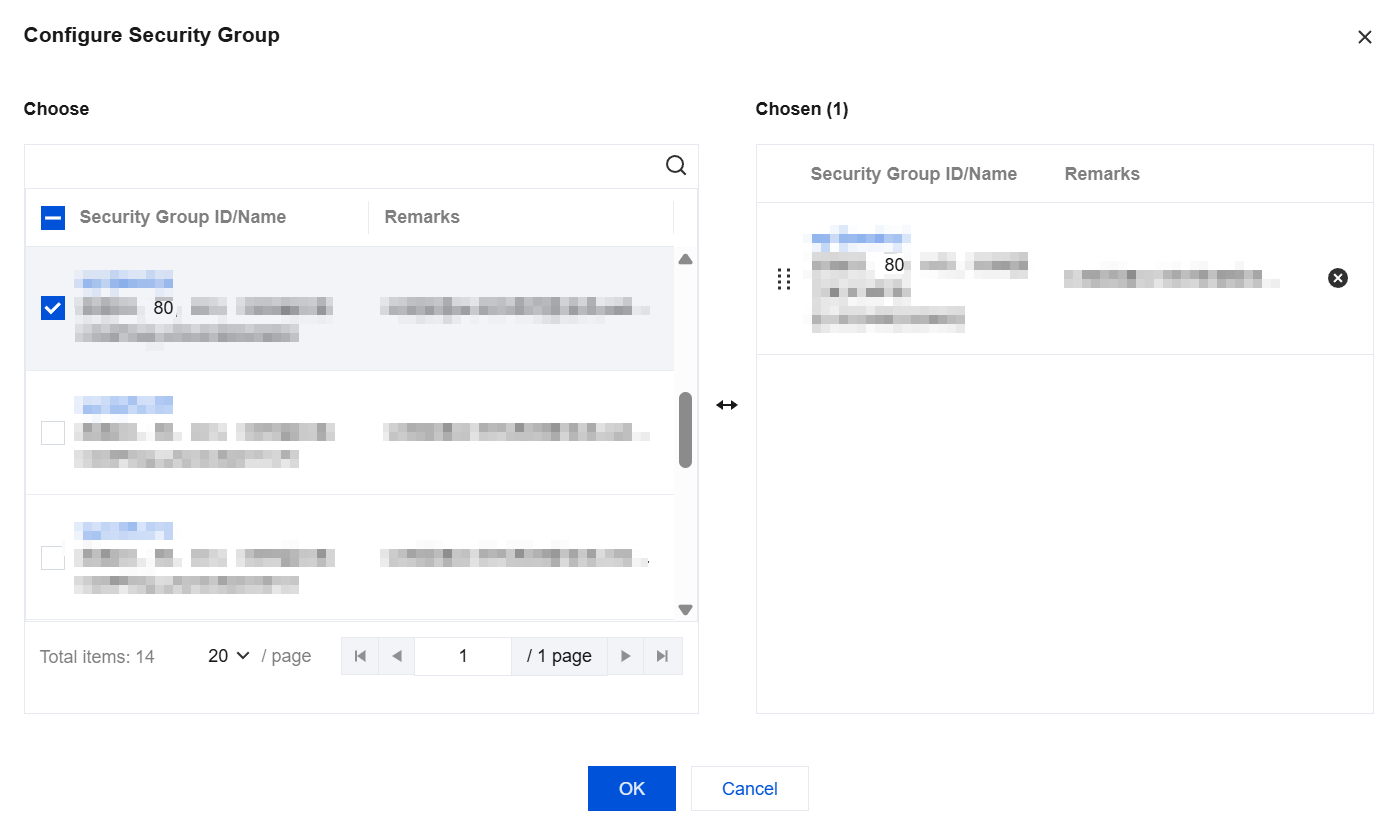
- On the Instance Details page, click the Security Group tab, and then click Bind in the Bound Security Groups module.
- In the pop-up Configure Security Group window, select the security group bound to the CLB instance, and click OK.
The CLB security group configuration is completed, which only allows access to CLB from port 80.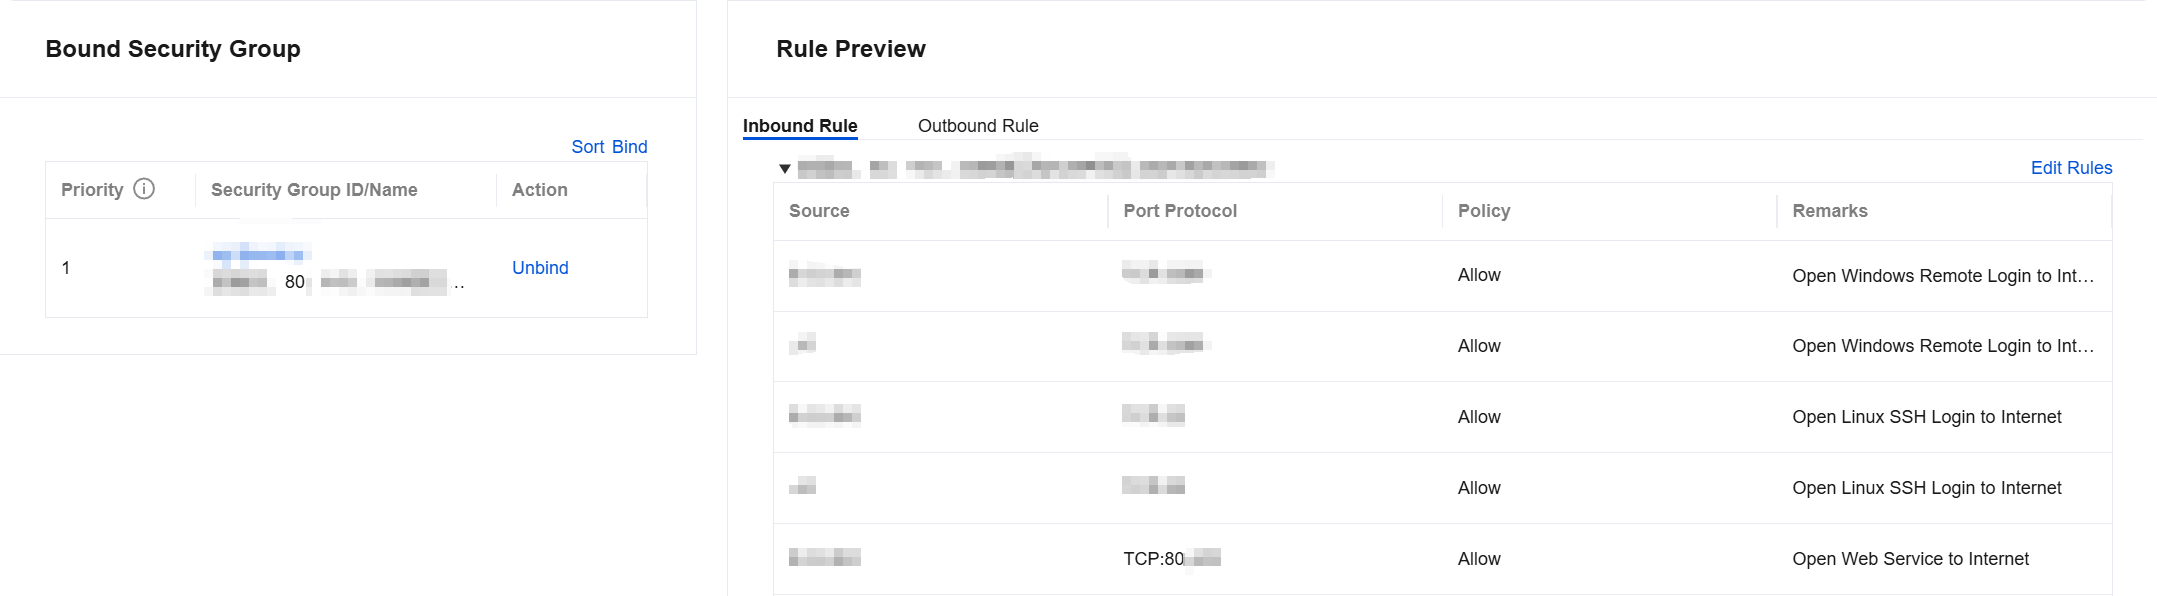
Step 3: Configuring the Feature of Allowing Traffic by Default in the Security Group
You can enable or disable the feature of allowing traffic by default in the security group with different configurations as follows:
- Method 1: Enable the feature of allowing traffic by default in the security group, so that the backend server does not need to open the port.
- Method 2: Disable the feature of allowing traffic by default in the security group, and allow the client IP address (
0.0.0.0/0in this example) in the CVM security group.
Method 1: Enabling the Feature of Allowing Traffic by Default in the Security Group
- Log in to the CLB console.
- On the LB Instance List page, click the ID of the target CLB instance.
- On the Instance Details page, click the Security Group tab.
- On the Security Group page, click
 to enable Enable Allow Traffic by Default.
 - After the feature is enabled, only the security group rules in the following rule preview will be verified for traffic from CLB instance, and the CVM security group will allow traffic from the CLB instance by default.
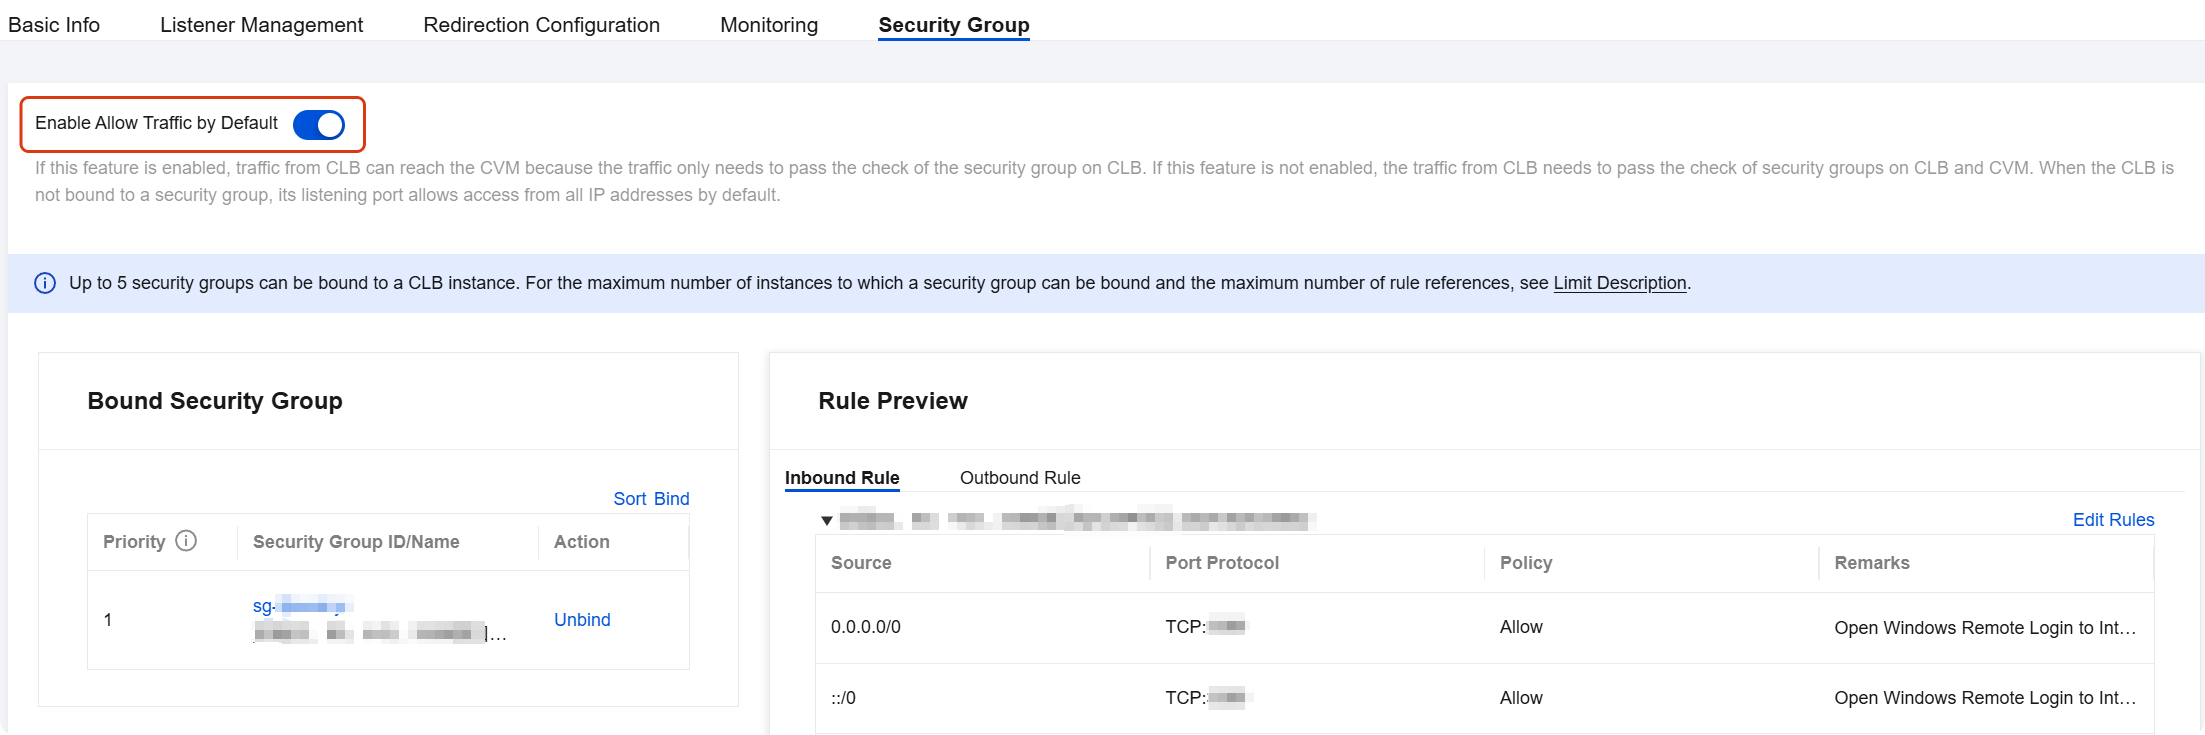
 to enable Enable Allow Traffic by Default.
Method 2: Disabling the Feature of Allowing Traffic by Default in the Security Group
If Allow by Default is disabled, you need to allow the client IP address in the CVM security group. Business traffic is allowed to access CVM only from CLB port 80 and use services provided by CVM port 8080.
Note:
Traffic from a specified client IP address can be allowed, but that should be done in both the CLB security group and the CVM security group. If the CLB instance is not configured with a security group, that only needs to be done in the CVM security group.
- Configure a CVM security group rule.
A CVM security group can be configured to only allow access from service ports for traffic accessing the backend CVM.
In the security group console, configure a security group policy. In the inbound rule, allow port 8080 of all IP addresses. To ensure remote host login and ping services, allow port 22, port 3389, and ICMP services in the security group. - Bind the security group to a CVM instance.
- In the CVM console, click the ID of the CVM instance bound to the CLB instance to go to the Details page.
- Select the Security Group tab and click Bind in the Bound Security Groups module.
- In the pop-up Configure Security Group window, select the security group to be bound to the CVM instance and click OK.