

You only need to complete the following two steps to access the internet through a NAT Gateway.
Step 1: Create a NAT Gateway
- Log in to the cloud console, select Cloud Products > Cloud Computing & Networking > Virtual Private Cloud to enter the VPC console, and click NAT Gateway on the left.
- Click Create in the upper left corner.

3. In the pop-up New dialog box, gateway parameters involved are:
Parameter description:
- Gateway Name: Customize the gateway name.
- Gateway Type: The gateway type supports small, medium, and large. Please set it according to the actual situation.
- AZ: Select the availability zone to which the NAT Gateway belongs.
- Network: Select the VPC to which the NAT gateway belongs.
- Max. Bandwidth: Select according to your needs.
- EIP: Bind an EIP to the NAT Gateway. You can select an existing EIP or purchase and bind a new one.
- Carrier: Select an ISP based on your actual situation.
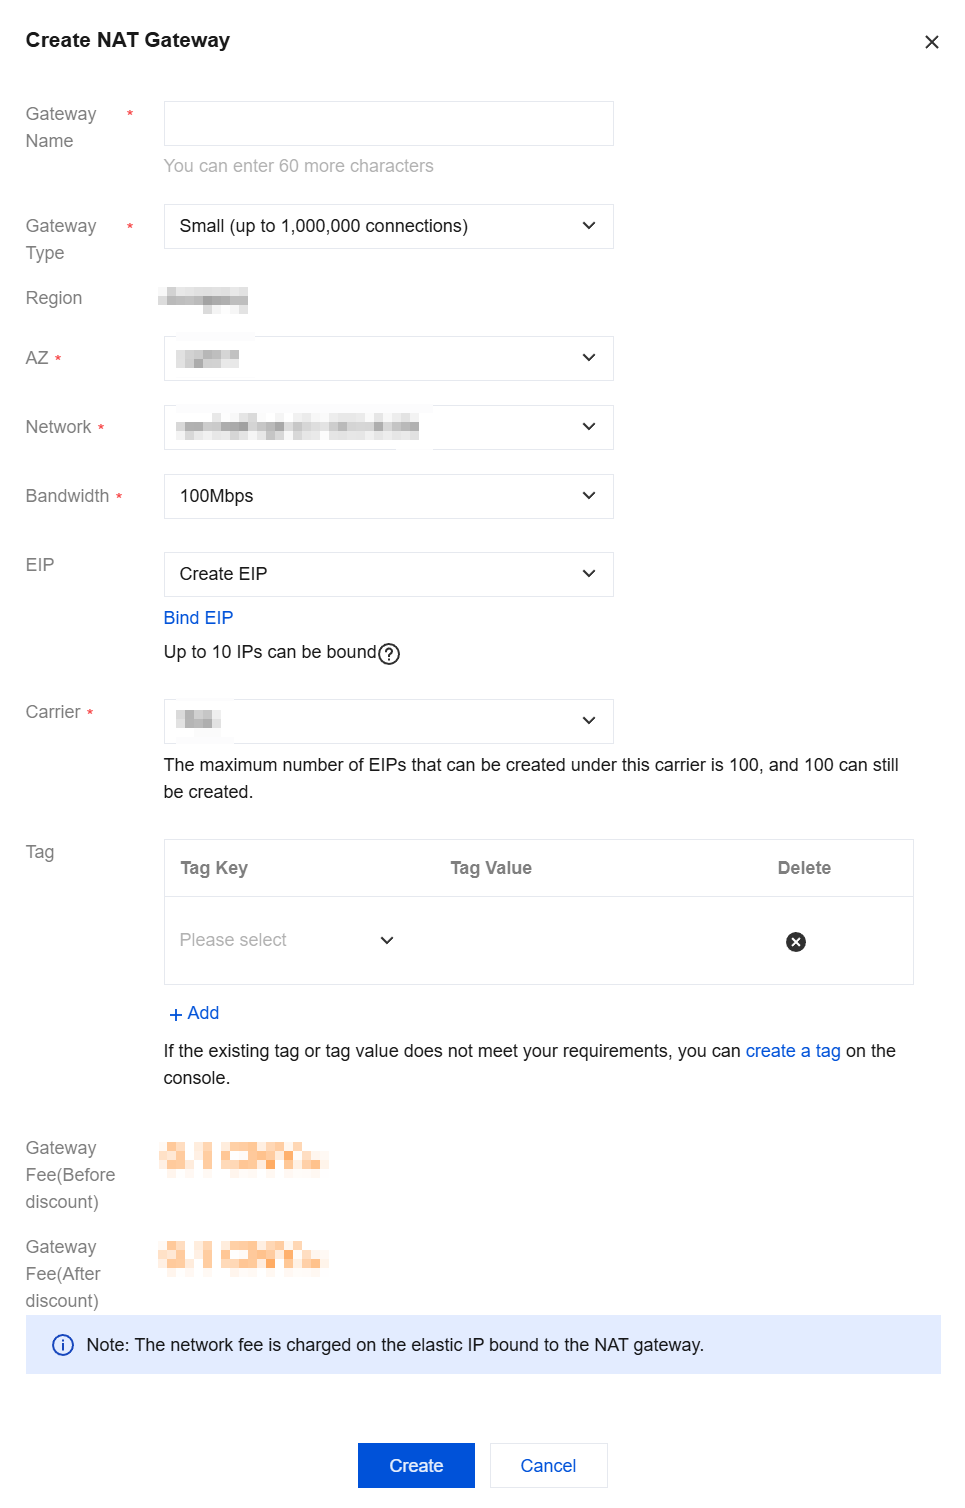
- After the parameter settings are completed, click Create to create the NAT Gateway.
Step 2: Configure the route table associated with the subnet
After you create a NAT Gateway, you need to configure routing rules to direct subnet traffic to the NAT Gateway.
- In the sidebar on the left side of the VPC console, click Route Table.
- In the route table list, click the route table ID associated with the subnet that needs to access the internet to enter the route table details page, then click Add Routing Policy in the routing policy.

3.Enter the destination (the public IP address segment to be accessed) in the pop-up box, select NAT Gateway for the next hop type, and select the created NAT Gateway ID for the next hop.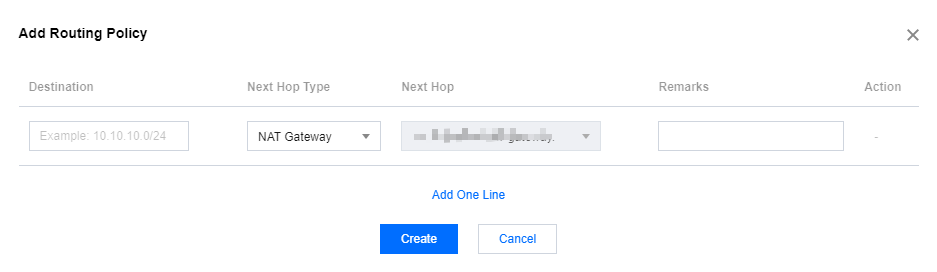
4.Click Create, and after the above configuration is completed, the traffic from the CVM in the subnet associated with this route table will be directed to the NAT Gateway when the CVM accesses the internet.