

Overview
You can use the COS console to set a bucket to host a static website and access the static website by accessing the bucket's static website domain name.
Note:
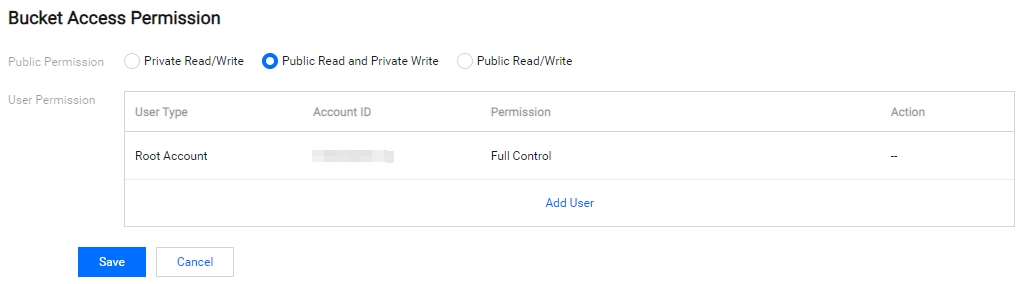
- To use a bucket to host a static website, you need to set the bucket's access permission to Public Read and Private Write.
- After enabling the static website configuration, you need to use the static website domain name to access the COS origin server for it to take effect. If you use the COS default domain name to access, there is no static website effect.
Prerequisites
The bucket is created. For more information, see the document Create Bucket.
Directions
- Log in to the COS console, click the Bucket List menu on the left, select the bucket you want to use to host the static website, and go to the bucket details interface.
- Select Permission Management > Bucket Access Permission, select Public Read and Private Write in the Public Permission section, and save.
- Select Basic Configuration > Static Website, click Modify, toggle on Current Status, and then fill in the configuration items of the static website one by one.
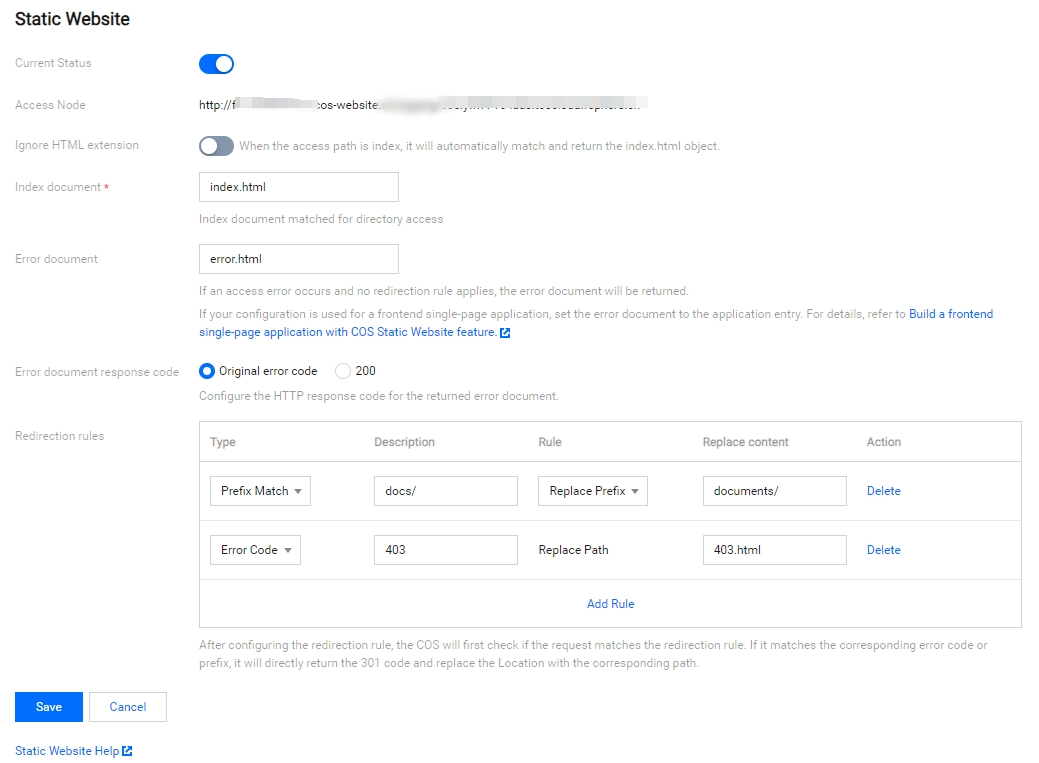
Description of the configuration is shown below:
Ignore HTML extension (optional): If the access path is index, the index.html object will be automatically matched and returned.
Index document (required): The index document is the homepage of the static website. It is the page returned when a user requests the root directory or any subdirectory of a website. This page is usually named index.html.
Note:
If a folder is created in the bucket, the index document needs to be added at each level of the folder.
Error document (optional): The error document is the page returned after an access error occurs at the static website. This configuration item allows you to customize your error document. When the static website fails to respond to the user's requests, the specified custom error page will be returned. For example, if you configure an error document named error.html, when the user encounters an HTTP error, the error.html page will be returned to help and guide the user. If you do not configure any error document, when the user encounters an HTTP error, a default error message will be returned.
Note:
Files in the bucket's root directory or subdirectories can be configured as error documents. Use a file in formats such as
.htmland.htm, which can be recognized by browsers. If you use a file in formats that cannot be recognized by browsers, for example, a.zipfile, most browsers will display "Error, inaccessible" or "Access request denied."Redirect rules (optional): The redirect rules allow you to redirect requests based on specific file paths, prefixes in requests, or response codes.
For example, if you delete or rename a file in the bucket, you can add a redirect rule to redirect access requests for this file to other files.- Error Code: Currently, the redirect rules only support redirect configuration for
4xxerror codes (such as 404). You can customize the error page. If a corresponding HTTP error is triggered by a user, you can provide other guidelines for your user on this error page. - Prefix match: You can use the prefix matching rules to set redirects for files or folders in the bucket. For specific examples, see Redirect Rule Examples.
- Error Code: Currently, the redirect rules only support redirect configuration for
- After completing the settings, click Save.