
- Log in to the cloud platform and select Cloud Products > Cloud Computing & Networking > Virtual Private Cloud to enter the Virtual Private Cloud console.
- In the directory on the left, click VPN Connection > VPN Tunnel to enter the VPN Tunnel interface.
- Select a region and Virtual Private Cloud, and click Create.
- Enter the channel name (for example, TomVPNConn), select
TomVPNGwas the VPN gateway andTomVPNUserGwas the customer gateway, and enter the pre-shared key (for example,123456), and click Next: SPD Policy.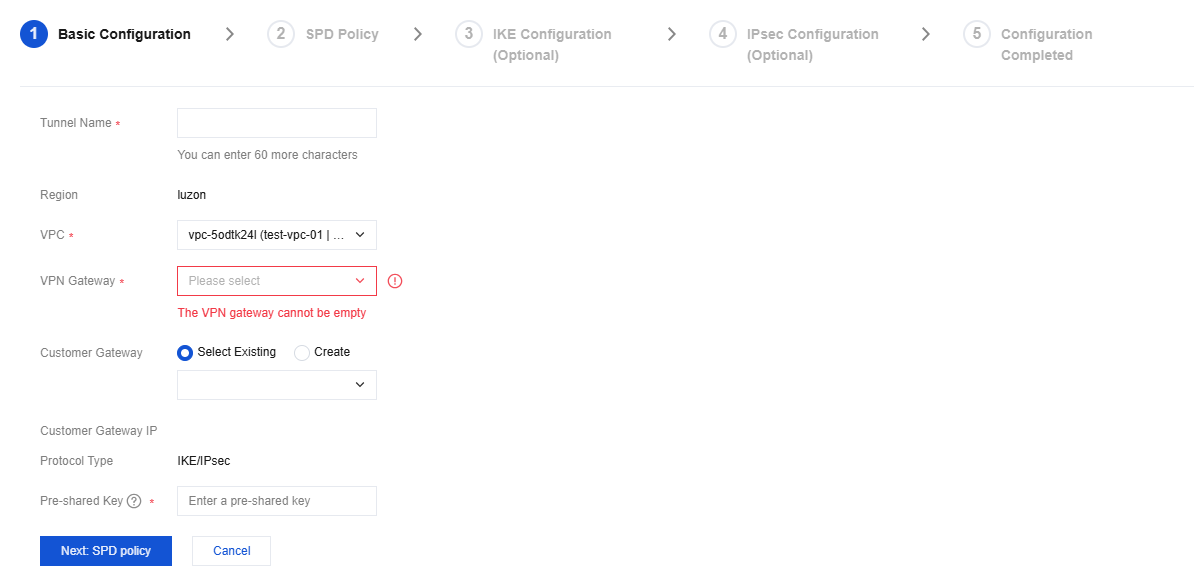
- Enter the SPD policy to match the local IP range with the customer IP rang. In this example, the local IP range is the IP range
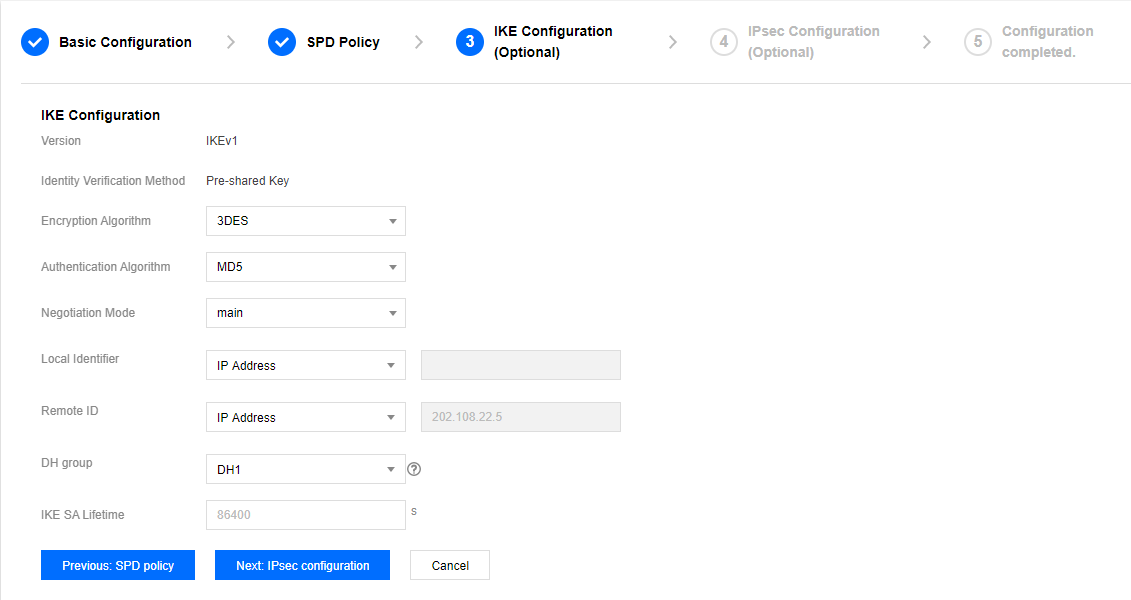
192.168.1.0/24of subnet A, and the customer IP range is10.0.1.0/24. Click Next: IKE Configuration. - (Optional) Configure IKE parameters. If advanced configuration is not required, click Next: IPsec Configuration.
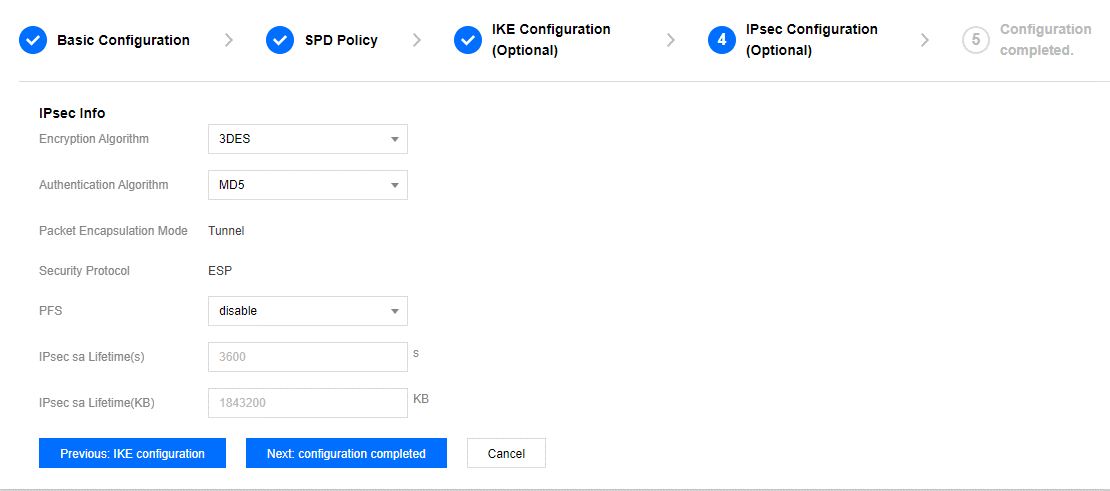
- (Optional) Configure IPsec parameters. If no configuration is required, click Next: Complete Configuration.
- After successful creation, return to the VPN channel list page, click Download Configuration File to download the file.


