

Scenarios
Access VPC remotely through the SSL VPN connection.
Operation Steps
Step 1: Creating an SSL VPN Gateway
Log in to the cloud platform and choose Cloud Products > Cloud Computing & Networking > Private Network to go to the VPC console.
In the directory on the left side, choose VPN Connection > VPN Gateway to go to the VPN Gateway management interface.
Select a region and click New.
Note:
If Create is grayed out and No Virtual Private Cloud Available is displayed when you move your mouse pointer over it, create a VPC before creating a VPN gateway.
Fill in the VPN gateway name (such as TomVPNGw), select the network to which it belongs (such as TomVPC) and bandwidth limit, select SSL VPN as the VPN type, and click Create. After a VPN gateway is created, the system randomly allocates a public network IP address such as
203.195.147.82.

Note:
VPN gateways with bandwidth above 100 Mbps should use DPDK hosts. If the option for bandwidth above 100 Mbps is not displayed on the Purchase page, contact the cloud platform's technical support personnel for assistance.
Step 2: Creating an SSL Server
- Click SSL Server to go to the SSL Server interface.
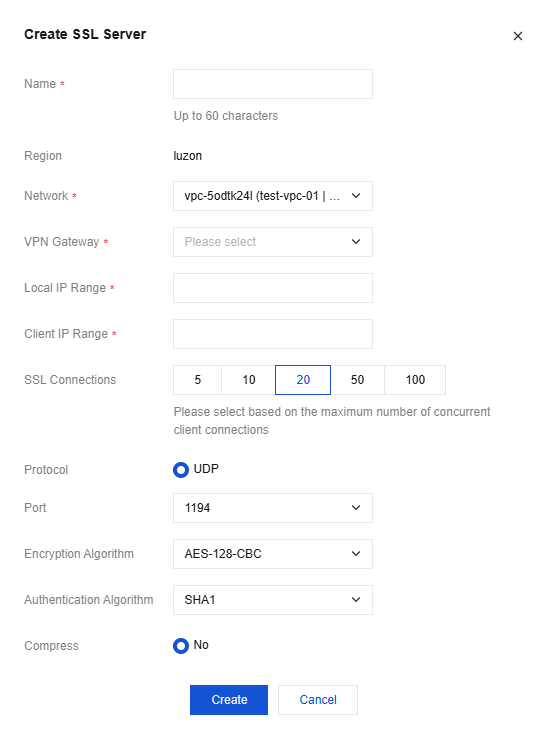
- Click Create, configure parameters in the pop-up Create SSL Server dialog box, and click Create.
Parameter description:- Network: Select a VPC to create a VPN connection.
- VPN Gateway: Select the SSL VPN gateway created in Step 1.
- Local IP Range: Fill in the local IP range of the server. The IP range should be within the VPC CIDR range.
- Client IP Range: Fill in the client IP range. Only private address segments 10, 172, and 192 are supported. The mask range is 16-24, which cannot overlap with the VPC IP range.
- Number of SSL Connections: Select the number of SSL connections.
- The protocol, port, encryption algorithm, authentication algorithm, and compression parameter values are shown in the figure and cannot be modified for the moment.
Step 3: Creating an SSL Client
- Click SSL Client to go to the SSL Client interface.
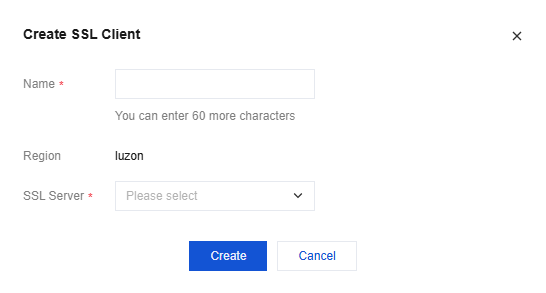
- Click Create, fill in the name of the SSL client in the pop-up Create SSL Client dialog box, select the SSL server created in Step 6, and click Create.
- Click Download Configuration. The certificate is used to verify identity with the server.
Note:
The user uses the certificate and key to establish a connection with the VPN gateway. The user verifies the server certificate, and the server verifies the user certificate. After the verification passes, the server allocates an IP address from the client IP address pool to the user. This IP address is used to communicate with the VM in the VPC.
Step 4: Configuring Routing
- Configure a routing policy in the VPC, with the destination address being the client IP address pool and the next hop being the SSL VPN gateway.
Feature Verification
Access the service in the VPC through the client browser. If you can access it normally, it means that the configuration is correct. If the access is abnormal, check and record the configuration information and contact technical support personnel in time.